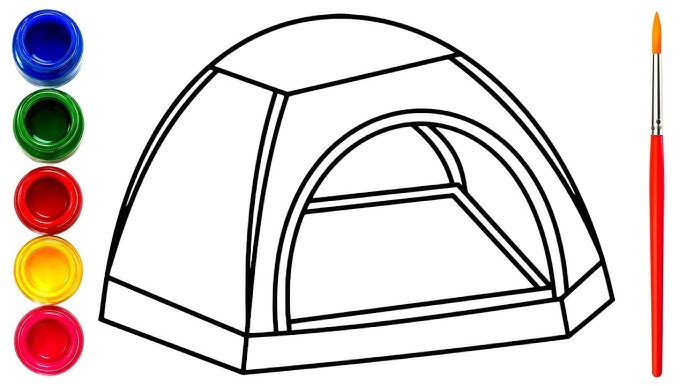
Have you ever wanted to draw a tent but didn’t know where to start? Whether you’re sketching for fun, school, or a creative project, drawing a tent can be easier than you think.
Imagine capturing that cozy camping vibe on paper with just a few simple steps. In this guide, you’ll learn how to draw a tent quickly and clearly, even if you’re a beginner. Keep reading, and you’ll be surprised at how simple and satisfying it is to bring your tent drawing to life!

Credit: www.youtube.com
Materials Needed
Drawing a tent needs the right materials. Good tools help you create a clear and neat drawing.
Gathering your materials before starting saves time and makes the process easier.
Essential Drawing Tools
Basic tools are important for any drawing. They help you sketch, outline, and erase mistakes.
- Pencils of different hardness (HB, 2B, 4B)
- Eraser to fix errors
- Sharpener to keep pencils sharp
- Ruler for straight lines
- Black pen or fineliner for outlines
Choosing The Right Paper
Paper choice changes how your drawing looks. Thick paper works well with pencils and ink.
Look for smooth paper that does not tear easily. This helps keep your drawing clean.
- Sketchbook paper with medium thickness
- Drawing paper with smooth texture
- A4 or A3 size for enough space
Optional Supplies For Detail
Extra supplies can add details and depth to your tent drawing. These are not needed but helpful.
- Colored pencils for shading
- Blending stump to smooth pencil marks
- White gel pen for highlights
- Fine-tip markers for small details
Basic Tent Shapes
Drawing a tent starts with simple shapes. You can build a tent by combining basic forms. This helps keep your drawing clear and easy.
Understanding tent shapes allows you to sketch tents that look real. Try to see the tent as a group of simple parts before adding details.
Simple Geometric Forms
Tents are often made from shapes like triangles and rectangles. These shapes form the roof and walls of the tent. Start by drawing these first.
- Triangles for the tent’s roof or peak
- Rectangles for the tent’s sides or entrance
- Squares for windows or flaps
- Lines to show poles or ropes
Recognizing Tent Structures
Tents come in different designs. Each design uses a frame to hold it up. Recognize the frame to draw the tent’s shape correctly.
| Tent Type | Frame Shape | Common Use |
| A-Frame | Two slanting poles forming a triangle | Camping and hiking |
| Dome | Curved poles crossing to make a dome | Backpacking |
| Cabin | Rectangular frame with vertical poles | Family camping |
Sketching Tent Frames
Start your tent drawing by sketching the frame. Use light lines to show poles and ropes. This helps you keep the right tent shape.
- Draw the base shape on the ground first
- Add the main poles as straight or curved lines
- Connect poles to form the roof and walls
- Sketch ropes or stakes for extra support
Step-by-step Drawing Process
Drawing a tent can be simple and fun. This guide will help you draw a tent clearly. Follow each step carefully to create a nice drawing.
We will start with the basic shape, then add depth, and finally draw the details. Each part builds on the last.
Outlining The Tent
Begin by sketching the main shape of the tent. Use simple lines to form a triangle for the roof and a rectangle for the base. Keep your lines light so you can adjust them later.
- Draw a large triangle for the tent’s roof.
- Add a rectangle under the triangle for the tent’s floor.
- Sketch two vertical lines inside the rectangle for the tent’s sides.
- Connect the sides to the roof with straight lines.
Adding Depth And Dimension
To make the tent look three-dimensional, add lines and shading. This shows where light and shadow fall. Use simple shading to give your tent shape and form.
| Technique | Purpose |
| Draw diagonal lines on the roof | Show the roof’s angle |
| Add shading on one side | Create shadow and depth |
| Use thicker lines on edges | Make the tent stand out |
Drawing Tent Flaps And Details
Finally, add the small parts that make the tent realistic. Tent flaps, ropes, and stakes bring your drawing to life. Pay attention to how these parts connect to the tent.
- Sketch the tent flaps as curved lines at the front.
- Draw ropes stretching from the tent to the ground.
- Add small stakes where the ropes end.
- Include folds and creases on the fabric for realism.
Adding Outdoor Elements
Drawing a tent can be simple and fun. Adding outdoor elements makes your drawing look alive and real.
These elements help show the tent in its natural setting. They tell a story about the place and time.
Incorporating Surrounding Nature
Include trees, grass, and rocks around the tent. These add depth and make the scene feel complete.
Draw bushes or flowers to add color and texture. Add a few clouds or birds in the sky for life.
- Sketch simple tree shapes behind or beside the tent
- Draw grass blades near the tent’s base
- Add small rocks or logs to create a natural floor
- Use light lines for distant hills or mountains
Shading For Realism
Use shading to show the tent’s shape and folds. It helps the tent look three-dimensional and solid.
Shade darker areas where fabric folds or overlaps. Leave lighter areas where light hits directly.
- Shade under the tent’s edges for shadow
- Use soft strokes for smooth fabric areas
- Add stronger shadows where parts overlap
- Blend shading to avoid harsh lines
Capturing Light And Shadow
Decide where the light source is in your drawing. This guides where shadows and highlights go.
Draw shadows on the ground next to the tent. Add highlights on the side facing the light.
- Pick one direction for the light source
- Shade the opposite side of the tent darker
- Draw soft shadow shapes on the ground
- Use white or light strokes for highlights
Common Mistakes To Avoid
Drawing a tent can be simple if you avoid some common errors. These mistakes can make your drawing look odd or confusing.
Focus on the right shape and view to make your tent look real. Below are some errors to watch out for.
Proportion Errors
Many people draw tents with wrong proportions. Making the tent too tall or too wide can spoil its look.
Keep the tent’s parts balanced. For example, the height should match the base width in a natural way.
- A tent too tall looks unstable
- A tent too wide looks flat
- Check the size of the door compared to the tent
Overcomplicating Details
Adding too many details can confuse the drawing. Simple lines and shapes work best for tents.
Focus on the main tent shape first. Add small details only if they improve the drawing.
- Avoid drawing too many folds or wrinkles
- Do not add unnecessary patterns or textures
- Use clear and simple lines for tent poles and ropes
Ignoring Perspective
Ignoring perspective makes the tent look flat or weird. Perspective shows how the tent sits in space.
Use basic perspective rules to draw the tent’s angles and sides. This helps create a 3D effect.
- Draw the front and side with correct angles
- Make lines converge if the tent is angled away
- Keep the base flat and aligned with the ground

Credit: www.youtube.com
Tips For Stunning Sketches
Drawing a tent can be fun and easy with the right tips. Simple steps help you create clear and beautiful sketches.
Focus on important details and practice often to improve your drawing skills quickly.
Using Reference Images
Reference images show you how tents look in real life. They help you understand shapes and lines better.
Look at photos from different angles to see all parts of the tent clearly.
- Find clear and simple pictures
- Study the tent’s structure and fabric
- Notice how light and shadow fall on the tent
Practicing Consistently
Practice drawing tents regularly to get better. Short daily sessions work well.
Try to draw tents from memory after using references. This improves your skill and confidence.
- Set aside 10-15 minutes daily for sketching
- Draw tents in different sizes and shapes
- Review your old sketches to see progress
Experimenting With Styles
Try different drawing styles to find what you enjoy. You can use lines, shading, or colors.
Changing your style makes your sketches unique and interesting to look at.
- Use simple outlines for a clean look
- Add shading for depth and texture
- Try using colors to show fabric and light

Credit: www.youtube.com
Frequently Asked Questions
How Do I Start Drawing A Tent?
Begin by sketching a simple triangle for the tent’s front. Add a horizontal line for the base. Use two diagonal lines for the sides and connect them at the top. This forms the basic structure. Then, add details like flaps, ropes, and texture to enhance realism.
What Materials Do I Need To Draw A Tent?
For drawing a tent, you’ll need paper, pencils, and an eraser. Start with a light pencil for sketching. Once satisfied, use a darker pencil for defining lines. Colored pencils or markers can add details and shading for a more finished look.
How Can I Add Texture To My Tent Drawing?
To add texture, use short, light strokes to mimic fabric folds. Varying your pencil pressure can create depth. Use cross-hatching for shadows. Add details like seams and stitches for realism. Experiment with different techniques to achieve the desired effect.
Can I Draw A Tent Digitally?
Yes, you can draw a tent digitally using graphic software. Programs like Adobe Illustrator or Procreate offer tools for precise lines and shading. Use layers to manage elements separately. Digital drawing allows for easy edits and experimenting with colors and textures.
Conclusion
Drawing a tent can be simple and fun. Start with basic shapes and add details step by step. Practice helps improve your skills fast. Try different tent styles to find what you like best. Keep your lines clean and your drawing clear.
Soon, you will feel more confident with your art. Enjoy the process and keep drawing every day. Your tent drawings will get better with time and care. Just remember to be patient and have fun!