Are you looking for a simple way to make professional name tents for your meetings, events, or classrooms? Creating name tents in Word is easier than you think, and it can save you time and effort.
Whether you want to impress your guests or keep things organized, this guide will show you step-by-step how to design clear, attractive name tents that fit your needs. Keep reading, and you’ll have your own custom name tents ready in no time!

Credit: www.seaofknowledge.org
Set Up Your Document
Creating name tents in Word starts with setting up your document properly. This helps you design tents that fit well on the paper and look neat.
Focus on choosing the correct page size and adjusting margins and orientation. These steps prepare your workspace for easy design and printing.
Choose The Right Page Size
Selecting the correct page size ensures your name tents print correctly. Most name tents use standard paper sizes like letter or A4.
- Go to the Layout or Page Setup menu in Word.
- Choose a page size that matches your paper, usually Letter (8.5 x 11 inches) or A4.
- Pick a size that fits your folding and cutting plans.
- Remember, smaller sizes work well for compact tents, larger sizes give more space for names.
Adjust Margins And Orientation
Margins and orientation affect how your name tents fit on the page. Adjust these settings before you add any text or shapes.
| Setting | Recommended Value | Reason |
|---|---|---|
| Margins | 0.5 inches all around | Gives enough space for cutting and folding |
| Orientation | Landscape | Better for folding tents with wider base |

Credit: formsofaddress.info
Create A Table For Name Tents
Creating name tents in Word is easy using tables. Tables help organize names clearly. You can make tents that fold and stand up.
This guide shows how to insert and customize tables for name tents. You will also learn to set the right cell size.
Insert And Customize Table
Start by inserting a table with two columns and one row. Each cell will be one side of the name tent.
- Go to the Insert tab and choose Table.
- Select 2 columns and 1 row.
- Click inside each cell to add a name or design.
- Use the Table Design tab to add borders or shading.
- Adjust the font style and size inside the cells.
Set Table Cell Size
Make sure the cells are the right size for folding and visibility. Set the width and height to fit your paper and text.
| Cell Size | Description | Example Size |
| Width | Width of each name tent side | 4 inches (10 cm) |
| Height | Height of each name tent side | 3 inches (7.5 cm) |
To set size, right-click the table and choose Table Properties. Enter the width and height values in inches or centimeters.
Add Names And Text
Creating name tents in Word is easy and fun. You can add names and other text quickly.
This guide shows you how to type and format names. You will also learn how to align text and change fonts.
Type And Format Names
Start by typing the name inside the Word document. Use simple text boxes or tables to organize each name.
- Click where you want to add a name.
- Type the person’s name clearly.
- Highlight the text to change its style.
- Use bold or italics to make the name stand out.
- Adjust the font size for visibility.
Use Text Alignment And Fonts
Text alignment and fonts help make name tents easy to read. Choose the alignment based on the tent shape.
| Alignment | Use For |
| Center | Names in the middle of the tent |
| Left | Names aligned to the left side |
| Right | Names aligned to the right side |
Choose fonts that are clear and simple. Avoid fancy fonts that are hard to read.
Example of good fonts for name tents:
- Arial
- Calibri
- Tahoma
Credit: www.avery.com
Add Design Elements
Design elements make name tents look neat and clear. They help names stand out on the table.
Using borders, shading, images, or logos can improve the look of your name tents in Word.
Insert Borders And Shading
Adding borders gives your name tent a clean edge. It makes the tent more visible from a distance.
Shading adds color behind the name. It helps highlight the text and adds style.
- Go to the “Insert” tab and choose “Table” to create a name tent base.
- Select the table and open “Table Design” to add borders.
- Choose border styles, thickness, and colors.
- Use “Shading” options to add background color to cells.
- Pick light colors for shading to keep text readable.
Include Images Or Logos
Adding images or logos makes your name tents unique. It can show a company brand or theme.
Use small, clear pictures so they do not cover the name. Place images where they balance the design.
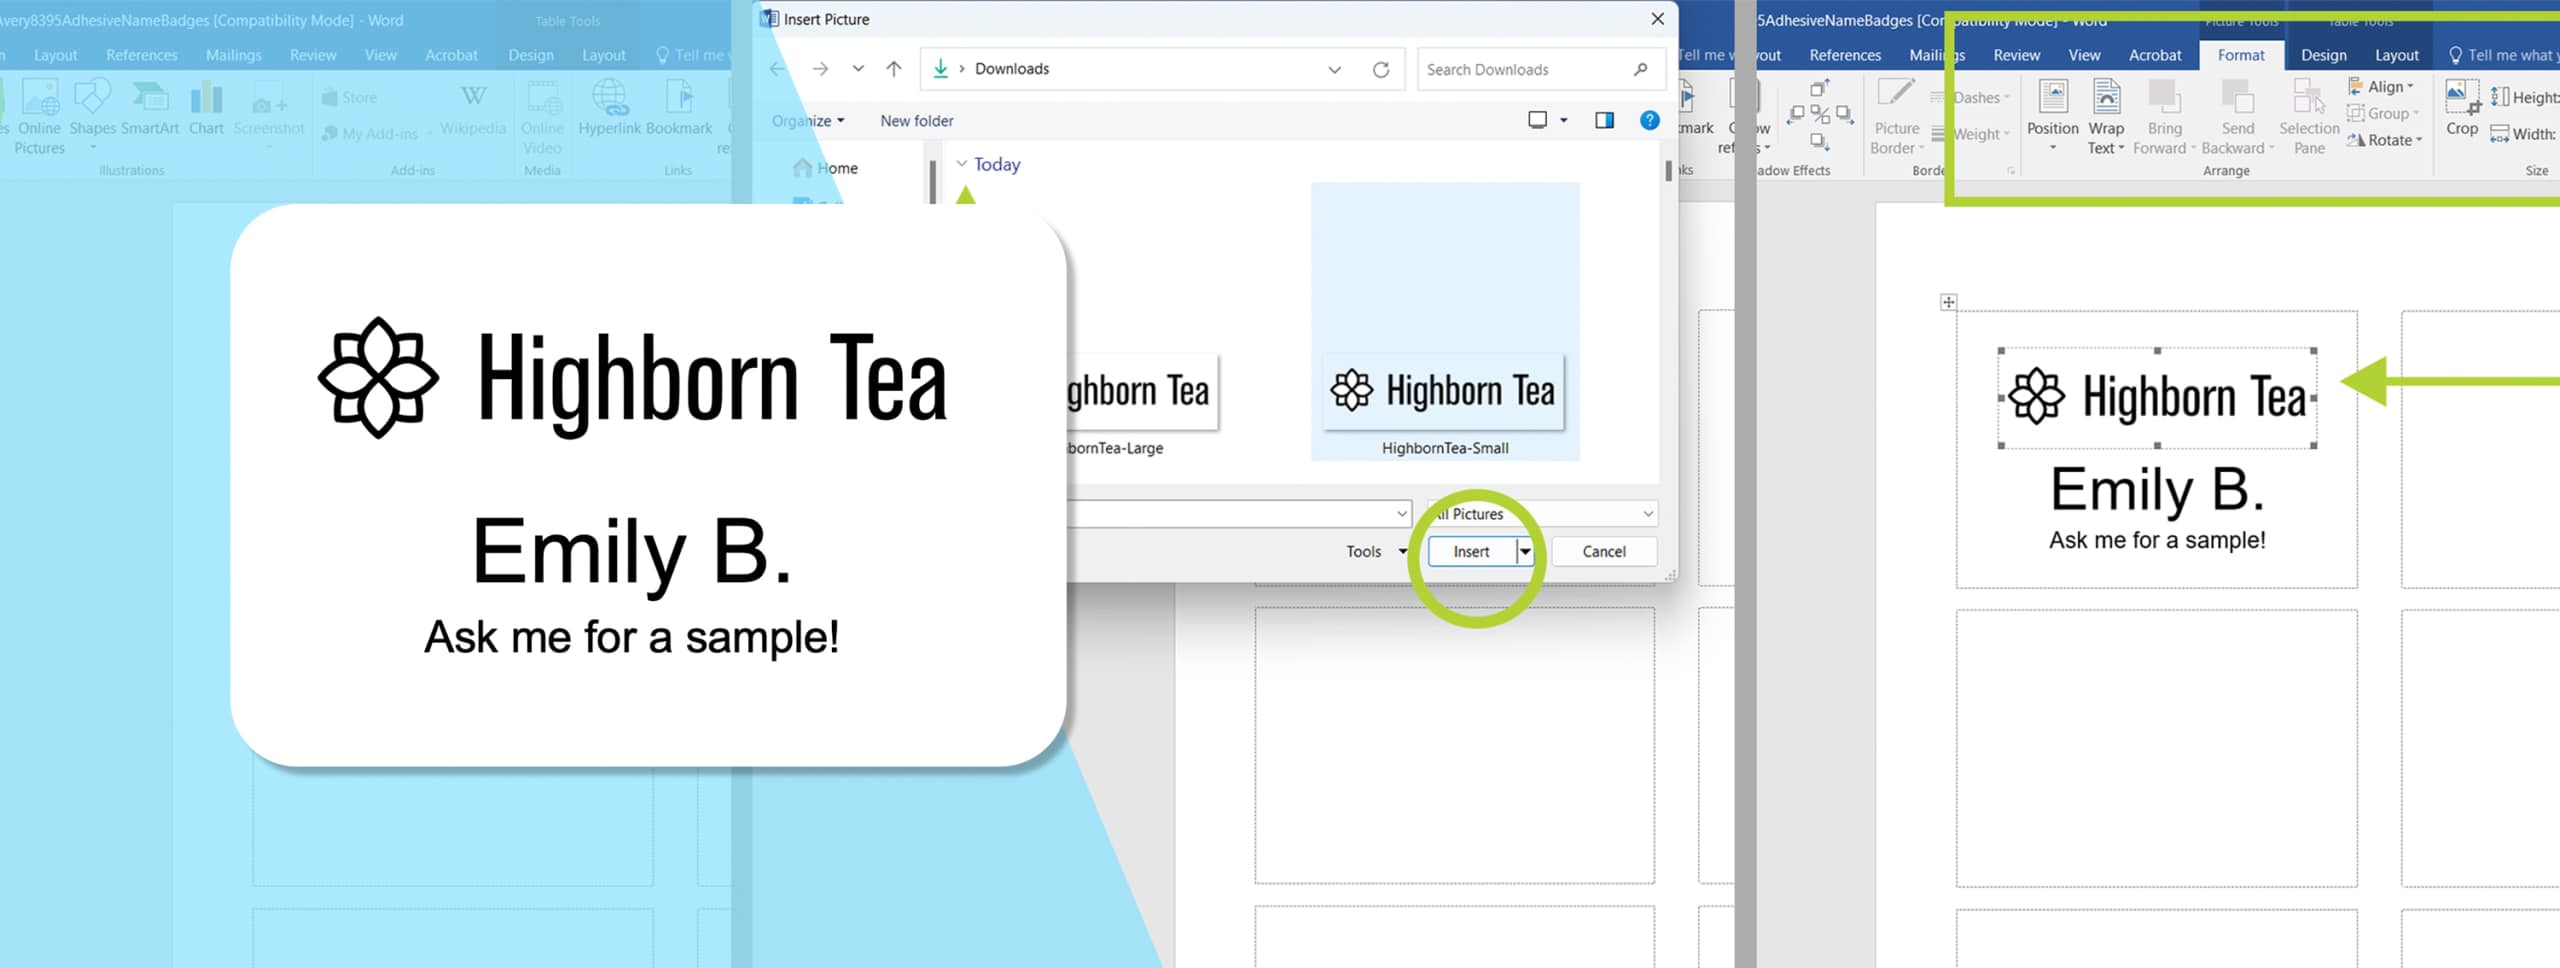
- Click “Insert” and select “Pictures” to add an image from your computer.
- Resize the image to fit inside the name tent.
- Use “Wrap Text” options to place the image near the text.
- Keep the image quality high but file size small.
- Align logos on corners or near the name for a professional look.
Duplicate And Arrange Name Tents
Name tents help people find their seats quickly. You can create many tents in Word by duplicating and arranging them.
This guide shows how to copy table cells and align tents for printing.
Copy Table Cells
To make multiple name tents, copy the table cells that contain the names. Select the cells by clicking and dragging your mouse.
Press Ctrl + C (Cmd + C on Mac) to copy the selected cells. Then, click where you want the new tents and press Ctrl + V (Cmd + V on Mac) to paste.
- Select the cells you want to copy
- Use keyboard shortcuts to copy and paste
- Repeat to create many name tents
Align Tents For Printing
After copying, arrange the tents evenly on the page. Use Word’s table tools to adjust the size and spacing.
Align tents in rows and columns to fit your paper size. This helps the tents print neatly and fold easily.
- Use table properties to set cell size
- Adjust margins for equal spacing
- Preview before printing to check alignment
Print And Fold Tips
Creating name tents in Word is easy and useful for events. Printing and folding them the right way makes them look neat.
Good paper and folding methods help your name tents stand strong and last longer.
Choose The Best Paper
Use thicker paper to keep your name tents upright. Cardstock works better than regular printer paper.
Glossy paper can make colors look bright. Matte paper reduces shine and looks clean.
- Choose 80-110 lb cardstock for stability
- Pick paper size that fits your printer
- Use bright or matte finish based on your preference
Folding Techniques For Stability
Fold your name tents carefully to help them stand well. A sharp crease makes folding easier.
Try folding the paper in half, then fold the edges to form a tent shape. This method keeps the tent balanced.
- Use a ruler or bone folder to make sharp folds
- Fold the paper into a tent shape (triangle) for stability
- Check the base to make sure it stands firmly
Frequently Asked Questions
How Do You Start A Name Tent In Word?
To start a name tent in Word, open a new document. Go to the “Layout” tab and select “Orientation. ” Choose “Landscape” to set the page orientation. Then, use “Insert” > “Table” to create a table for your name tent content.
What Size Should Name Tents Be?
Name tents are typically 4×11 inches when folded. To set this size in Word, go to the “Layout” tab, select “Size,” and choose “More Paper Sizes. ” Enter 11 inches for width and 8. 5 inches for height.
How To Add Text To A Name Tent?
To add text, click inside the table cell of your name tent. Type your desired text, such as names or titles. Use the “Home” tab to format the text with preferred font style, size, and color.
Can I Add Images To Name Tents?
Yes, you can add images to name tents. Go to the “Insert” tab and select “Pictures. ” Choose an image from your device, then resize and position it within the table cell as desired.
Conclusion
Creating name tents in Word is simple and quick. You can personalize tents for any event or meeting. Using tables, text boxes, or templates makes the process easy. Try different fonts and colors to fit your style. Save your work to print multiple copies.
Practice a few times to get comfortable with the steps. This skill saves time and looks professional. Now, you have a clear way to make name tents in Word. Give it a try today!