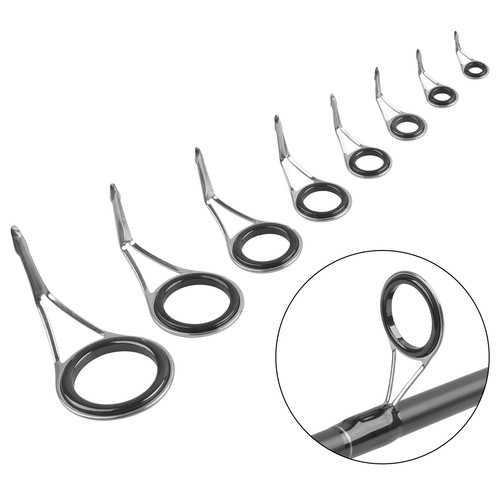
Have you ever been out fishing, only to find your rod’s eye damaged or broken? It can be frustrating and might even ruin your day on the water.
But don’t worry—you don’t have to toss your rod or spend a lot on repairs. Fixing a fishing rod eye yourself is easier than you think. In this guide, you’ll learn simple steps to get your rod back in perfect shape quickly.
Keep reading, and you’ll be casting again in no time!
Credit: collegeofems.com
Identify Eye Damage
Fishing rod eyes guide the line and protect it from wear. Checking for damage helps avoid line breaks and lost fish.
Knowing the types of damage and signs to watch for keeps your rod in good shape. Early detection saves time and money.
Common Types Of Damage
Fishing rod eyes can suffer from cracks, bending, and corrosion. Each type affects performance and may cause line damage.
- Cracks:Small breaks that can cut the line.
- Bending:Distorted shape that misaligns the line.
- Corrosion:Rust or pitting that roughens the surface.
- Missing inserts:Loss of the smooth ring inside the eye.
Signs To Look For
Look closely at the eye for visible damage or feel for rough spots. Watch for line fraying during use.
| Sign | What It Means | Check Method |
| Visible cracks | Eye may break under stress | Inspect with a bright light |
| Rough edges | Line can fray or snap | Run finger gently around eye |
| Rust spots | Corrosion weakens eye | Look for discoloration |
| Loose or missing insert | Line rubs directly on rod | Check for gaps or movement |
Gather Repair Tools
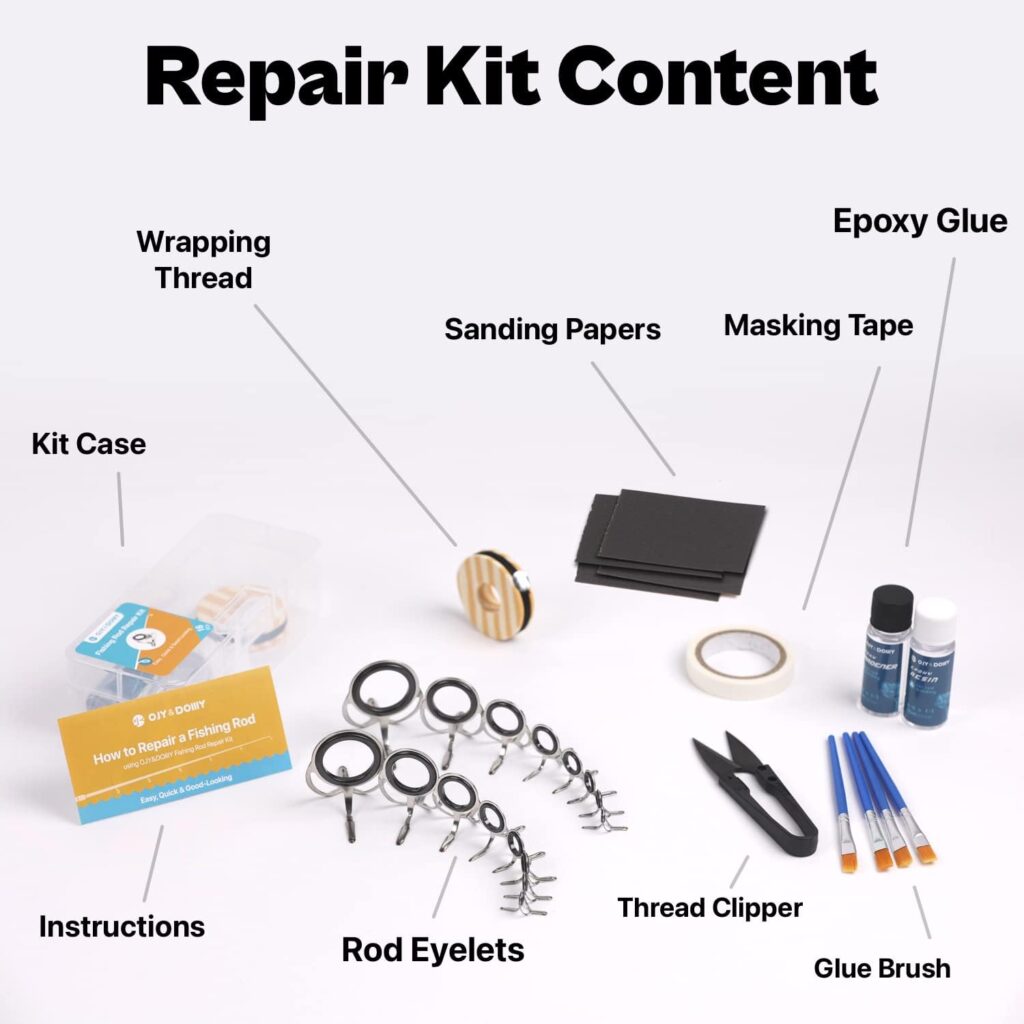
Fixing a fishing rod eye requires the right tools. Having them ready helps you work faster and better.
This guide lists the essential materials and optional equipment you might need for the repair.
Essential Materials
These materials are must-haves for fixing a fishing rod eye. They help you remove the old guide and attach a new one properly.
- Replacement rod eye or guide
- Strong thread for wrapping the guide
- Epoxy or rod finish glue
- Sandpaper for smoothing the rod
- Small scissors or thread cutter
- Cleaning cloth or rag
Optional Equipment
This equipment is not required but can make the repair easier or cleaner. Use them if you have access to these tools.
- Small pliers to remove the broken guide
- Heat gun or lighter to soften old glue
- Magnifying glass for close work
- Toothpicks for applying glue precisely
- Rod drying cradle or stand to hold the rod steady
Remove The Damaged Eye
Removing a damaged fishing rod eye is important to keep your rod working well. This guide helps you do it safely and correctly.
Careful removal prevents damage to the rod and makes replacing the eye easier. Follow the tips below for best results.
Techniques For Safe Removal
Use the right tools to remove the damaged eye without hurting the rod. A heat source, such as a lighter or heat gun, softens the glue holding the eye.
- Warm the eye gently to loosen the adhesive.
- Use pliers with a soft grip to avoid scratching the rod.
- Pull the eye slowly and steadily from the rod.
- If the eye resists, reapply heat and wait a moment.
- Clean off any leftover glue before installing a new eye.
Precautions To Take
Take safety steps to protect yourself and your rod during removal. Avoid burns and damage by following these precautions.
| Precaution | Reason |
| Wear heat-resistant gloves | Protect hands from burns |
| Work in a well-ventilated area | Prevent inhaling fumes from heated glue |
| Do not overheat the rod | Avoid weakening the rod material |
| Use gentle force | Prevent breaking or cracking the rod |
| Keep tools clean | Ensure smooth removal and avoid damage |

Credit: www.youtube.com
Prepare The Rod For Repair
Fixing a fishing rod eye needs careful preparation. This helps the repair last longer.
Start by getting the rod ready. Clean and smooth the area around the broken eye.
Cleaning The Area
Remove dirt, old glue, and rust from the rod eye area. This makes the new eye stick well.
- Use a soft cloth with warm water and mild soap
- Gently scrub the damaged area to clear debris
- Dry the rod completely with a clean towel
- Use rubbing alcohol to remove any grease or oil
Sanding And Smoothing
Sand the rod area carefully. This creates a smooth surface for a better repair.
| Tool | Purpose |
| Fine-grit sandpaper (400-600 grit) | Remove rough edges and old glue |
| Small sanding block | Keep sanding flat and even |
| Soft cloth | Clean dust after sanding |
Attach The New Eye
Fixing a fishing rod eye is simple with the right steps. Attaching the new eye guide carefully helps keep your rod working well.
This guide will explain how to align the new eye and secure it properly.
Aligning The Guide
Place the new eye where the old one was. Make sure it lines up with the other guides on the rod.
Check the rod from tip to handle to see if the new eye is straight. This keeps your line running smooth.
- Hold the eye in place on the rod.
- Look along the rod to align the eye with others.
- Adjust until the eye is straight and in line.
Securing With Thread Or Epoxy
Use thread or epoxy to fasten the eye guide tightly. This stops it from moving while you fish.
Wrap thread around the foot of the eye guide. Apply epoxy over the thread to protect and strengthen it.
- Start wrapping the thread at one end of the eye foot.
- Wrap tightly and evenly until the foot is covered.
- Coat the wrapped thread with a thin layer of epoxy.
- Let the epoxy dry completely before using the rod.
Finish And Protect
Fixing a fishing rod eye is only part of the repair. You need to finish and protect the repair. This helps the eye last longer and work well.
A proper finish stops rust and damage. It also keeps the rod strong and ready for fishing.
Applying Coating
Use a clear coating to cover the repaired eye. This layer protects the metal from water and rust. It also keeps the glue or epoxy safe.
Apply the coating with a small brush. Make sure to cover all parts of the eye and the rod near it. Avoid thick layers that can drip.
- Choose a waterproof clear coat or epoxy resin
- Use a fine brush for smooth application
- Cover the eye and nearby rod surface fully
- Apply thin, even coats to avoid drips
Drying And Curing Tips
Let the coating dry in a clean, dust-free place. The drying time depends on the product used. Follow instructions on the label for best results.
Keep the rod still while drying. Avoid touching the coated area. This helps the finish harden evenly and fully protect the repair.
- Place the rod on a flat surface without touching coated areas
- Dry in a room with good air flow but no dust
- Wait the full curing time as per product instructions
- Avoid fishing or bending the rod until fully cured
Test The Repair
After fixing your fishing rod eye, testing is important. It helps ensure the repair works well under pressure.
Proper testing can prevent further damage and improve fishing performance.
Checking Alignment
Check if the repaired eye lines up with other guides on the rod. Misalignment can cause line damage or poor casting.
- Hold the rod straight and look through all the eyes.
- Ensure the repaired eye is in a straight line with the rest.
- Adjust if the eye tilts or sits off-center.
- Test casting with light line tension to feel any snags.
Ensuring Durability
Durability means the repair holds under real use. You want the eye to stay secure during fishing.
| Test Method | Purpose | What to Look For |
| Line Pull | Check strength of glue or wrap | Eye does not move or loosen |
| Water Exposure | Test resistance to moisture | No softening or peeling |
| Cast Simulation | Check smooth line flow | No catching or unusual friction |

Credit: www.thehulltruth.com
Prevent Future Damage
Fixing a fishing rod eye is important, but preventing damage is better. Taking care of your rod helps it last longer.
Simple habits can protect the fishing rod eye from breaking again. Follow these tips to keep your gear safe.
Maintenance Tips
Check your fishing rod eye often for cracks or rust. Clean it gently with fresh water after fishing.
Use a soft cloth to dry the rod eye. Avoid using harsh chemicals that can weaken the metal.
- Inspect the eye before and after each trip
- Remove dirt and salt with fresh water
- Dry the rod eye completely to stop rust
- Replace damaged eyes quickly to avoid worse breaks
Proper Storage Practices
Store your fishing rod in a dry place away from direct sunlight. Heat and moisture can weaken the rod eye.
Use a rod holder or rack to keep the rod straight. Avoid leaning it against hard surfaces that can cause dents.
- Keep rods in a cool, dry area
- Use rod sleeves or cases for extra protection
- Store rods vertically or horizontally on racks
- Do not stack heavy items on top of rods
Frequently Asked Questions
How Do I Identify A Broken Fishing Rod Eye?
To identify a broken fishing rod eye, look for cracks or bends. Check if the eye is loose or missing. Run a finger along the rod to feel for any sharp edges. Inspect for misalignment which can cause line friction or breakage.
What Tools Do I Need To Fix A Rod Eye?
To fix a rod eye, you’ll need a replacement eye, epoxy glue, and a lighter. Additionally, have a small brush and sandpaper on hand. These tools will help in removing the old eye and securely attaching the new one.
Can I Fix A Fishing Rod Eye Myself?
Yes, you can fix a fishing rod eye yourself. It’s a simple process requiring some basic tools. Follow step-by-step guides for best results. With patience and precision, you can restore your rod to optimal condition.
How Long Does It Take To Fix A Rod Eye?
Fixing a fishing rod eye typically takes around 30 minutes. This includes removing the old eye and attaching the new one. Allow additional time for the epoxy to set. Ensure everything is secure before using the rod again.
Conclusion
Fixing a fishing rod eye is easier than you think. Small steps can save your rod from damage. Use the right tools and take your time. A smooth eye helps your line run well. This keeps your fishing trips fun and safe.
Regular checks help catch problems early. Care for your gear, and it lasts longer. Keep practicing these fixes to feel confident. Enjoy fishing without worries about your rod. Simple repairs make a big difference every time.