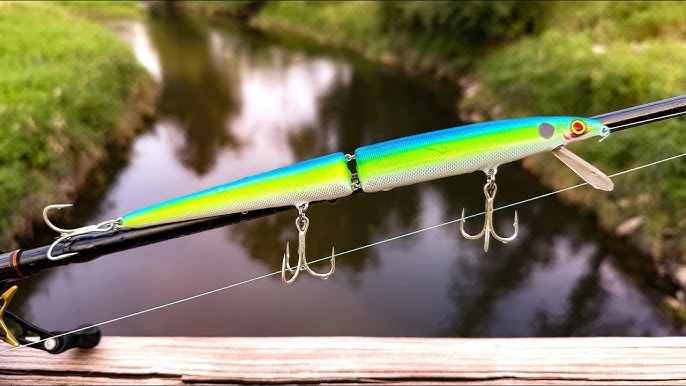
Are you ready to catch fish with a rod you built yourself? Making a homemade fishing rod is easier than you think.
With just a few simple tools and materials, you can create a rod that feels personal and unique. Imagine the pride you’ll feel casting your line, knowing you crafted it by hand. In this guide, you’ll find clear steps to build your own fishing rod, even if you’re new to this.
Keep reading, and soon you’ll be out on the water, enjoying a truly special fishing experience.
Choosing The Right Materials
Making a homemade fishing rod starts with picking the right materials. Good materials make the rod strong and easy to use.
Each part of the rod needs special materials for the best results. Choose carefully to build a rod that lasts.
Selecting The Rod Blank
The rod blank is the main part of the fishing rod. It should be light but strong. Many use fiberglass or graphite.
Fiberglass is flexible and good for beginners. Graphite is lighter and more sensitive. Choose based on your fishing style.
- Fiberglass: durable and flexible
- Graphite: light and sensitive
- Length depends on the type of fishing
Picking The Handle Material
The handle should feel comfortable in your hand. Cork and EVA foam are common choices for handles.
Cork is lightweight and offers good grip. EVA foam is soft and lasts longer in wet conditions.
- Cork: natural, lightweight, and comfortable
- EVA foam: soft, durable, and water-resistant
- Choose handle shape to match your grip style
Choosing The Guides And Reel Seat
Guides help the fishing line move smoothly. The reel seat holds the reel tightly on the rod.
Look for guides made of stainless steel or ceramic for smooth line flow. Pick a reel seat that fits your reel size well.
- Stainless steel guides resist rust and last longer
- Ceramic guides reduce line friction
- Reel seat must match your reel’s size

Credit: www.littlegeniusworkshop.com
Gathering Essential Tools
Making a homemade fishing rod needs specific tools. These tools help you shape, build, and finish your rod well.
Start by collecting everything needed. This guide shows what to use for shaping, assembly, and sealing.
Tools For Shaping And Sanding
You need tools that help you shape and smooth the rod blank. These tools make the rod comfortable and strong.
- Sandpaper (various grits)
- Wood rasp or file
- Hand planer
- Spokeshave
- Fine sanding block
Equipment For Assembly
Assembly tools hold parts together. They help you attach guides and reel seats securely.
| Tool | Purpose |
| Epoxy resin | Glue parts firmly |
| Brushes | Apply glue and finish |
| Thread | Wrap guides to rod blank |
| Clamp | Hold parts steady |
| Utility knife | Cut thread and tape |
Items For Finishing And Sealing
Finishing items protect your rod and give it a clean look. They keep the rod safe from water and wear.
Key finishing materials include:
- Clear coat or varnish
- Brush or spray applicator
- Polishing cloth
- Masking tape to protect parts
- Fine steel wool for smoothing
Shaping The Rod Blank
Shaping the rod blank is a key part of making a fishing rod at home. This process gives the rod its strength and flexibility. Careful shaping helps you catch more fish with a rod that feels right in your hands.
In this section, we cover cutting, sanding, and tapering. Each step changes the rod blank to fit your fishing needs. Follow each part carefully for the best results.
Cutting To Desired Length
Start by cutting the rod blank to the length you want. Use a fine saw to make a clean cut. Measure twice to avoid mistakes. The length depends on the type of fishing you plan to do.
Keep these points in mind when cutting:
- Use a ruler or tape measure for accuracy
- Mark the cut line clearly
- Cut slowly to avoid splintering
- Wear safety goggles to protect your eyes
- Check the cut edge for smoothness before moving on
Sanding For Smoothness
Sanding smooths the rod blank’s surface. It removes rough spots and splinters. Start with coarse sandpaper, then use finer grades for a polished finish. Sand evenly along the whole blank.
| Sandpaper Grit | Purpose |
| 80-120 | Remove large rough spots |
| 150-220 | Smooth surface scratches |
| 320-400 | Final polishing for smoothness |
Tapering For Flexibility
Tapering shapes the rod to be flexible yet strong. This means the rod is thicker at the handle and thinner at the tip. Use a file or sanding block to remove material slowly. Test the rod’s bend often to check flexibility.
Follow these tips for good tapering:
- Mark taper zones with a pencil before sanding
- Remove small amounts of material at a time
- Keep the rod round and even
- Check the rod’s flex by bending gently
- Stop tapering once you reach the desired action
Attaching The Handle
Attaching the handle is a key part of making a homemade fishing rod. It gives you control and comfort while fishing.
This guide will help you prepare the handle, secure it to the rod, and make sure it feels good in your hand.
Preparing The Handle
Choose a handle material like cork, wood, or foam. Make sure it is smooth and free of cracks.
Cut the handle to fit the rod’s butt end. Sand the edges to avoid rough spots.
Securing The Handle To The Rod
Apply strong glue to the inside of the handle and the rod’s end. Slide the handle onto the rod firmly.
Wrap the joint with strong tape or thread to hold the handle in place until the glue dries.
- Use waterproof glue for durability
- Press the handle tightly to avoid gaps
- Let glue dry for 24 hours
Ensuring Comfort And Grip
Wrap the handle with grip tape or add a layer of cork for better hold. This helps if your hands get wet.
Test the handle by holding the rod. Adjust the grip until it feels comfortable and secure.
Installing Guides And Reel Seat
Installing guides and the reel seat is key to making a fishing rod work well. Guides help the line move smoothly. The reel seat holds the reel firmly.
This part needs care and patience. Proper placement and secure wrapping make your rod strong and easy to use.
Marking Guide Positions
Start by measuring where each guide will go. Space them evenly along the rod blank. The first guide should be near the tip.
Mark the spots lightly with a pencil. Make sure the guides line up straight on top of the rod. This helps the line flow well.
- Place the tip guide closest to the rod’s end
- Space the other guides evenly toward the handle
- Align all guides in a straight line along the rod
Wrapping And Securing Guides
Use strong thread to wrap the guides onto the rod. Start wrapping a few inches below the guide foot. Wrap tightly and evenly.
Cover the guide foot completely with thread. Tie off the thread securely to keep the guide in place. Apply epoxy to protect the wraps.
- Begin wrapping below the guide foot
- Keep thread tight and even
- Cover the entire guide foot
- Secure thread ends with tight knots
- Coat wraps with epoxy for strength
Mounting The Reel Seat Properly
Slide the reel seat onto the rod handle. Position it so the reel will face the right way for casting. Usually, the reel seat goes near the handle’s end.
Use epoxy or strong glue to fix the reel seat in place. Hold it steady until the glue sets. Make sure it does not move or shift during drying.
- Place reel seat near the handle end
- Align reel seat for comfortable use
- Apply epoxy or strong glue inside the seat
- Slide seat onto the handle firmly
- Hold steady until glue dries fully

Credit: www.youtube.com
Finishing Touches
Finishing touches make your homemade fishing rod last longer. These steps help protect and test your rod. They ensure your rod works well on your fishing trips.
Take your time with these final steps. They add strength and durability to your fishing rod. Let’s explore how to finish your rod properly.
Applying Protective Coatings
Protective coatings guard your fishing rod against water and damage. Use clear varnish or epoxy resin for the best results. Apply thin, even layers with a brush.
Cover the entire rod, especially joints and handle areas. This stops wood from cracking and keeps the rod strong. Let each coat dry before adding the next one.
- Choose a waterproof coating like varnish or epoxy
- Apply thin coats with a soft brush
- Cover all parts of the rod evenly
- Focus on joints and handle areas
Allowing Proper Drying Time
Drying is important after applying coatings. It helps the protective layer harden and stick well. Place your rod in a clean, dust-free spot to dry.
Wait at least 24 hours before touching the rod. Some coatings may need more time. Check the product instructions for exact drying times.
- Find a dust-free, dry place
- Lay the rod flat or hang it carefully
- Wait a full day before handling
- Follow coating instructions for drying
Testing Flex And Strength
Test your rod’s flex and strength before fishing. Gently bend the rod to see if it holds well. Avoid sudden or hard bends that may cause damage.
Check the rod’s balance and feel. Make sure it flexes smoothly without cracking. If the rod feels weak, add more protective coating or reinforce the handle.
- Bend the rod gently to test flexibility
- Look for smooth bending without cracks
- Check the rod’s balance and grip comfort
- Strengthen weak spots with extra coating if needed
Tips For Beginners
Making a homemade fishing rod can be a fun and rewarding project. It helps you learn the basics of fishing gear and saves money. This guide shares simple tips to get started.
Follow these tips to avoid common mistakes, care for your rod properly, and improve it over time. This way, your fishing rod will last and work well.
Common Mistakes To Avoid
Many beginners make errors that can weaken their fishing rod or reduce its performance. Watch out for these common mistakes to build a strong rod.
- Using weak or low-quality materials that break easily
- Skipping proper measurements and cutting parts too short
- Not securing the guides tightly to the rod blank
- Ignoring balance and weight distribution
- Applying too much glue or leaving gaps in joints
Maintenance And Care
Keeping your fishing rod in good shape is easy if you follow a few simple care steps. Proper maintenance helps your rod last longer and work better.
| Care Task | How Often | Details |
| Clean rod after use | Every time | Wipe with fresh water and dry fully |
| Check guides and tip | Monthly | Look for cracks or loose parts |
| Lubricate reel seat | Every 3 months | Use light oil to prevent rust |
| Store rod properly | Always | Keep in a cool, dry place away from direct sun |
Upgrading Your Rod Over Time
You can improve your fishing rod as you gain experience. Small upgrades make your rod stronger and easier to use.
Consider these upgrades:
- Replace basic guides with stainless steel or ceramic guides
- Use a higher quality reel seat for better grip
- Add a comfortable handle made of cork or EVA foam
- Balance the rod by adjusting the weight of the tip or handle

Credit: www.youtube.com
Frequently Asked Questions
What Materials Are Needed For A Homemade Fishing Rod?
To make a homemade fishing rod, gather bamboo, fishing line, hooks, and a reel. Bamboo provides flexibility and strength. Securely attach the fishing line and hook. Choose materials that are durable and suitable for the fishing environment. This ensures a functional and efficient fishing rod.
How Do You Attach A Reel To A Homemade Rod?
To attach a reel, use strong, secure tape or clamps. Ensure the reel is aligned properly with the rod. This alignment is crucial for smooth casting and reeling. Test the attachment for stability. A securely attached reel enhances the rod’s performance, making fishing more enjoyable.
Can You Use Bamboo For A Fishing Rod?
Yes, bamboo is an excellent choice for making fishing rods. It’s flexible, durable, and lightweight, making it perfect for fishing. Bamboo rods provide good sensitivity and are eco-friendly. They are ideal for beginners and experienced anglers alike, offering a traditional and effective fishing experience.
How Do You Choose The Right Fishing Line?
Select a fishing line based on the type of fish you target. Consider factors like strength, thickness, and stretch. Monofilament lines are versatile, while braided lines offer superior strength. Match the line to your rod and reel for optimal performance.
The right line enhances your fishing success.
Conclusion
Making a homemade fishing rod can be fun and rewarding. You only need simple materials and basic tools. The steps are easy to follow, even for beginners. Crafting your own rod helps you understand fishing better. It also saves money and adds a personal touch.
Try different designs to see what works best. Enjoy the process and the time spent outdoors. This skill grows with practice and patience. Start building today and enjoy fishing with your own rod.