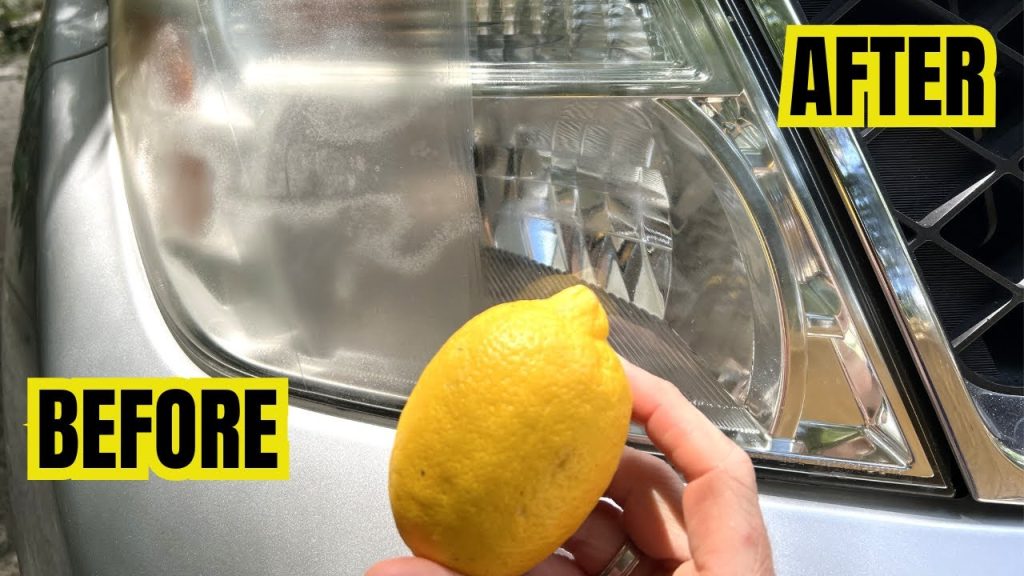
Your car headlights are more than just lights—they’re your safety lifeline on the road. When they get cloudy or yellowed, your visibility drops, putting you and others at risk.
But don’t worry—you don’t need expensive tools or a mechanic to fix this. In this guide, you’ll discover simple, effective ways to clean your car headlights and restore their brightness. Keep reading, and you’ll learn how to make your headlights shine like new, improve your night driving, and boost your car’s appearance—all with easy steps you can do yourself.
Why Clean Headlights Matter
Dirty headlights can reduce the light your car sends out. This makes driving at night or in bad weather unsafe.
Cleaning headlights is an easy way to keep your car safe and looking good.
Safety Benefits
Clean headlights help you see the road clearly. They also make it easier for other drivers to see you.
Clear lights lower the chance of accidents by improving how well you and others can spot hazards.
Improved Visibility
Headlights covered with dirt or fog give off less light. This reduces how far you can see ahead.
Cleaning your headlights helps you drive safely in the dark and bad weather by giving better light.
- Brighter lights help you spot obstacles early
- Better light improves night driving comfort
- Clean lenses reduce glare for other drivers
Enhancing Car Appearance
Clear headlights make your car look newer and well cared for. Cloudy or yellow lights can make a car look old.
Keeping headlights clean helps maintain your car’s value and shows pride in your vehicle.

Credit: www.carsales.com.au
Tools And Materials Needed
Cleaning car headlights improves your visibility and car appearance. You need the right tools and materials for this job.
This guide covers the basic supplies, protective gear, and optional polishing tools you may use.
Cleaning Supplies
Use cleaning supplies that remove dirt, grime, and oxidation from headlights. These make the surface clear again.
- Mild soap or car wash detergent
- Water in a spray bottle or bucket
- Microfiber cloths or soft rags
- Masking tape to protect car paint
- Sandpaper (various grits) for heavy oxidation
- Headlight restoration kits (optional)
Protective Gear
Wear protective gear to keep yourself safe during cleaning. Some supplies can irritate skin or eyes.
- Latex or nitrile gloves to protect hands
- Safety glasses or goggles to shield eyes
- Mask to avoid inhaling dust from sanding
Optional Polishing Tools
Polishing tools help restore shine and smoothness to headlights. Use them after cleaning for best results.
- Polishing compound or paste
- Soft foam or microfiber polishing pads
- Electric buffer or drill with polishing attachment
Preparing Your Car For Cleaning
Cleaning your car’s headlights needs some prep work. This ensures the process is safe and effective.
Start by choosing the right spot and cleaning the area around the headlights. This helps avoid dirt and damage.
Park In A Shaded Area
Find a shaded place to park your car before you start cleaning. Direct sunlight can cause cleaning products to dry too fast.
- Shade keeps the headlights cool
- Prevents streaks from quick drying
- Makes the cleaning process easier
Wash Headlights And Surrounding Area
Before cleaning the headlights, wash them and the nearby car surface. This removes dirt and grime that can scratch the lenses.
| What to Use | How to Use |
| Car soap | Mix with water and apply gently |
| Soft cloth or sponge | Wipe headlights and surrounding paint |
| Clean water | Rinse off soap completely |

Credit: www.carsales.com.au
Step-by-step Cleaning Process
Dirty headlights make it hard to see at night. Cleaning them improves safety. Follow these easy steps to clean your car headlights.
You only need a few items and some time. This guide will help you get clear headlights again.
Apply Cleaning Solution
Start by applying a cleaning solution to the headlights. You can use a commercial cleaner or a mix of baking soda and water.
Cover the entire surface to break down dirt and grime. Let the solution sit for a few minutes to work well.
- Use a spray bottle for easy application
- Apply evenly to avoid streaks
- Wait 5 minutes before scrubbing
Scrub With A Soft Cloth Or Sponge
Use a soft cloth or sponge to scrub the headlights gently. Avoid rough materials that can scratch the surface.
Move in small circles and cover all areas. This will remove dirt and old polish from the headlights.
- Choose a clean, soft cloth or sponge
- Use gentle pressure to avoid damage
- Scrub all parts of the headlight evenly
Rinse And Dry Thoroughly
Rinse the headlights with clean water to remove the cleaning solution and dirt. Make sure no residue stays on the surface.
Dry the headlights with a clean towel. This prevents water spots and keeps the surface clear and shiny.
- Use a hose or bucket of water for rinsing
- Check for any leftover dirt after rinsing
- Use a soft, dry towel to dry completely
Removing Stubborn Oxidation
Car headlights can get cloudy and yellow due to oxidation. This makes night driving unsafe. Removing stubborn oxidation restores clear light and improves visibility.
Some oxidation layers are tough to remove with simple cleaning. Using sandpaper, polishing compounds, and buffing can help clear the headlights effectively.
Use Sandpaper Or Abrasive Pads
Start by wet sanding the headlights to remove the top oxidized layer. Use fine-grit sandpaper or abrasive pads made for headlights. Wet the surface and sand gently in a circular motion.
Keep the surface wet to avoid scratches. Start with 1000 grit sandpaper, then move to 1500 or 2000 grit for a smooth finish. This process removes the yellow and cloudy buildup.
- Wet the headlight and sandpaper before sanding
- Smooth circular motions remove oxidation evenly
- Use finer grit sandpaper for better results
Apply Polishing Compound
After sanding, use a polishing compound to restore shine. Apply a small amount on the headlight surface. Use a soft cloth or polishing pad to spread it evenly.
The polishing compound fills small scratches and smooths the surface. This step is important for a clear and bright finish on your headlights.
- Choose a polishing compound made for plastic headlights
- Apply in small amounts and work evenly
- Use soft, clean cloths or pads for best results
Buff For A Clear Finish
Buff the headlights to remove excess polish and enhance clarity. Use a microfiber cloth or a buffing tool to gently rub the surface. Buffing makes headlights shiny and clear.
Buff until the surface looks smooth and free of haze. This final step improves light output and protects your headlights from future damage.
- Use clean microfiber cloths for buffing
- Buff in circular motions for even shine
- Repeat if necessary for better clarity

Credit: www.youtube.com
Preventing Future Cloudiness
Keeping your car headlights clear is important for safe driving. Cloudy headlights reduce light and can cause accidents. You can stop cloudiness from coming back with simple steps.
Using a protective layer and regular care keeps headlights bright longer. Follow these tips to protect your headlights and improve night visibility.
Apply Uv Sealant
A UV sealant protects headlights from sun damage. The sun’s rays cause plastic to yellow and cloud. After cleaning, apply a UV sealant to block harmful rays.
Use a clean cloth to spread the sealant evenly. Let it dry fully before driving. This layer keeps headlights clear and helps prevent future cloudiness.
Regular Maintenance Tips
- Wash headlights with mild soap and water weekly
- Check for cracks or chips and fix them quickly
- Park your car in shaded areas to avoid sun damage
- Use car wax on headlights every few months for extra protection
- Inspect headlights monthly and clean off dirt and bugs
Diy Vs Professional Headlight Restoration
Car headlights get cloudy and dirty over time. Cleaning them improves your car’s look and safety. You can fix headlights yourself or hire a professional. Each way has pros and cons to consider.
This guide compares DIY and professional headlight restoration. It covers cost, how well they work, and how long results last.
Cost Comparison
DIY headlight cleaning kits cost less than professional services. You pay once for the kit and clean your headlights at home. Kits usually cost between $10 and $30.
Professional restoration costs more. Prices range from $50 to $150 per vehicle. The price depends on the service provider and the damage level.
- DIY kits: $10 – $30
- Professional service: $50 – $150
Effectiveness And Longevity
DIY kits work well for light to moderate headlight cloudiness. They remove dirt and some oxidation but may not fix deep damage. Results last a few months to a year.
Professional restoration uses special tools and chemicals. It removes heavy oxidation and deep scratches. The headlights look clearer and the results last longer, often over a year.
- DIY: Good for light cloudiness, lasts months
- Professional: Removes tough damage, lasts 1+ years
Frequently Asked Questions
How To Clean Car Headlights Naturally?
To clean car headlights naturally, use a mixture of baking soda and water. Apply it with a soft cloth. Rub gently in circular motions. Rinse with water and dry with a microfiber towel. This method effectively removes grime and restores clarity without using harsh chemicals.
What Household Items Clean Car Headlights?
Household items like toothpaste, baking soda, and vinegar can clean car headlights. Toothpaste acts as a mild abrasive, while baking soda and vinegar remove dirt and grime. Use a soft cloth to apply these items. Always rinse thoroughly and dry for best results.
How Often Should You Clean Car Headlights?
Clean your car headlights every three months for optimal visibility. Regular cleaning prevents the buildup of dirt and grime. This maintenance ensures headlights remain clear and effective. Frequent cleaning also prolongs the lifespan of your headlights, enhancing safety during night driving.
Can Vinegar Clean Foggy Headlights?
Yes, vinegar can clean foggy headlights effectively. Mix it with water and apply using a cloth. Gently scrub in circular motions to remove haze and dirt. Rinse thoroughly with water afterward. This natural solution helps restore brightness and clarity to your headlights.
Conclusion
Cleaning car headlights keeps them bright and clear. Clear headlights improve your driving safety at night. Regular cleaning stops dirt and grime buildup. Use simple tools like toothpaste or baking soda. A clean headlight also makes your car look better.
Try to clean them every few months. Easy steps save money on replacements later. Bright lights mean better vision and fewer accidents. Keep your headlights shining for safer drives ahead.