Is your RV air conditioner not cooling like it used to? Replacing it might seem tricky, but you can do it yourself with the right steps.
Imagine enjoying a cool, comfortable trip without worrying about a broken AC. In this guide, you’ll learn exactly how to replace your RV air conditioner quickly and safely. By the end, you’ll feel confident tackling this project and saving money on costly repairs.
Let’s get started so you can keep your RV trips cool and stress-free!
Tools And Materials Needed
Replacing an RV air conditioner requires some basic tools and materials. Having everything ready makes the job easier.
- Screwdrivers:Both flathead and Phillips types.
- Wrench set:For loosening bolts and nuts.
- Drill:To remove rivets or screws quickly.
- Caulk gun and sealant:To seal gaps and prevent leaks.
- Wire cutters and strippers:For electrical connections.
- Replacement air conditioner unit:The correct size for your RV.
- Safety gloves and glasses:To protect hands and eyes.
- Putty knife:To scrape old sealant or caulk.
Having these ready helps the replacement go smoothly. Safety gear keeps you protected during the work.
Choosing The Right Air Conditioner
Choosing the right air conditioner for your RV is important to keep it cool and comfortable. The size and capacitymust match your RV’s space. Too small won’t cool well; too big wastes energy. Check the unit’s BTU rating to find a good fit.
Energy efficiencysaves power and lowers your bills. Look for models with a high Energy Efficiency Ratio (EER) to get the most cooling for less energy use. This is especially helpful when camping off-grid.
Compatibility with your RVmeans the air conditioner fits the roof opening and works with your electrical system. Measure the opening carefully. Also, check if your RV’s power supply can handle the new unit’s power needs.
Preparing Your Rv
Disconnecting poweris very important before starting any work on your RV air conditioner. This prevents electric shock or damage. Locate the main power switch or circuit breaker and turn it off. Unplug the RV from any external power source to ensure safety.
Next, focus on clearing the work area. Remove any objects or furniture near the air conditioner. This gives you enough space to move and work easily. Clean the rooftop or wherever the AC unit is installed. A clear area helps avoid accidents and makes the process smoother.

Credit: www.youtube.com
Removing The Old Air Conditioner
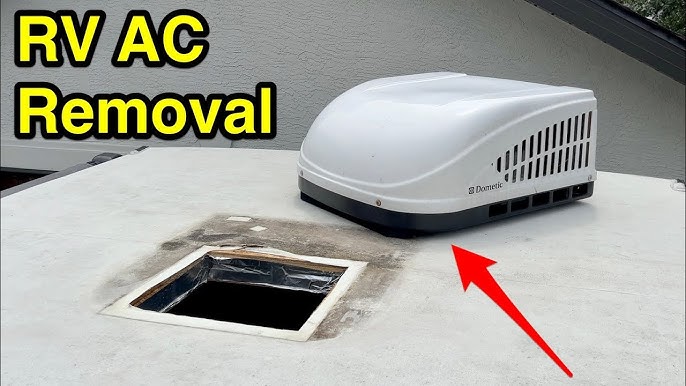
Start by turning off the power to the air conditioner. This is important for safety. Remove the screws or bolts that hold the unit in place. Carefully lift the air conditioner away from the roof opening. It might be heavy, so ask for help if needed.
Next, disconnect the wiring. Look for the wires connected to the unit and gently unplug them. Keep track of which wire goes where. This helps when installing the new unit.
Seal removal is the final step. Peel off the old sealant or foam around the base of the unit. Clean the surface to remove any leftover glue or dirt. A clean surface makes a better seal for the new air conditioner.
Installing The New Air Conditioner
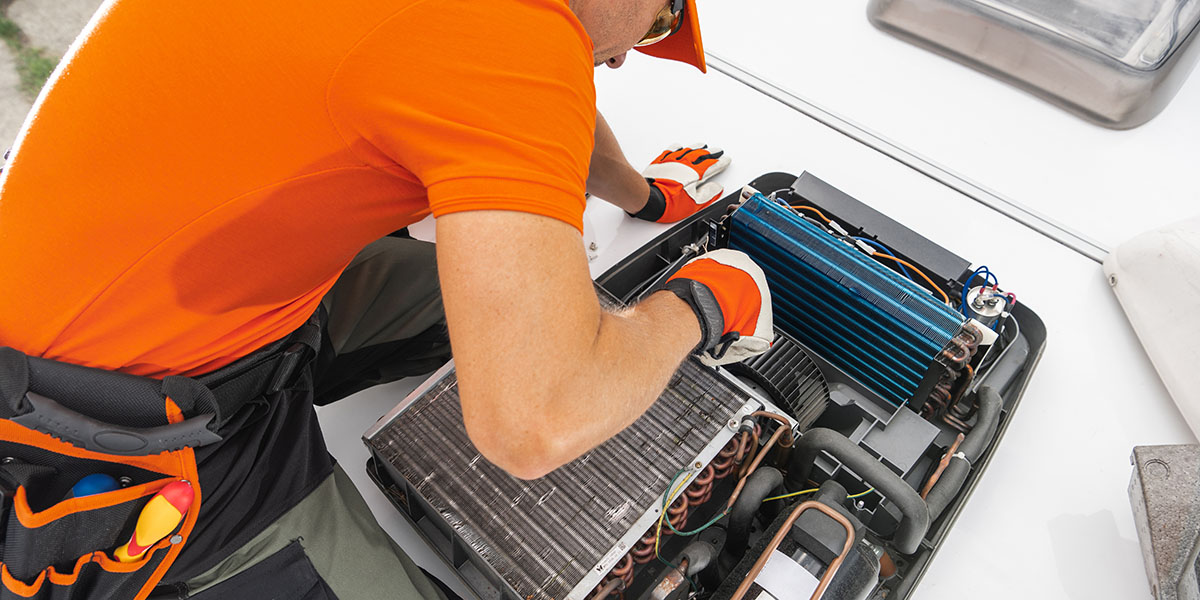
Place the new air conditioner carefully into the RV roof opening. Make sure it fits snugly without gaps. Align it evenly so it does not tilt or move.
Connect the electrical wires as shown in the unit’s manual. Turn off power before starting. Match wire colors and secure connections tightly to avoid shorts.
Use weatherproof sealant around the edges to stop leaks. Press down the unit firmly and bolt it in place. Check that all screws are tight for a secure fit.
Credit: www.rvtrader.com
Testing The New System
Turn on the RV air conditioner to check if it powers up correctly. Watch for any unusual sounds or smells. The unit should start quietly and cool the air fast.
Inspect all connections for leaks. Use a soap solution to spot bubbles on pipes and joints. Listen carefully for any hissing or rattling noises that might mean a problem.
- Check that the fan runs smoothly without noise.
- Confirm the thermostat controls the temperature well.
- Look for water drips or moisture near the unit.
- Ensure the power supply is steady and safe.
Fix any leaks or noises before using the air conditioner regularly. Proper testing helps the system last longer and work better.
Maintenance Tips For Longevity
Keep the air conditioner clean to ensure long-lasting performance. Dirt and dust can block airflow and make the unit work harder. Wipe down the exterior and clean the filters regularly. This helps the air conditioner cool better and saves energy.
Check the unit each season to catch small issues early. Look for signs of damage or wear, like cracks or leaks. Tighten loose parts and clear debris from vents. This simple habit prevents costly repairs and keeps your RV comfortable.

Credit: www.rvtrader.com
Frequently Asked Questions
How Do I Remove An Old Rv Air Conditioner?
First, disconnect the power supply to the AC unit. Then, unscrew the mounting bolts and carefully lift the unit off the roof. Remove any sealing materials or insulation. Clean the area before installing the new air conditioner to ensure a proper fit and seal.
What Tools Are Needed To Replace An Rv Air Conditioner?
You will need a screwdriver, wrench set, putty knife, sealant, and possibly a drill. Safety gloves and goggles are recommended. Having a helper can make lifting the unit easier and safer. Ensure all tools are suitable for outdoor and electrical work.
How Long Does It Take To Replace An Rv Ac Unit?
Replacing an RV air conditioner typically takes 2 to 4 hours. Time varies depending on experience and unit complexity. Preparing the workspace and having all tools ready speeds up the process. Double-check connections before sealing the unit.
Can I Replace My Rv Air Conditioner Myself?
Yes, if you have basic DIY skills and follow safety precautions. Carefully read the manufacturer’s instructions. Proper tools and a helper are recommended. If unsure, consult a professional to avoid damage or injury.
Conclusion
Replacing your RV air conditioner can seem challenging. But it’s manageable with guidance. Start by gathering your tools and materials. Follow each step carefully for safety. Remove the old unit before installing the new one. Always double-check connections and seals.
Test the new air conditioner to ensure it works well. Regular maintenance keeps your RV cool and comfortable. Save money and time by doing it yourself. Enjoy your journeys with a refreshing breeze. Your RV adventures just got cooler!