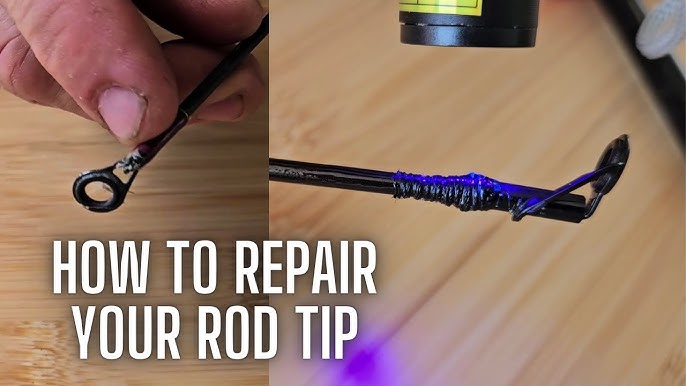
Have you ever felt the frustration of a broken fishing rod just when you were about to catch the big one? You’re not alone.
A damaged rod can quickly turn your perfect day on the water into a disappointment. But here’s the good news: fixing your fishing rod is easier than you think. In this guide, you’ll discover simple, step-by-step methods to repair your rod and get back to fishing faster.
Keep reading, and you’ll learn how to save money, avoid stress, and enjoy your favorite hobby without interruption. Your next great catch is waiting—let’s make sure nothing stands in your way.

Credit: www.youtube.com
Tools Needed
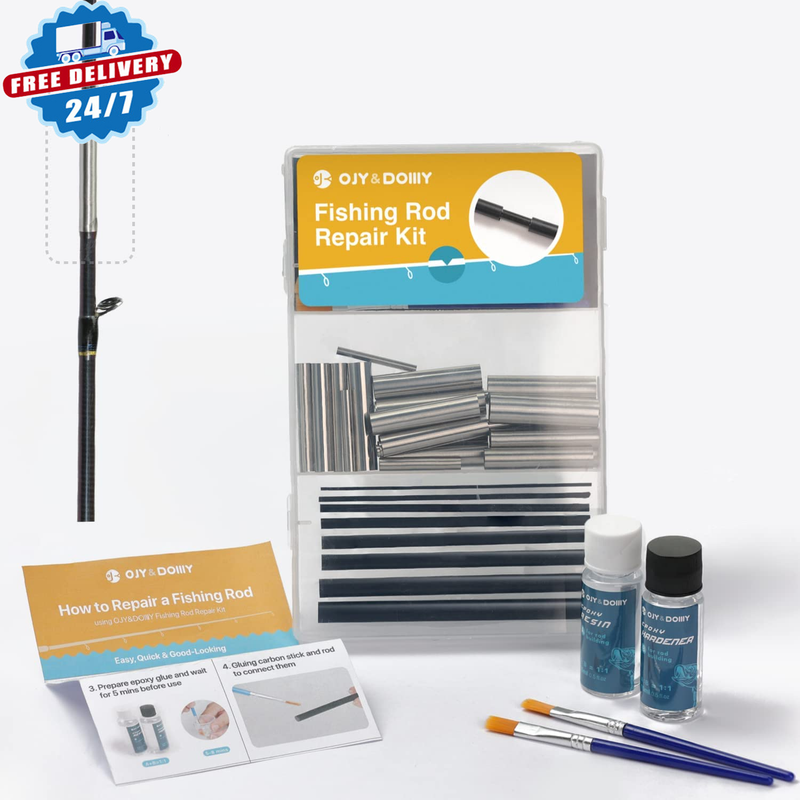
Fixing a fishing rod needs the right tools. These tools help you repair the rod safely and well.
Some tools are basic and must-have. Others are optional but can make the job easier.
Basic Repair Tools
These tools are needed for most fishing rod repairs. They help you cut, glue, or replace parts.
- Small screwdriver set – to remove screws
- Needle-nose pliers – to grip small parts
- Sharp scissors or a knife – to cut thread or tape
- Sandpaper – to smooth rough edges
- Strong glue or epoxy – to fix broken pieces
- Replacement rod tips or guides – for damaged sections
- Thread – for wrapping guides
Optional Supplies
Optional supplies can help make repairs neater or last longer. You may not need them every time.
- Heat shrink tubing – to cover and protect repairs
- Rod drying rack – to hold the rod steady while working
- Brushes – to apply glue or epoxy smoothly
- Masking tape – to mark spots and hold parts temporarily
- Fine thread sealant – to keep wraps tight and water-resistant
- Small clamps – to hold glued parts while drying
Credit: www.ebay.ca
Common Rod Issues
Fishing rods face many problems after long use. Knowing how to fix them saves money and time.
This guide covers three common issues: broken guides, cracked rod blank, and loose reel seat.
Broken Guides
Guides help the fishing line move smoothly. They can break or bend from impact or wear.
- Inspect all guides for cracks or missing rings.
- Remove broken guides carefully with heat or cutting tools.
- Buy replacement guides that match the size and shape.
- Attach new guides using strong thread and epoxy glue.
- Let the glue dry fully before using the rod again.
Cracked Rod Blank
The rod blank is the main shaft of the rod. Cracks weaken its strength and can get worse over time.
Fix cracks by following these steps:
| Step | Action |
| 1 | Clean the cracked area with alcohol and dry it well. |
| 2 | Apply a small amount of strong epoxy resin on the crack. |
| 3 | Wrap the area with fiberglass tape for added strength. |
| 4 | Let it cure for 24 hours before use. |
Loose Reel Seat
The reel seat holds the reel tightly. It can become loose from wear or bad fitting.
- Check if the reel seat moves or wiggles.
- Remove the reel and clean the seat area thoroughly.
- Use waterproof glue or epoxy inside the seat to secure it.
- Reattach the reel and tighten the seat firmly.
- Let the glue dry fully before fishing again.
Fixing Broken Guides
Fishing rod guides help direct the fishing line along the rod. Broken guides can affect casting and line control. Fixing them is simple with the right tools and steps.
This guide shows how to remove damaged guides, install new ones, and secure them properly using thread and epoxy.
Removing Damaged Guides
First, carefully remove the broken guides. Use a sharp blade or scissors to cut the thread holding the guide. Avoid damaging the rod blank during this step.
Once the thread is cut, gently pull off the damaged guide. Clean any leftover glue or thread residue with fine sandpaper or a cloth.
Installing New Guides
Choose guides that match the size and style of the original ones. Place the new guide on the rod in the exact position of the old one.
- Align the guide so it points straight along the rod.
- Use small pieces of tape to hold the guide in place temporarily.
- Check that all guides line up in a straight path from bottom to tip.
Securing With Thread And Epoxy
Wrap thread tightly around the guide foot to secure it. Use smooth, even wraps to avoid lumps. Cover the thread with epoxy to protect and harden the wraps.
| Material | Purpose |
|---|---|
| Thread | Holds guide firmly on rod |
| Epoxy | Protects thread and adds durability |
| Tape | Temporarily holds guide before wrapping |
Repairing Cracks
Fishing rods can develop cracks after heavy use or accidental damage. Fixing cracks promptly can save your rod and keep it working well.
This guide shows simple ways to repair cracks in your fishing rod. Follow these steps to restore your rod’s strength.
Assessing The Damage
Look closely at the cracked area to check its size and depth. Small surface cracks are easier to fix than deep breaks.
Try to bend the rod gently near the crack. If it feels weak or bends too much, the damage may be severe.
- Check if the crack goes around the rod or is just on one side
- Note if any pieces are missing or splintered
- Decide if the rod can be repaired or needs replacement
Using Rod Repair Kits
Rod repair kits include glue, epoxy, and other tools for fixing cracks. They help bond broken parts and seal the crack.
Clean the cracked area before applying glue. Use the kit’s instructions to apply adhesive and hold the parts together until dry.
- Sand the cracked surface lightly to remove rough edges
- Apply epoxy or glue evenly over the crack
- Use tape or clamps to keep the crack closed while drying
- Let the glue cure fully for the best strength
Reinforcing With Fiberglass Tape
Fiberglass tape adds strength to the repaired area. It wraps around the rod and helps prevent the crack from growing.
After applying glue, wrap the tape tightly around the crack. Use resin or glue over the tape to hold it firmly in place.
- Cut a strip of fiberglass tape slightly longer than the crack
- Wrap the tape evenly and tightly around the rod
- Coat the tape with epoxy or resin to seal it
- Let the repair dry completely before using the rod
Tightening Reel Seats
Tightening the reel seat is important to keep your fishing reel secure. A loose seat can cause wobbling and affect your fishing experience.
This guide explains how to check and fix loose reel seats on your fishing rod.
Identifying Loose Seats
Start by checking if the reel seat feels loose or wobbly. Hold the rod and gently try to move the reel. If it shifts, the seat needs tightening.
- Look for cracks or damage around the seat.
- Check if the locking rings spin easily without tightening.
- Notice any unusual movement of the reel during use.
Applying Adhesive
Use adhesive to secure the reel seat if it is loose and the locking rings do not tighten well. Choose a waterproof epoxy or strong glue made for fishing gear.
Follow these tips when applying adhesive:
- Clean the reel seat area with rubbing alcohol.
- Apply a thin layer of adhesive inside the seat.
- Slide the reel into place and tighten the rings.
- Let the adhesive dry for 24 hours before use.
Ensuring Proper Fit
Make sure the reel seat fits the reel snugly after tightening. A proper fit prevents damage and keeps the reel steady.
| Check Point | What to Look For |
| Seat Tightness | Reel does not move or wiggle |
| Locking Rings | Spin smoothly and lock firmly |
| Comfort | Reel feels stable when holding rod |
Preventive Maintenance Tips
Keeping your fishing rod in good shape helps it last longer. Preventive care stops damage before it starts.
Simple habits protect your rod and make fishing more fun. Follow these tips to maintain your gear.
Regular Cleaning
Clean your fishing rod after every use. Dirt and salt can harm the rod and reel parts.
Use fresh water and a soft cloth to remove grime. Dry the rod well before storing it.
- Rinse with fresh water after saltwater fishing
- Wipe down guides and reel seat carefully
- Use mild soap for stubborn dirt
- Dry completely to avoid rust
Safe Storage Practices
Store your fishing rod in a dry place away from direct sunlight. Heat and moisture can weaken the rod.
Keep the rod upright or in a rack to avoid bending or warping. Avoid leaning it against walls.
- Use rod holders or racks for support
- Keep away from extreme temperatures
- Store in a rod tube for travel
- Avoid stacking heavy objects on the rod
Routine Inspections
Check your fishing rod regularly for cracks or loose parts. Early fixes stop bigger problems.
Look closely at the guides, reel seat, and handle. Replace damaged parts to keep the rod safe.
- Inspect guides for cracks or bends
- Check reel seat for tightness
- Look for damage on the rod blank
- Test handle grips for wear

Credit: www.reddit.com
Frequently Asked Questions
How Do I Fix A Broken Fishing Rod Tip?
To fix a broken fishing rod tip, remove the damaged tip. Clean the end of the rod and apply glue. Attach a new tip guide and let it dry. Ensure alignment before securing. This quick fix can restore your rod’s functionality and extend its lifespan.
Can I Repair A Fishing Rod Guide?
Yes, you can repair a fishing rod guide. Remove the old guide and clean the area. Wrap the new guide onto the rod using thread. Apply a layer of epoxy for durability. Allow it to dry completely before using. This simple repair can enhance your fishing experience.
What Glue Is Best For Fishing Rod Repair?
Epoxy glue is best for fishing rod repair. It provides a strong bond and resists water damage. Apply it carefully to avoid excess. Let it cure completely before using the rod. This ensures a long-lasting and effective repair, helping you get back to fishing quickly.
How To Fix A Fishing Rod Handle?
To fix a fishing rod handle, identify the loose or damaged section. Use epoxy glue to secure loose parts. For replacement, remove the old handle and attach a new one. Ensure a snug fit and let the glue dry. This can improve comfort and control during fishing.
Conclusion
Repairing a fishing rod takes patience and basic tools. Small fixes can save money and extend rod life. Always check your rod for damage before fishing trips. Clean and dry it well after use. Regular care helps avoid bigger problems later.
Try the steps described here to fix common issues. Enjoy fishing with a rod that feels like new. Keep practicing repair skills for better results each time. Simple repairs bring more fun to every fishing day.