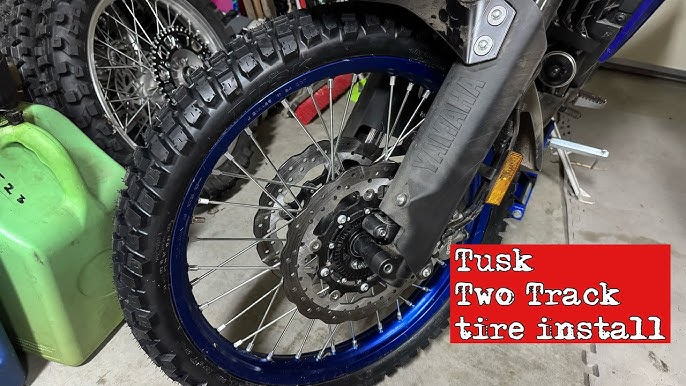
Changing your motorcycle tire might seem tricky, but it’s easier than you think. Whether you want to save money or be ready for the road anytime, knowing how to install a tire yourself gives you control and confidence.
In this guide, you’ll get clear, simple steps that anyone can follow. By the end, you’ll feel proud handling your bike’s tire like a pro. Ready to learn the skill that can keep your rides smooth and safe? Let’s get started!
Tools And Materials Needed
Installing a motorcycle tire requires the right tools and materials. Using proper equipment helps you work safely and efficiently.
Here is a list of essential tools and materials needed for this task. Prepare them before you start to make the process smooth.
Tire Irons
Tire irons help you remove and install the tire on the wheel rim. They are strong and curved to fit the rim shape.
- Usually made of metal
- Use at least two tire irons
- Protect the rim from scratches
Bead Breaker
A bead breaker loosens the tire bead from the rim. It makes it easier to remove the old tire without damage.
You can use a manual or hydraulic bead breaker depending on your equipment.
Lubricant
Lubricant helps the tire bead slide over the rim. It prevents damage and makes installation easier.
- Use tire mounting lubricant or soapy water
- Apply evenly on the tire bead and rim edge
- Do not use oil or grease
Air Compressor Or Pump
You need an air compressor or a strong pump to inflate the tire after installation. It ensures the tire fits tightly on the rim.
Check the tire pressure with a gauge while inflating to avoid over or under-inflation.
Valve Core Tool
This tool removes and installs the valve core inside the valve stem. It helps release or hold air during tire installation.
- Use to deflate the tire completely
- Reinstall valve core after mounting
- Small and easy to use
Wheel Balancer And Weights
Balancing the wheel keeps the ride smooth and safe. Use a wheel balancer to find heavy spots on the tire.
Attach small weights on the rim to balance the tire after installation.
Protective Gloves
Wear gloves to protect your hands from sharp edges and dirt. Gloves improve grip when handling tools and tires.
Rim Protectors
Rim protectors prevent scratches and damage to the wheel rim. Use them between tire irons and the rim during installation.
Preparing The Motorcycle
Installing a motorcycle tire starts with proper preparation. This ensures safety and makes the process easier.
Two key steps are securing the bike and removing the wheel. Follow these carefully before tire installation.
Securing The Bike
Stabilize the motorcycle to prevent it from moving while you work. Use a suitable stand or lift.
- Park on a flat, solid surface.
- Engage the parking brake if available.
- Use a center stand or paddock stand for support.
- Place wheel chocks if necessary for extra stability.
Removing The Wheel
Once the bike is secure, remove the wheel carefully. This allows access to replace the tire.
| Action | Details |
| Loosen axle nut | Use the correct wrench to loosen the nut before lifting the bike. |
| Lift the bike | Use the stand to raise the motorcycle off the ground. |
| Remove brakes | Detach brake calipers or drum brakes if needed to free the wheel. |
| Slide out the axle | Carefully remove the axle and keep all washers and spacers safe. |
| Take off the wheel | Gently pull the wheel away from the forks or swingarm. |
Removing The Old Tire
Removing an old motorcycle tire needs care and the right steps. This guide shows simple actions to take.
Follow these steps safely to take off the tire and prepare for a new one.
Deflating The Tire
Start by letting all air out of the tire. This makes it easier to remove.
Use a valve tool or press the valve core to release the air slowly. Wait until no air escapes.
Breaking The Bead
The bead is where the tire seals to the rim. You must break this seal to take the tire off.
- Place the wheel on a flat surface.
- Use a bead breaker tool or a heavy object to push the tire sidewall away from the rim.
- Work around the tire to break the bead all the way around.
- Check both sides of the tire to make sure the bead is loose.
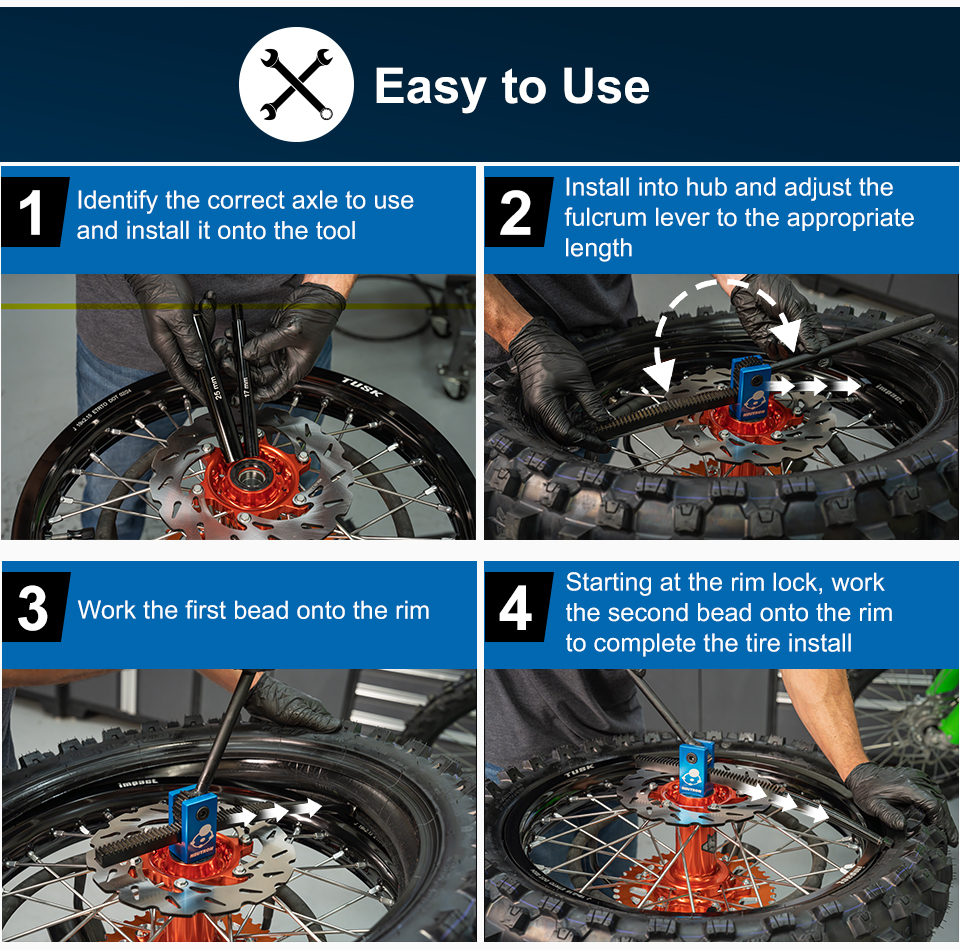
Using Tire Levers
Tire levers help lift the tire off the rim safely without damage.
Follow these tips for using tire levers:
- Insert the first lever under the tire bead near the rim.
- Hook the lever to a spoke to hold it in place.
- Insert a second lever a few inches away and pry the tire over the rim edge.
- Move the levers around the rim to free the tire fully.
- Remove the tire carefully once loose.
Credit: www.rockymountainatvmc.com
Inspecting The Rim And Tire
Checking the rim and tire before installation is important. This helps ensure safety and good performance.
Look carefully at both parts to find any dirt or damage. Fix these issues before putting on the tire.
Cleaning The Rim
A clean rim helps the tire fit better and stay secure. Dirt or grease can cause the tire to slip.
Use a cloth and mild soap to wipe the rim. Remove all dirt, grease, and old rubber bits.
- Wipe with a damp cloth
- Use mild soap if needed
- Dry the rim completely
- Check for any leftover grease or dirt
Checking For Damage
Look closely for cracks, bends, or rust on the rim. These can cause problems when riding.
Check the tire for cuts, bulges, or worn tread. A damaged tire can be unsafe to use.
- Inspect rim edges for dents or bends
- Look for cracks or rust spots on the rim
- Check tire sidewalls for cuts or bulges
- Examine tread depth and wear patterns
Installing The New Tire
Installing a new motorcycle tire is a careful process. It ensures safety and good performance on the road.
This guide covers three important steps: applying lubricant, positioning the tire, and seating the bead.
Applying Lubricant
Lubricant helps the tire slide onto the rim easily. Use a tire-specific lubricant or soapy water.
Apply lubricant evenly around the tire bead and rim edge. Avoid using oil or grease as they can damage the tire.
Positioning The Tire
Place the tire on the rim carefully. Start by fitting one side of the tire bead over the rim edge.
- Make sure the tire’s directional arrow points the right way.
- Align the valve stem with the hole on the rim.
- Work the tire bead around the rim using your hands or tire levers.
- Avoid pinching the tube if you use one.
Seating The Bead
Seating the bead means making the tire fit tightly against the rim. Inflate the tire slowly to help this.
| Inflation Tip | Reason |
| Inflate to about 20 psi first | Helps the bead seat evenly |
| Check bead seating all around the rim | Prevents air leaks and tire damage |
| Then inflate to the recommended pressure | Ensures proper tire performance |
Inflating The Tire
Properly inflating a motorcycle tire is important for safety and performance. It helps the tire wear evenly and improves control on the road.
Use the right tools and follow clear steps to get the correct pressure and ensure no air leaks.
Achieving Proper Pressure
Check the tire’s recommended pressure on the motorcycle manual or tire sidewall. Use a reliable tire pressure gauge to measure the air.
- Remove the valve cap from the tire.
- Press the tire gauge firmly onto the valve stem.
- Read the pressure on the gauge.
- Use an air compressor or pump to add air if pressure is low.
- Release some air if the pressure is too high by pressing the valve core.
- Repeat measuring until the pressure matches the recommended level.
- Put the valve cap back on securely.
Checking For Leaks
After inflating, check the tire for leaks. Air leaks can cause loss of pressure and unsafe riding conditions.
| Method | How to Check |
|---|---|
| Soapy Water Test | Apply soapy water around the valve and bead. Look for bubbles showing air escape. |
| Listen for Hissing | Hold your ear close to the tire surface to hear escaping air. |
| Use a Leak Detector | Spray a commercial leak detector on the tire and watch for bubbles. |
Reinstalling The Wheel
After changing a motorcycle tire, reinstalling the wheel is the next important step. This ensures your bike is safe and ready to ride. Pay close attention to alignment and securing the wheel properly.
Take your time during this process. A correctly installed wheel improves your motorcycle’s stability and handling.
Aligning And Securing
Start by placing the wheel back into the fork or swingarm. Make sure the axle fits straight through the hub and the mounting points. Proper alignment prevents wobbling and uneven tire wear.
- Check that the brake disc or drum fits between the brake pads without rubbing.
- Ensure the chain or belt lines up with the sprockets.
- Slide the axle through the wheel and mounting points carefully.
- Tighten the axle nut lightly to hold the wheel in place.
Final Tightening
Once the wheel is aligned and lightly secured, you must tighten all fasteners to the correct torque. This ensures the wheel stays firmly attached during riding.
| Fastener | Tightening Torque (Nm) | Tool Needed |
|---|---|---|
| Axle Nut | 80-100 | Torque Wrench |
| Brake Caliper Bolts | 20-30 | Allen Key |
| Axle Pinch Bolts | 25-35 | Torque Wrench |
Safety Checks
Installing a motorcycle tire requires careful safety checks. These checks ensure the tire fits properly and the bike is ready to ride. Safety helps prevent accidents and tire damage.
Before and after installation, follow important steps. These steps keep you and your motorcycle safe on the road.
Inspecting Tire Fit
Check the tire size matches the motorcycle rim. A wrong fit can cause handling problems or tire failure. Look for any gaps or uneven contact between the tire and rim.
- Verify the tire size and type on the sidewall.
- Ensure the tire bead seats evenly on the rim.
- Check for damage or sharp edges on the rim.
- Confirm tire rotation direction matches the arrow on the sidewall.
- Make sure the valve stem is straight and secure.
Test Ride Tips
After installing the tire, take a slow test ride. This helps spot any issues early. Watch how the motorcycle feels and listens for unusual noises.
| Test Ride Step | What to Check |
| Start with low speed | Feel for vibrations or wobble |
| Brake gently | Notice any pulling or uneven braking |
| Turn slowly | Check tire grip and stability |
| Listen carefully | Detect any rubbing or clicking sounds |
| Stop and inspect | Look for air leaks or tire movement on rim |
Common Mistakes To Avoid
Installing a motorcycle tire is not as simple as it looks. Many riders make mistakes that can cause damage or unsafe riding.
Knowing what to avoid helps you save time and keeps you safe on the road.
Not Checking Tire Size
Using the wrong tire size can cause handling problems. Always check the tire’s size against your motorcycle’s requirements.
Do not assume tires that look similar will fit perfectly. Measure the width, diameter, and rim size carefully.
Ignoring Tire Direction
Most motorcycle tires have a tread direction. Installing the tire backwards reduces grip and increases wear.
Look for arrows or marks on the sidewall to find the correct rotation direction before mounting.
Failing To Lubricate The Bead
The tire bead must slide easily over the rim. Skipping lubrication can cause damage to the bead or rim.
Use a proper tire lubricant to protect the tire and help it fit securely on the rim.
Not Checking Rim Condition
Installing a tire on a bent or rusty rim can cause air leaks and tire failure. Always inspect the rim first.
- Remove dirt and rust from the rim
- Check for bends or cracks
- Replace damaged rims before fitting new tires
Over Or Under Inflating Tires
Incorrect tire pressure causes poor handling and quick tire wear. Inflate tires to the recommended PSI.
Use a quality pressure gauge to check pressure after installation and before every ride.
Not Balancing The Tire
Unbalanced tires cause vibrations and uneven tread wear. Always balance the tire after installation.
Use wheel weights or take your wheel to a professional if you lack balancing tools.
Skipping Safety Checks
Rushing to finish the job can cause missed safety steps. Always double-check your work before riding.
- Ensure the valve stem is tight and not leaking
- Confirm the tire bead is seated properly
- Verify tire pressure and balance
- Inspect for any damage on the tire or rim

Credit: www.youtube.com
Credit: www.stromtrooper.com
Frequently Asked Questions
What Tools Are Needed For Motorcycle Tire Installation?
To install a motorcycle tire, you’ll need a tire iron, rim protectors, a bead breaker, and a tire balancer. Ensure you have a valve stem tool and tire lubricant. These tools help in removing and fitting the tire safely and effectively.
How Do I Remove A Motorcycle Tire?
First, safely elevate the motorcycle using a stand. Then, loosen the axle nuts and remove the wheel. Use a bead breaker to separate the tire from the rim. Tire irons help in prying the tire off completely. Follow these steps carefully to avoid damage.
How To Ensure The Tire Is Properly Seated?
After mounting the tire, inflate it to the recommended pressure. Check if the bead is evenly seated on the rim. Spin the wheel to ensure it’s balanced. If not seated properly, deflate and re-inflate until it sits correctly. Proper seating ensures safe rides.
Can I Install Motorcycle Tires Myself?
Yes, with the right tools and guidelines, you can install motorcycle tires yourself. Follow step-by-step instructions carefully. Ensure you understand the process to avoid damage or injury. If unsure, consult a professional for assistance.
Conclusion
Installing a motorcycle tire is simpler than it seems. Follow the steps carefully and take your time. Use the right tools to avoid damage. Check the tire pressure before riding for safety. Practice makes perfect, so don’t rush the process.
A well-installed tire improves your bike’s performance and safety. Keep your bike in good shape and enjoy the ride.