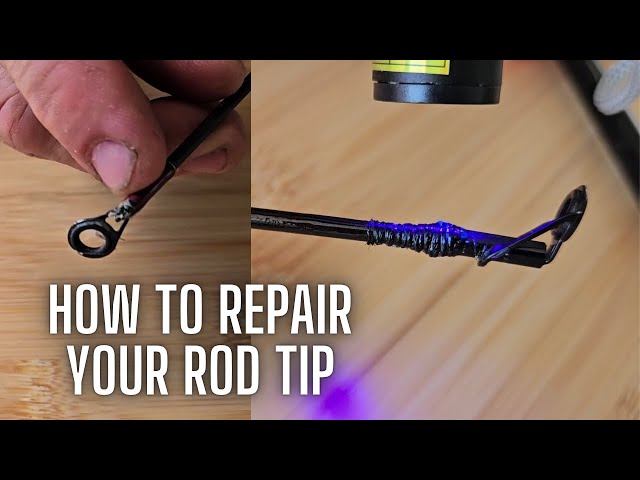
Have you ever been out fishing, only to have your rod tip snap or bend at the worst moment? It’s frustrating, right?
But before you toss your fishing rod aside or rush to buy a new one, there’s good news. You can fix your fishing rod tips yourself, saving time and money. In this guide, you’ll discover simple, effective ways to repair your rod tips and get back to fishing faster.
Keep reading, and you’ll learn how to bring your fishing gear back to life with easy steps anyone can follow.
Common Rod Tip Issues
Fishing rod tips are delicate parts that often face damage. Knowing common problems helps keep your rod working well.
This guide covers three frequent issues with rod tips and how to spot them.
Tip Breakage Causes
Rod tips break mostly from impacts or bending too much. Hitting hard surfaces or stepping on the rod can cause cracks or breaks.
Using too heavy a lure or pulling hard can also snap the tip. Old rods are more likely to break because materials weaken over time.
Guide Ring Damage
Guide rings help the fishing line run smoothly. If these rings crack or bend, they can cut or wear out the line quickly.
Damage happens when the rod hits rocks, or the line gets stuck and pulls hard. Dirt and salt buildup can also harm the rings.
- Cracked rings cause line frays
- Bent rings stop line from moving freely
- Dirt and salt cause corrosion
Loose Or Missing Tips
Sometimes the tip section loosens or falls off the rod. This reduces control and can make fishing harder.
Loose tips happen if the rod sections are not fitted tightly. Tips can get lost if the rod is dropped or stored carelessly.
- Check that rod parts fit snugly
- Store rods in cases to protect tips
- Replace lost tips with matching pieces
Tools And Materials Needed
Fixing a fishing rod tip requires the right tools and materials. Using proper supplies makes the repair easier.
This guide covers the key tools, adhesives, and replacement parts you need for fixing rod tips.
Essential Repair Tools
You need a few basic tools to repair your fishing rod tip. These tools help you work carefully and safely.
- Small needle-nose pliers to hold and bend parts
- Sharp scissors or a craft knife to cut thread or tape
- Sandpaper or a small file to smooth rough edges
- Heat gun or lighter for shrinking heat-shrink tubing
- Tweezers to handle small pieces
- Ruler or measuring tape to check sizes
- Cloth or paper towels for cleaning
Recommended Adhesives
Choosing the right glue is important to keep your rod tip strong. Some adhesives work better than others.
- Epoxy resin: strong and waterproof, ideal for rod tips
- Super glue (cyanoacrylate): quick drying for small fixes
- Rod wrapping cement: used for securing thread wraps
- UV cure glue: sets fast under UV light, good for precision
Make sure to use adhesives that dry clear to keep your rod looking good.
Replacement Tips And Guides
Replacement tips and guides must fit your fishing rod well. Check the size and style before buying.
- Match the diameter of the replacement tip to your rod tip
- Choose the right guide type: ceramic or stainless steel inserts
- Order tips with heat-shrink tubing included for easy attachment
- Keep extra tips and guides for future repairs
Having the right replacement parts helps your fishing rod perform like new again.
Preparing The Rod For Repair
Fixing fishing rod tips starts with good preparation. Cleaning and checking the rod tip area is important before any repair.
This step helps you see the damage clearly and makes the repair last longer.
Cleaning The Rod Tip Area
Remove dirt, salt, and old glue from the rod tip area. This helps the new parts stick well and prevents future damage.
- Use a soft cloth to wipe the area gently.
- Apply rubbing alcohol to remove grease and old glue.
- Use a small brush to clean hard-to-reach spots.
- Let the rod dry completely before starting repairs.
Removing Broken Or Damaged Parts
Carefully take off any broken or damaged rod tip parts. This makes the repair neat and safe.
| Tool | Use |
| Needle-nose pliers | To pull out broken guides or tips |
| Utility knife | To cut away old thread or glue |
| Fine sandpaper | To smooth rough edges after removal |

Credit: www.reddit.com
Step-by-step Tip Replacement
Fixing a fishing rod tip is easier than you might think. With the right tools, you can do it yourself. Follow these steps to replace your fishing rod tip safely and correctly.
Each step ensures your rod works well and lasts longer. This guide will help you size the new tip, apply adhesive, and secure it properly.
Sizing The New Tip
Measure the outer diameter of your broken tip’s base. Choose a new tip that fits snugly over this measurement. A correct fit keeps your rod balanced and strong.
| Tip Size (mm) | Rod Diameter (mm) |
| 1.5 | 1.3 – 1.5 |
| 2.0 | 1.8 – 2.0 |
| 2.5 | 2.3 – 2.5 |
| 3.0 | 2.8 – 3.0 |
Applying Adhesive Properly
Use a strong adhesive designed for fishing rods or epoxy glue. Apply a small amount inside the new tip and on the rod end. Avoid excess glue to keep the tip clean and smooth.
- Clean the rod end to remove dirt and old glue.
- Apply adhesive evenly inside the new tip.
- Spread a thin layer on the rod end.
- Insert the tip onto the rod gently but firmly.
- Wipe off any extra glue immediately.
Securing And Aligning The Tip
Align the new tip with the other guides on your rod. Keep it straight before the glue sets. Hold or tape it in place for at least 15 minutes to ensure a firm bond.
- Place the rod on a flat surface for stability.
- Use masking tape to hold the tip steady.
- Check alignment from multiple angles.
- Allow glue to cure fully before use.
Fixing Guide Rings
Guide rings on fishing rods help control the fishing line. They can bend or loosen over time. Fixing them keeps your rod working well.
This guide shows how to realign bent guides and rewrap loose guide threads. Both fixes improve your rod’s performance.
Realigning Bent Guides
Bent guides cause the line to snag or wear out. Fixing them helps your line run smoothly. Use gentle pressure to straighten bent guides.
Hold the rod firmly and bend the guide back into place slowly. Avoid using too much force to prevent damage.
- Use pliers with a soft cloth to protect the guide
- Check alignment from different angles
- Make small adjustments until the guide is straight
- Test the line movement after realignment
Rewrapping Loose Guide Threads
Loose threads around the guides can cause them to move or fall off. Rewrapping tightens these threads and secures the guides again.
Start by removing old wraps carefully. Use strong thread to rewind around the guide foot and rod. Apply epoxy to protect and hold the wraps.
- Remove damaged thread wraps with a blade
- Use nylon or polyester thread for rewinding
- Wrap tightly and evenly around the guide foot
- Apply epoxy resin over the wraps for strength
- Let the epoxy dry fully before use

Credit: anglersresource.net
Quick Temporary Fixes
Fishing rod tips can break or bend during use. Quick fixes help you keep fishing until you can repair or replace the tip.
These temporary fixes are simple and use common items. They provide enough strength to keep fishing for a short time.
Using Tape Or Heat Shrink
Tape or heat shrink tubing can hold a cracked or loose fishing rod tip. They keep the tip in place and stop further damage.
Wrap tape tightly around the broken area. Use strong tape like electrical or duct tape. Heat shrink tubing fits over the tip and shrinks when heated.
- Clean the broken tip before applying tape or tubing.
- Wrap tape in several tight layers for better hold.
- Heat shrink tubing needs a heat source like a hair dryer.
- Check the repair often and reapply if needed.
Temporary Glue Solutions
Glue can fix small cracks or loose tips temporarily. Use glue that dries fast and sticks well to plastic or metal.
Apply a small amount of glue to the broken area. Hold the tip firmly until the glue sets. Avoid using too much glue to prevent mess.
- Super glue works well for quick fixes.
- Epoxy glue is stronger but takes longer to dry.
- Let the glue dry fully before using the rod.
- Temporary glue fixes may not hold under heavy strain.
Maintenance Tips To Prevent Damage
Fishing rod tips are delicate and need care to last longer. Proper maintenance helps avoid costly repairs. Simple habits protect your gear from damage.
Follow these tips to keep your rod tips strong and ready for your next fishing trip. Good care saves time and money over time.
Proper Storage Techniques
Store fishing rods in a safe place to prevent bending and breaking. Avoid places with extreme heat or moisture. Use holders or racks to keep rods straight.
- Keep rods off the ground to avoid accidental steps
- Use rod sleeves or covers to protect tips
- Store rods vertically or horizontally without pressure on tips
- Avoid leaning rods against walls for long periods
- Choose a cool, dry area away from direct sunlight
Regular Inspection And Cleaning
Check your fishing rod tips often for cracks or wear. Clean off dirt and salt to keep parts working well. Use fresh water and a soft cloth after fishing.
| Inspection Area | Signs to Check | Cleaning Tips |
| Rod Tip | Cracks, bends, or loose guides | Wipe gently with damp cloth |
| Guides | Rust, dirt, or damage | Use mild soap and rinse well |
| Handle | Wear or looseness | Dry thoroughly after cleaning |

Credit: www.youtube.com
Frequently Asked Questions
How Do I Fix A Broken Fishing Rod Tip?
To fix a broken fishing rod tip, start by carefully removing the damaged section. Use a lighter to heat and remove the old tip top. Then, attach a new tip top using a strong adhesive or glue. Ensure it aligns with the rod’s guides for optimal performance.
What Materials Are Needed For Rod Tip Repair?
For rod tip repair, you’ll need a new tip top, strong adhesive or glue, and a lighter. A pair of pliers can help with removal and alignment. These tools ensure the repair is secure and effective, restoring your fishing rod’s functionality quickly.
Can I Repair My Rod Tip At Home?
Yes, you can repair your rod tip at home with minimal tools. Follow a few simple steps like removing the damaged tip, heating, and attaching a new one with adhesive. This process is quick and doesn’t require professional help, saving time and money.
How To Choose The Right Replacement Tip?
To choose the right replacement tip, match the diameter of your rod’s tip section. Ensure the tip top aligns with the rod guides for smooth casting. Consider the type of fishing you do, as different tips may suit specific needs.
Conclusion
Fixing fishing rod tips is easier than it seems. Small repairs can save your rod and money. Follow steps carefully and take your time. A good fix helps you fish longer and better. Keep your tools ready for quick fixes.
Practice makes the process smoother each time. Enjoy fishing without worry about broken tips. Simple care keeps your rod in top shape. Try these tips and feel the difference. Fishing fun is just a repair away.