Have you ever noticed your car’s headlight flickering or going out at the worst possible moment? It’s frustrating and even dangerous.
But here’s the good news: changing a car headlight is easier than you think. You don’t need to be a mechanic or spend a fortune at the repair shop. In this guide, you’ll learn simple, step-by-step instructions that anyone can follow.
By the end, you’ll feel confident fixing your headlights quickly and safely. Keep reading—you’ll thank yourself the next time you hit the road at night!
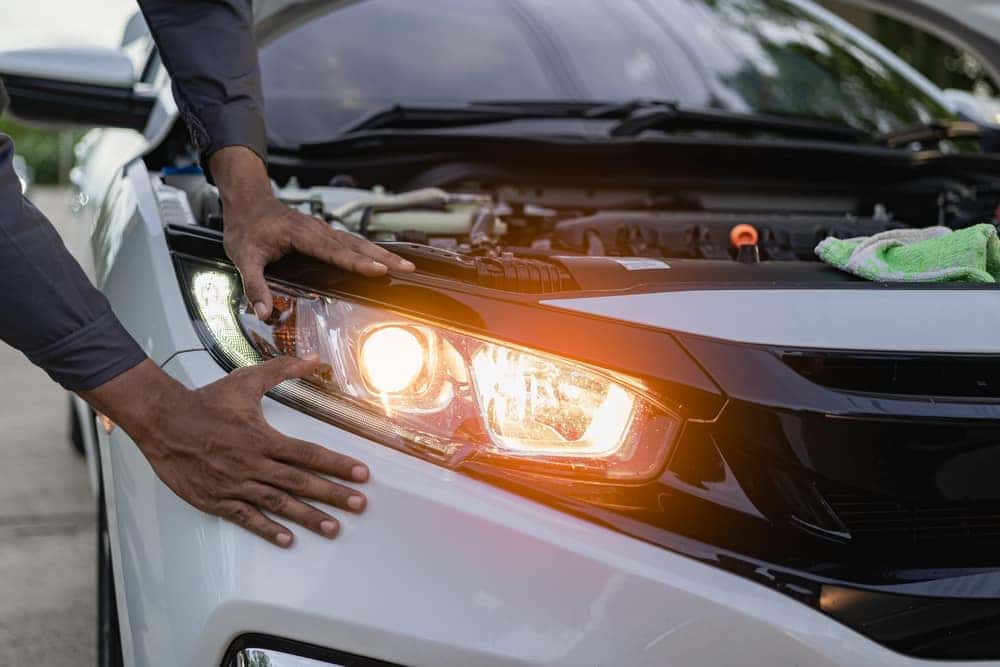
Credit: www.infinitidanbury.com
Tools Needed
Changing a car headlight is a simple task if you have the right tools. Using the correct tools makes the job easier and safer.
Gather your tools before starting. This saves time and helps avoid mistakes.
Screwdrivers
You will need screwdrivers to remove parts blocking the headlight. Most cars use Phillips or flathead screws.
Keep both types ready. This helps you handle different screw heads without trouble.
Socket Wrench Set
A socket wrench set helps remove bolts holding the headlight assembly. Sizes vary, so have multiple sockets available.
Using the right socket prevents damage to bolts and makes removal easier.
Gloves
Wear gloves to protect your hands from sharp edges and dirt. Gloves also keep the new bulb clean.
Clean bulbs last longer because oils from skin do not cause damage.
Replacement Headlight Bulb
Make sure you have the correct replacement bulb for your car model. Check your owner’s manual or bulb packaging.
Using the right bulb ensures proper fit and light output.
Clean Cloth
A clean cloth helps you hold and clean the bulb without touching it with bare hands.
It also helps wipe dirt from the headlight housing if needed.

Credit: www.youtube.com
Preparing Your Car
Changing a car headlight starts with proper preparation. This helps you work safely and effectively.
Follow simple steps to get your car ready before you replace the headlight bulb.
Park Your Car Safely
Find a flat surface to park your car. Use the parking brake to keep it from moving.
Turn Off The Engine And Lights
Switch off the engine and all the lights. This prevents electric shocks and burns.
Gather Necessary Tools
- A new headlight bulb
- Screwdriver or wrench
- Gloves to protect your hands
- Clean cloth
- Owner’s manual
Open The Hood
Locate the hood release inside your car. Pull it to open the hood and secure it with the prop rod.
Locate The Headlight Assembly
Look for the back of the headlight inside the engine bay. Check your owner’s manual if unsure.
| Part | Location |
| Hood release lever | Below dashboard on driver’s side |
| Headlight assembly | Front corners of engine bay |
| Headlight bulb socket | Back of headlight assembly |
Accessing The Headlight
Changing a car headlight starts with reaching the headlight itself. This means opening parts of the car to get clear access.
This guide explains how to open the hood and remove the headlight cover safely.
Opening The Hood
To access the headlight, first open the car’s hood. Locate the hood release inside the car, usually near the driver’s side.
- Pull the hood release lever inside the car.
- Go to the front of the car and find the safety catch under the hood.
- Push or lift the safety catch to fully open the hood.
- Use the hood prop rod to keep the hood open if your car has one.
Make sure the hood is secure before working near the engine or headlight area.
Removing The Headlight Cover
The headlight cover protects the bulb and wiring. Removing it lets you reach the bulb for replacement.
| Common Headlight Cover Types | How to Remove |
|---|---|
| Plastic Cap | Turn counterclockwise and pull off. |
| Rubber Boot | Pull gently to remove from headlight base. |
| Metal Clip | Unclip or unscrew before lifting off. |
Check your car manual for the exact cover type. Handle parts carefully to avoid damage.
Removing The Old Bulb
Changing a car headlight starts with removing the old bulb. This process is simple but needs care.
Follow the steps to disconnect the wiring and take out the bulb safely.
Disconnecting The Wiring
First, open the car hood to access the back of the headlight. Find the wiring connected to the bulb.
Gently pull the wiring plug away from the bulb. Do not use too much force to avoid damage.
- Locate the wiring connector at the bulb base
- Press the release tab or clip if there is one
- Pull the connector straight out from the bulb
Taking Out The Bulb
After disconnecting the wiring, you can remove the old bulb. Some bulbs twist off, others pull straight out.
Check how the bulb is fixed. Turn it counterclockwise or pull it gently to remove it.
- Hold the bulb by its base, not the glass
- Turn the bulb counterclockwise if it twists
- Pull straight out if it does not twist
- Remove the bulb carefully to avoid breaking
Installing The New Bulb
Changing a car headlight bulb is simple if you follow the right steps. Installing the new bulb carefully ensures it works well and lasts long.
This guide explains how to handle the bulb safely and insert it properly into your car’s headlight.
Handling The Bulb Safely
Always handle the new bulb with care to avoid damage. Oils from your skin can shorten the bulb’s life.
Use clean gloves or a cloth to hold the bulb. Avoid touching the glass part directly.
- Wear gloves or use a clean cloth
- Do not touch the glass with bare hands
- Keep the bulb away from dirt and moisture
- Handle the bulb gently to avoid breaking it
Inserting The New Bulb
Place the bulb carefully into the socket. Make sure it fits snugly to avoid loose connections.
Secure the bulb with the clip or cover. Check if the bulb is stable before closing the headlight cover.
- Align the bulb with the socket correctly
- Push the bulb gently until it fits tightly
- Lock the bulb with the clip or cover
- Test the light before closing the headlight
Testing The Headlight
After installing a new headlight, it is important to test it. Testing ensures the light works properly and safely.
This section explains how to test your car headlight step-by-step.
Check The Light Power
Turn on your car’s headlights. Look to see if the new bulb lights up. If it does not, check the connections and power source.
Inspect The Beam Alignment
Stand in front of your car at a safe distance. The beam should shine evenly and not be too high or low. Adjust the headlight if needed.
Test The High And Low Beams
- Switch on the low beam and check the light output.
- Switch to the high beam and observe the brightness.
- Make sure both beams turn on and off smoothly.
- Look for any flickering or dimming.
Check Headlight Controls
Use the headlight control switch inside the car. Test all functions like turning lights on/off and switching beams. Ensure controls work without delay.
Use A Wall For Beam Pattern Test
Park your car about 10 feet from a flat wall. Turn on the headlights and mark the center of the beam with tape.
| Distance | Expected Beam Height |
|---|---|
| 10 feet | About 2 to 4 inches below center of headlight |
| 20 feet | About 4 to 8 inches below center |
If the beam is too high, it can blind other drivers. Too low means less road visibility.
Common Issues And Fixes
Changing a car headlight can seem simple but several common issues may arise. Knowing these problems helps you fix them quickly and safely.
This guide covers frequent headlight problems and practical solutions to get your lights working again.
Burned Out Bulb
A burned out bulb is the most common headlight issue. The light will not turn on or will be very dim.
Fix this by removing the old bulb and replacing it with a new one that matches your car’s specifications.
Corroded Socket
Corrosion in the socket can prevent the bulb from receiving power. It often appears as green or white buildup.
- Disconnect the car battery before working on the socket.
- Clean the socket with a wire brush or sandpaper.
- Apply dielectric grease to prevent future corrosion.
Faulty Wiring
Damaged or loose wiring can cause flickering or no light at all. Check wires for cuts or loose connections.
| Symptom | Possible Cause | Fix |
| Light flickers | Loose wiring | Secure connections |
| No light | Broken wire | Replace or repair wire |
| Dim light | Corroded connector | Clean and protect connector |
Moisture Inside Headlight
Moisture can fog the headlight lens and damage bulbs. It usually enters through cracks or poor seals.
To fix this issue:
- Remove the headlight assembly.
- Dry the inside with a hair dryer or leave it in the sun.
- Check seals and replace if damaged.
- Apply silicone sealant around edges.
Tips For Maintenance
Changing a car headlight is important for safe driving. Regular maintenance keeps headlights bright.
Good care helps headlights last longer and work well in the dark.
Check Headlights Regularly
Look at your headlights at least once a month. Check if both lights are bright and clear.
Clean any dirt or bugs from the headlight covers to keep light shining brightly.
Use Gloves When Handling Bulbs
Wear clean gloves to avoid touching the bulb glass. Oils from your skin can shorten bulb life.
Handle bulbs carefully to prevent damage and ensure they work well after installation.
Replace Both Headlights Together
Change both headlights at the same time. This keeps light levels even on both sides of the car.
New bulbs work best together and help you see clearly at night or in bad weather.
Adjust Headlight Aim After Replacement
After changing bulbs, check the headlight aim. Poor aim can reduce visibility and blind others.
Use your car manual to find how to adjust the lights or ask a mechanic for help.
Keep Headlight Covers Clean
Clean covers with mild soap and water regularly. Cloudy covers reduce light output.
Use special polish if covers become yellow or foggy to restore brightness.

Credit: www.whocanfixmycar.com
Frequently Asked Questions
How Do I Know If My Headlight Is Burnt Out?
If your headlight appears dim or doesn’t turn on, it may be burnt out. Check by switching on the lights and observing the beam. If one side remains dark or flickers, it’s likely burnt out. Regularly inspecting your headlights can help ensure they function properly.
What Tools Do I Need To Change A Headlight?
You typically need a screwdriver, gloves, and possibly a wrench. These tools help safely access and remove the headlight unit. Check your car’s manual for any specific tools required. Having these tools ready can make the process smoother and quicker.
Can I Change A Headlight Myself?
Yes, changing a headlight is usually a simple DIY task. It involves removing the headlight cover, replacing the bulb, and securing it back. Always refer to your vehicle’s manual for specific instructions. This can save you time and money compared to visiting a mechanic.
How Often Should I Check My Car Headlights?
It’s advisable to check your headlights every few months. Regular checks ensure they are functioning correctly and are not dimming. This helps maintain optimal visibility and safety while driving. Keeping them clean and free of obstructions is also important.
Conclusion
Changing a car headlight is simple and saves money. You only need a few tools and some patience. Follow the steps carefully for safety and success. Check your new bulb before installing it. Proper lighting keeps you safe on the road.
Try this task yourself next time your headlight goes out. It feels good to fix things on your own. Keep your car lights bright and clear every time you drive.