Are you tired of feeling cold and uncomfortable inside your sleeping bag? A sleeping bag liner might be the simple solution you need.
Making your own liner is easier than you think, and it can add extra warmth, keep your sleeping bag clean, and even make packing up quicker. In this guide, you’ll learn step-by-step how to create a liner that fits your needs perfectly.
Keep reading, and soon you’ll sleep warmer and cozier on every outdoor adventure.
Materials Needed
Making a sleeping bag liner is simple and fun. You only need a few materials to get started. These materials help keep you warm and comfortable inside your sleeping bag.
This guide will explain the main materials you need. It covers fabric choices, sewing tools, and optional accessories to make your liner better.
Fabric Choices
Choosing the right fabric is important. It affects how warm and soft your liner feels. Some fabrics are lighter and dry faster than others.
- Cotton: Soft and breathable but takes longer to dry.
- Silk: Lightweight, warm, and smooth but more expensive.
- Flannel: Warm and cozy, good for cold weather.
- Fleece: Warm and quick-drying, but a bit bulky.
- Nylon or Polyester: Light, strong, and dries fast.
Essential Sewing Tools
You need basic sewing tools to make your liner. These tools help you cut, stitch, and finish the fabric easily and neatly.
- Sewing machine or hand sewing needles
- Thread that matches your fabric
- Scissors or rotary cutter for cutting fabric
- Measuring tape or ruler
- Pins or clips to hold fabric pieces together
- Seam ripper for fixing mistakes
- Iron for pressing seams flat
Optional Accessories
These accessories are not required but can improve your sleeping bag liner. They add comfort and make the liner easier to use.
- Zipper or Velcro to close the liner
- Elastic bands to keep the liner in place
- Drawstrings for adjustable openings
- Waterproof spray to make fabric water-resistant
- Labels or tags for personalization
Measuring And Cutting
Making a sleeping bag liner starts with careful measuring and cutting. Accurate steps help your liner fit well and feel comfortable.
Use a flat surface and clear measurements for the best results. Take your time to avoid mistakes.
Determining The Size
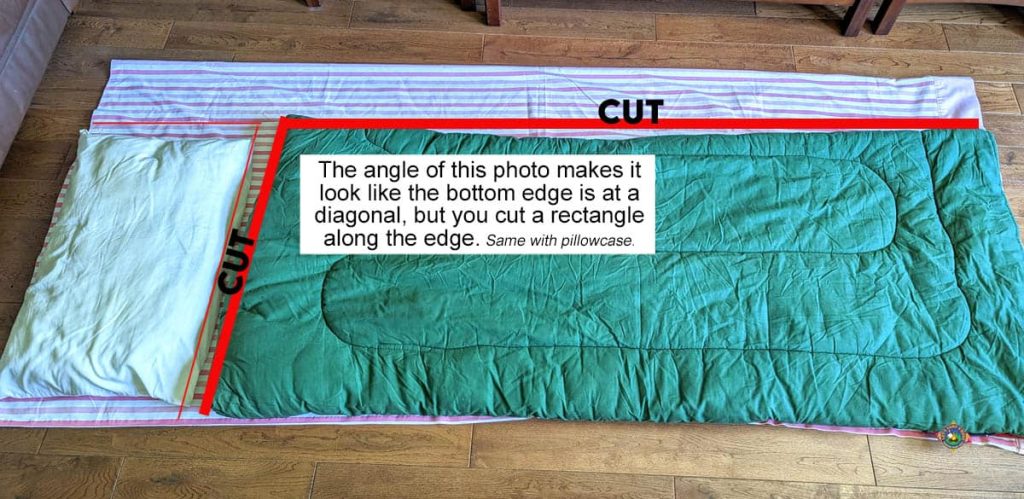
First, measure the inside of your sleeping bag. This gives the right size for your liner. Add extra space for seams and comfort.
Common liner sizes match standard sleeping bags, but check your bag’s length and width. Include room to move inside the liner.
- Measure the sleeping bag length from head to foot
- Measure the width at the widest point inside the bag
- Add about 2 to 3 inches to length and width for seams and ease
Marking The Fabric
Lay the fabric flat on a clean surface. Use a fabric marker or tailor’s chalk to mark your measurements. Draw straight lines for easier cutting.
Double-check your marks before cutting. Mark seam allowances clearly to avoid cutting mistakes.
- Use a ruler or measuring tape for straight lines
- Mark seam allowance lines about 1/2 inch inside the fabric edges
- Label each piece to keep track
Cutting Techniques
Use sharp fabric scissors for clean cuts. Cut slowly along the marked lines to keep fabric even. Avoid lifting the fabric too much.
Keep the fabric flat and steady. If the fabric shifts, your pieces may not fit well later.
- Cut on a flat, stable surface
- Follow your marked lines carefully
- Keep scissors sharp for smooth cuts
- Cut one layer of fabric at a time for precision
Sewing The Liner
Sewing a sleeping bag liner requires careful stitching to make it strong and comfortable. Use simple sewing techniques to join fabric pieces well.
Good sewing helps the liner last longer and keeps you warm. Follow these steps to sew the liner correctly.
Basic Stitching Methods
Use straight stitches for most parts of the liner. This stitch holds the fabric firmly and is easy to sew.
You can also use a zigzag stitch to stop the fabric edges from fraying. This stitch adds flexibility and strength.
- Straight stitch for joining pieces
- Zigzag stitch to finish edges
- Backstitch at the start and end for strength
Creating Seams
Cut fabric pieces slightly larger than the liner size. This extra fabric helps when sewing seams.
Place two fabric pieces together with the right sides facing each other. Sew along the edge with a ½ inch seam allowance.
- Sew edges with right sides together
- Use ½ inch seam allowance
- Press seams open with an iron for flatness
- Trim seam allowances if needed to reduce bulk
Adding A Zipper Or Closure
A zipper or closure makes it easy to get in and out of the liner. Choose a zipper that matches the liner length.
Sew the zipper to one side of the liner fabric. Use a zipper foot on your sewing machine for straight stitching close to the zipper teeth.
- Pin zipper to fabric edge with right sides facing
- Sew zipper with a zipper foot for accuracy
- Test zipper to ensure it moves smoothly
- Use buttons or Velcro as alternative closures

Credit: www.amazon.com
Customizing Your Liner
Making your own sleeping bag liner lets you add special touches. You can change it to fit your needs perfectly.
Customizing helps improve comfort and usability. Small changes can make a big difference on trips.
Adding Pockets
Pockets keep small items close and safe. You can sew them inside or outside your liner.
Choose pocket sizes based on what you want to carry. Use zippers or Velcro to keep things secure.
- Small pockets for keys or phone
- Larger pockets for snacks or maps
- Waterproof pockets to keep items dry
Incorporating Insulation
Adding insulation makes your liner warmer. Use thin, lightweight materials that fit inside your liner.
Choose insulation based on weather conditions. You can layer it or sew it directly into the fabric.
- Fleece for mild warmth
- Thinsulate for cold weather
- Synthetic fill for moisture resistance
Personalizing With Colors And Patterns
Use colors and patterns to make your liner unique. Pick fabrics that show your style or mood.
Bright colors help find your liner easily. Patterns can hide dirt or add fun designs.
- Solid colors for simple looks
- Stripes or checks for classic style
- Camouflage for outdoor blending
Care And Maintenance
Keeping your sleeping bag liner clean and in good shape is important. It helps the liner last longer and stay comfortable.
Simple care steps will protect the fabric and keep it fresh for your next trip.
Washing Instructions
Wash your sleeping bag liner gently to avoid damage. Use cold water and mild detergent to keep the fabric soft.
Avoid bleach and fabric softeners because they can weaken the material.
- Use a gentle cycle on your washing machine
- Hand wash if the liner is delicate
- Rinse well to remove all soap
- Air dry in shade to keep colors bright
Storage Tips
Store your liner in a dry and clean place. Avoid tight packing to keep the fabric from getting crushed.
Use a breathable storage bag or hang it to keep it fresh and ready to use.
- Keep the liner away from direct sunlight
- Do not store when wet or damp
- Use a cotton or mesh bag for storage
- Check the liner regularly for damage
Repairing Common Issues
Small tears and holes can be fixed easily. Repairing stops damage from getting worse.
Use a needle and thread or fabric patches to fix the liner quickly.
- Sew small holes with matching thread
- Apply fabric patches for larger tears
- Use fabric glue for quick fixes
- Check seams for loose stitches and repair

Credit: us.alpkit.com

Credit: www.amazon.com
Frequently Asked Questions
What Materials Are Best For A Sleeping Bag Liner?
Cotton, silk, and fleece are popular materials for liners. Cotton is breathable and easy to wash. Silk is lightweight and warm. Fleece adds extra insulation and comfort. Choose based on your climate and personal preference for comfort and warmth.
How Do I Sew A Sleeping Bag Liner?
Cut fabric to match your sleeping bag size. Sew three sides together inside out. Leave one side open for entry. Turn it right side out after sewing. Finish edges with a hem for durability and neatness.
Can A Sleeping Bag Liner Improve Warmth?
Yes, a liner adds an extra insulation layer. It traps body heat and blocks cold air. Using a liner can increase warmth by several degrees. This is especially useful in colder camping conditions.
How Do I Clean A Sleeping Bag Liner?
Machine wash liners on gentle cycle with mild detergent. Avoid bleach and fabric softeners. Air dry or tumble dry on low heat. Regular cleaning maintains hygiene and prolongs liner life.
Conclusion
Making a sleeping bag liner is simple and useful. It keeps your sleeping bag clean and adds warmth. You only need a few materials and easy steps. This small project saves money and makes camping more comfortable. Try it out on your next trip.
Enjoy a cozy, fresh sleeping space every time you camp. A homemade liner can make a big difference. Give yourself the comfort you deserve. Happy camping!