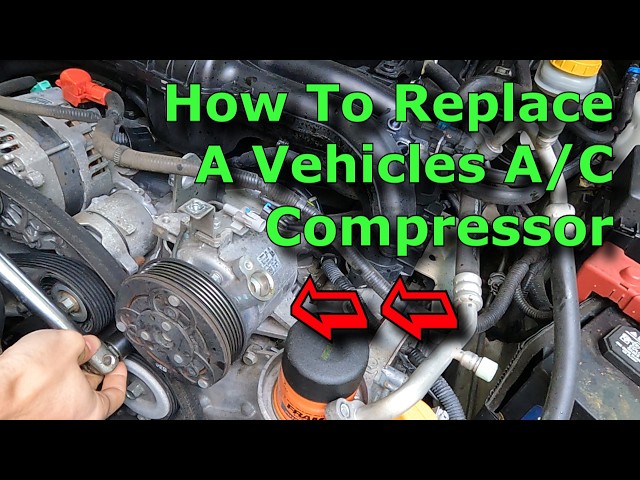
Is your air conditioner not cooling like it used to? The problem might be your compressor.
Replacing an air conditioner compressor might sound tricky, but with the right steps, you can do it yourself and save money. In this guide, you’ll find clear, simple instructions to help you fix your AC and bring back that cool comfort.
Keep reading—you’re closer to beating the heat than you think.

Credit: www.reddit.com
Signs Of A Faulty Compressor
The air conditioner compressor is key to cooling your home. If it breaks, the AC won’t work well. Knowing the signs of a bad compressor can save time and money.
Watch for unusual noises or poor cooling. These often point to compressor issues. Early detection helps avoid full system failure.
Common Symptoms
A faulty compressor shows clear signs. These symptoms affect your AC’s performance and comfort.
- AC blows warm air instead of cold
- Loud clicking or humming noises from the unit
- Frequent tripping of the circuit breaker
- Unit struggles to start or stops suddenly
- Higher energy bills due to inefficient cooling
- Ice buildup on the refrigerant lines
If you notice one or more of these symptoms, your compressor might be failing. Acting fast can prevent bigger problems.
When To Replace
Replacing the compressor is needed when repairs no longer fix the problem. Some signs tell you it’s time to replace it.
- Compressor fails to start after multiple tries
- Repair costs near or exceed replacement cost
- Unit is very old, and efficiency is low
- Frequent breakdowns after repairs
- Severe damage like burned or seized compressor
Consult a professional technician to confirm the need for replacement. Timely action keeps your AC running well.
Tools And Materials Needed
Replacing an air conditioner compressor requires the right tools and materials. Having everything ready makes the job easier and safer.
This guide lists the essential tools and safety gear you will need before starting the replacement process.
Essential Tools
Gather these tools to remove and install the air conditioner compressor properly.
- Wrench set for loosening bolts
- Screwdrivers (flathead and Phillips)
- Refrigerant recovery machine
- Manifold gauge set to check pressures
- Vacuum pump to remove air and moisture
- Tube cutter for refrigerant lines
- Multimeter to test electrical connections
- Torque wrench to tighten bolts correctly
Safety Gear
Wear safety gear to protect yourself during the compressor replacement.
| Safety Gear | Purpose |
| Safety glasses | Protect eyes from debris and refrigerant |
| Gloves | Prevent cuts and chemical exposure |
| Respirator mask | Protect lungs from refrigerant fumes |
| Long sleeves | Shield skin from sharp edges and chemicals |
Preparing For Replacement
Replacing an air conditioner compressor needs careful preparation. You must follow safety steps to avoid accidents.
Start by gathering tools and understanding the process for a smooth replacement.
Turning Off Power
Always turn off the power before working on your air conditioner. This stops electric shock and damage.
- Locate the main electrical panel.
- Find the breaker that controls the air conditioner.
- Switch the breaker off to cut the power.
- Use a voltage tester to check the wires for current.
- Wear insulated gloves for extra safety.
Recovering Refrigerant
Refrigerant must be recovered safely before removing the compressor. This protects the environment and follows the law.
| Step | Action |
|---|---|
| 1 | Connect recovery machine to service valves. |
| 2 | Turn on recovery machine to extract refrigerant. |
| 3 | Monitor pressure gauges closely. |
| 4 | Once complete, close valves and disconnect equipment. |
| 5 | Store recovered refrigerant in approved containers. |
Removing The Old Compressor
Removing the old air conditioner compressor is a key step in replacement. It requires care to avoid damage and ensure safety.
Focus on disconnecting electrical parts, detaching refrigerant lines, and removing mounting bolts. Follow each step carefully.
Disconnecting Electrical Components
First, turn off the power to the air conditioner at the breaker box. This prevents electric shock during removal.
Locate the compressor’s electrical connections. These include wires linked to the contactor and capacitor.
- Remove the wire connectors carefully.
- Label each wire for easy reconnection later.
- Use a screwdriver to loosen terminal screws.
- Set aside all removed wires safely.
Detaching Refrigerant Lines
Before disconnecting refrigerant lines, recover the refrigerant using certified equipment. This is important for safety and the environment.
Once the refrigerant is recovered, find the service valves on the compressor. Use a wrench to loosen the flare nuts connecting the lines.
| Tool Needed | Use |
| Refrigerant recovery machine | Safely remove refrigerant |
| Adjustable wrench | Loosen flare nuts on refrigerant lines |
| Safety gloves | Protect hands from cold refrigerant |
Removing Mounting Bolts
Locate the mounting bolts securing the compressor to the base or frame. These bolts hold the compressor firmly in place.
Use a socket wrench or ratchet to remove each bolt. Support the compressor while removing bolts to prevent it from falling.
- Identify all mounting bolts around the compressor.
- Place a hand or support under the compressor.
- Use the correct socket size to loosen and remove bolts.
- Lift the compressor gently out of its place.
Installing The New Compressor
Installing a new air conditioner compressor requires careful steps. Proper installation ensures the system works well and lasts long.
Follow these instructions to position, connect, and wire the new compressor safely and correctly.
Positioning And Securing
Place the new compressor in the same spot as the old one. Align the mounting holes with the base frame.
- Lift the compressor carefully to avoid damage.
- Set it firmly on the mounting pad.
- Use bolts or screws to secure it tightly.
- Check that the compressor does not move or vibrate.
Reconnecting Refrigerant Lines
Reconnect the refrigerant lines to the compressor’s ports. Make sure the connections are clean and tight.
| Port Type | Connection Tip |
| Discharge Line | Attach securely with proper gasket |
| Suction Line | Ensure no leaks at joint |
Wiring Connections
Connect the electrical wires to the compressor terminals. Follow the wiring diagram on the unit.
- Turn off power before starting.
- Match wire colors with terminal labels.
- Tighten terminal screws firmly.
- Check for any loose or exposed wires.
Vacuuming And Recharging System
Replacing an air conditioner compressor requires careful vacuuming and recharging. These steps remove air and moisture and add the correct refrigerant.
Proper vacuuming and recharging help the system work well and last longer.
Vacuuming Air And Moisture
Air and moisture inside the air conditioner can cause damage. Use a vacuum pump to remove all air and moisture from the system.
- Connect the vacuum pump to the service port.
- Turn on the vacuum and run it for at least 30 minutes.
- Check if the gauge shows a deep vacuum, usually below 500 microns.
- Close the valves and turn off the pump.
- Watch the gauge for 10 minutes to ensure the vacuum holds steady.
Doing this stops corrosion and ice inside the system. It also prevents loss of cooling power.
Adding Refrigerant
After vacuuming, add the right amount of refrigerant. Follow the manufacturer’s guidelines for type and weight.
| Refrigerant Type | Charge Amount (lbs) | Charging Method |
| R-410A | 2.5 | Liquid charge through low side |
| R-22 | 3.0 | Gas charge through low side |
| R-134a | 1.8 | Liquid charge through service port |
Use a scale to measure the refrigerant. Connect the can or tank to the service port. Add refrigerant slowly and check pressure levels.
Testing The New Compressor
After installing a new air conditioner compressor, testing is important. It ensures the unit works safely and efficiently.
Testing helps find any issues early. It also confirms the compressor is ready for regular use.
Powering On
Turn on the air conditioner to start the compressor. Listen for any unusual sounds during startup.
Check if the compressor motor runs smoothly without jerks or stops. This shows it is operating well.
Checking For Leaks
Look for refrigerant leaks around the compressor and connections. Leaks reduce cooling and can harm the system.
Use a leak detector or soapy water on joints. Bubbles or alerts mean there is a leak that needs fixing.
- Inspect all pipe connections
- Check seals and gaskets
- Test pressure levels to confirm no loss
Monitoring Performance
Watch the air conditioner’s cooling ability. It should cool the room as expected within minutes.
Check the compressor’s temperature and electrical usage. Normal levels mean the compressor runs efficiently.
- Measure temperature drop in the room
- Monitor compressor current draw
- Listen for steady, quiet operation

Credit: m.youtube.com
Maintenance Tips For Longevity
Replacing an air conditioner compressor is important for a healthy cooling system. Proper maintenance helps the compressor last longer.
Simple care steps keep your AC working well and avoid costly repairs. Regular checks and cleaning are key parts of maintenance.
Regular Inspections
Look over your air conditioner often to spot problems early. Check for strange noises, leaks, or weak cooling.
Inspect electrical parts and wiring to avoid failures. Tighten loose connections and replace damaged wires quickly.
- Listen for unusual sounds from the compressor
- Check for oil or refrigerant leaks
- Examine electrical connections and wires
- Look for signs of rust or corrosion
- Monitor cooling performance regularly
Cleaning And Servicing
Keep your air conditioner clean to help the compressor work well. Dirt and dust reduce efficiency and cause wear.
Clean or replace filters often. Clear debris from the outdoor unit and coils to improve airflow and cooling.
- Clean or change air filters every 1-3 months
- Remove leaves and dirt from outdoor unit
- Clean evaporator and condenser coils yearly
- Check and clear drain lines to avoid blockages
- Schedule professional servicing each year

Credit: www.youtube.com
Frequently Asked Questions
What Tools Do I Need To Replace An Ac Compressor?
You need wrenches, screwdrivers, a refrigerant recovery machine, vacuum pump, manifold gauge set, and safety gear. Proper tools ensure a safe, efficient replacement process.
How Long Does It Take To Replace An Ac Compressor?
Replacing an AC compressor typically takes 2 to 4 hours. Time varies based on skill level and system complexity.
Can I Replace An Ac Compressor Myself Safely?
Yes, if you have HVAC knowledge and proper tools. Handle refrigerants carefully and follow safety protocols to avoid injury or damage.
When Should I Replace My Air Conditioner Compressor?
Replace the compressor if it’s leaking, making noise, or failing to cool efficiently. Early replacement prevents further system damage.
Conclusion
Replacing an air conditioner compressor takes time and care. Follow the steps slowly and double-check your work. Safety must come first at all times. A well-installed compressor helps your AC work better and last longer. Trust your skills but ask for help if unsure.
Regular maintenance keeps your system running smoothly. Now, your home can stay cool and comfortable again. Simple actions can save you money and stress. Keep learning and take good care of your AC.