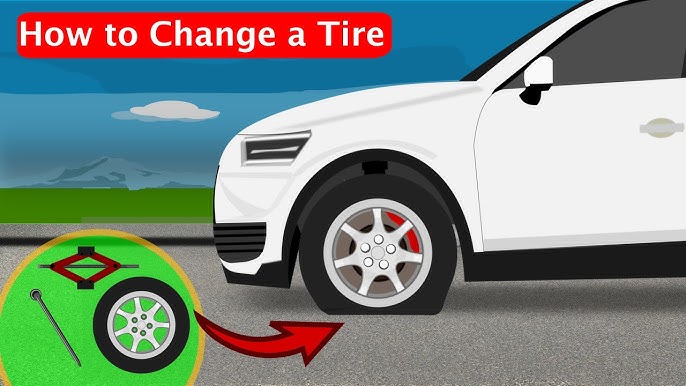
Imagine you’re driving down the road, and suddenly your car starts to feel wobbly. You pull over and discover a flat tire.
It’s frustrating and can feel overwhelming if you don’t know what to do next. But don’t worry—changing a flat tire is easier than you think. In this guide, you’ll learn simple, clear steps to get your car back on the road quickly and safely.
By the end, you’ll feel confident handling a flat tire anytime it happens to you. Keep reading to take control of the situation and avoid waiting for help.
Gathering Essential Tools
Changing a flat tire needs the right tools. Having these tools ready makes the job easier.
Before you start, gather all essential items. This helps you work safely and quickly.
Spare Tire
A spare tire replaces the flat one. It lets you drive to a repair shop safely.
Most cars have a full-size or a smaller temporary spare tire. Know which type you have.
Jack And Lug Wrench
The jack lifts your car off the ground. It creates space to remove the flat tire.
The lug wrench loosens and tightens the wheel nuts. It helps remove the flat tire safely.
- Use the jack on a flat, stable surface
- Turn the jack handle slowly to lift the car
- Use the lug wrench in a star pattern to loosen nuts
Safety Equipment
Safety gear protects you while changing the tire. It keeps you visible and safe.
Common safety items include reflective vests, gloves, and wheel chocks. These prevent accidents.
- Wear a reflective vest to be seen by drivers
- Use gloves to protect your hands
- Place wheel chocks to stop the car from moving
Preparing Your Car
Changing a flat tire starts with preparing your car safely. Taking the right steps keeps you safe and makes the process easier.
Follow these simple actions before you lift your car. Proper preparation helps prevent accidents and damage.
Park On A Flat Surface
Stop your car on a flat, stable surface. Avoid hills or soft ground to keep the car steady.
Parking on a flat surface reduces the chance of your car rolling while you change the tire.
Engage Parking Brake
Always set the parking brake before changing a tire. This keeps your car from moving unexpectedly.
Engaging the parking brake adds extra safety, especially on surfaces that are not perfectly flat.
Turn On Hazard Lights
Switch on your hazard lights to alert other drivers. This makes your car more visible on the road.
Hazard lights warn others that you are stopped and working on your car, helping to prevent accidents.
Loosening The Lug Nuts
Before removing a flat tire, you need to loosen the lug nuts. This step makes it easier to take off the tire later. Doing this while the car is still on the ground helps keep the wheel from spinning.
Use the right tools and apply force carefully. This will prevent damage and make the process safer.
Position The Lug Wrench
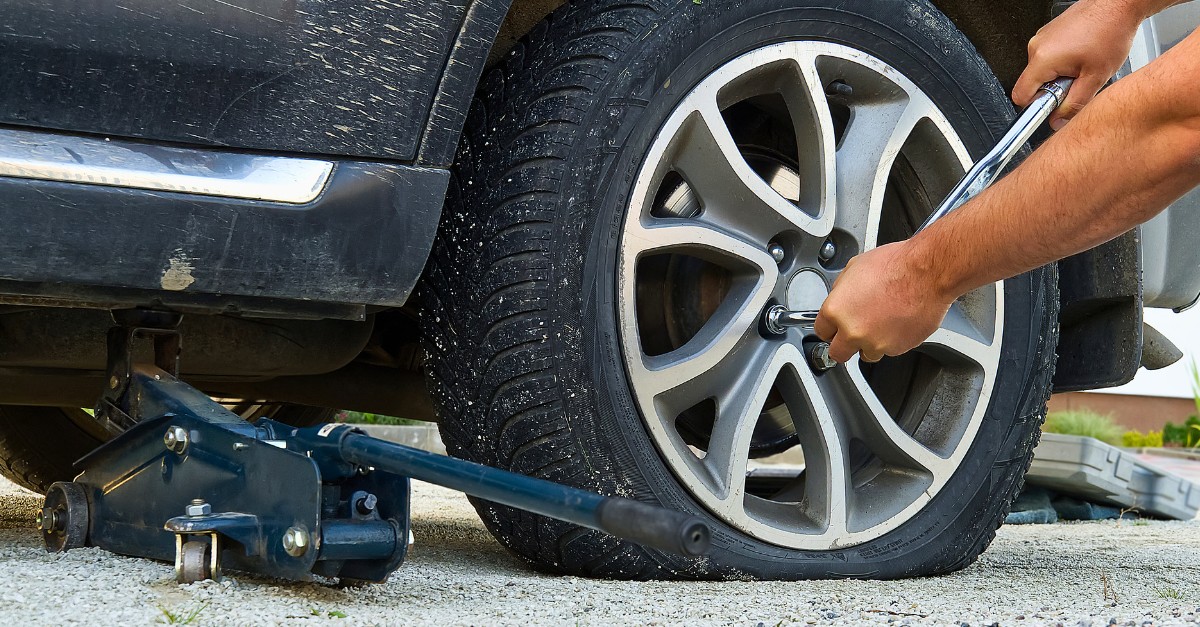
Place the lug wrench firmly on one of the lug nuts. Make sure it fits snugly over the nut to avoid slipping. Use the correct size wrench for your car’s lug nuts.
- Align the wrench straight with the lug nut
- Push the wrench onto the nut until it is fully seated
- Hold the wrench steady to prevent it from slipping
Apply Proper Force
Turn the lug wrench counterclockwise to loosen the nuts. Use steady and controlled force. Avoid sudden jerks to prevent injury or damage.
| Tip | Reason |
| Use your body weight | Makes loosening easier |
| Loosen nuts slightly, do not remove yet | Keeps wheel stable during lifting |
| Ask for help if nuts are too tight | Prevents strain and accidents |
Credit: www.morisoninsurance.ca
Lifting The Vehicle
Lifting the car is a key step to change a flat tire. You must do it safely to avoid accidents.
Using the jack correctly makes the job easier and protects you and the vehicle.
Locate The Jack Point
Find the jack point near the flat tire. It is a strong spot made to hold the jack.
Check your car manual if you are unsure where the jack points are located.
- Look for a small notch or reinforced metal area near the tire
- Avoid placing the jack under plastic or weak parts
- Use the jack point closest to the flat tire for stability
Raise The Car Safely
Place the jack under the jack point and start lifting the car slowly. Keep the jack steady.
Lift the car until the flat tire is off the ground. Do not go too high to avoid tipping.
- Ensure the car is on a flat surface before lifting
- Engage the parking brake and put the car in gear or park
- Use wheel chocks on the opposite side for extra safety
- Raise the car just enough to remove the flat tire easily
Removing The Flat Tire
Removing a flat tire is an important skill for every driver. It helps you fix the problem and get back on the road quickly.
In this section, you will learn how to take off the flat tire safely. Follow the steps carefully to avoid damage or injury.
Unscrew Lug Nuts Completely
Start by loosening the lug nuts on the flat tire. Use a wrench to turn them counterclockwise. Do this before lifting the car.
Loosen each lug nut until you can turn it by hand. Do not remove them yet. This prevents the wheel from spinning when you lift the car.
- Place the wrench on each lug nut
- Turn the wrench left to loosen
- Loosen all lug nuts but keep them on the wheel
Take Off The Tire
After loosening the lug nuts, use a jack to lift the car. Raise it until the flat tire is off the ground. Make sure the car is stable.
Now, remove the lug nuts completely. Keep them in a safe place. Then, pull the flat tire straight off the wheel hub.
- Lift the car with a jack
- Remove all lug nuts
- Pull the tire off the wheel hub
Installing The Spare Tire
After removing the flat tire, you need to install the spare tire safely. This step helps you get back on the road quickly.
Follow these instructions to fit the spare tire correctly and prepare it for driving.
Align The Spare Tire
Hold the spare tire next to the wheel hub. Line up the holes on the tire with the wheel studs.
Make sure the tire sits flat against the hub. Proper alignment helps the tire fit securely.
Hand-tighten Lug Nuts
Place the lug nuts onto the wheel studs. Turn them clockwise with your hand to start tightening.
Do not use tools yet. Hand-tightening keeps the tire in place and prevents cross-threading.
- Start by tightening one lug nut
- Move to the lug nut opposite it
- Tighten all lug nuts evenly
Lowering The Car
Lowering the car safely after changing a flat tire is important. It helps avoid damage and keeps you safe.
Follow the steps carefully to bring the vehicle back to the ground and finish the tire change process.
Slowly Lower The Vehicle
Turn the jack handle slowly to lower the car. Do this step-by-step to avoid sudden drops. Keep your hands clear of the wheel and jack.
- Turn the jack handle in the opposite direction used to lift the car.
- Lower the car until the flat tire lightly touches the ground.
- Stop lowering if you feel resistance or hear unusual sounds.
- Make sure the vehicle is stable and resting on all four tires before removing the jack.
Remove The Jack
Once the car is on the ground, remove the jack carefully. Make sure the car is stable before fully taking the jack away.
| Do | Don’t |
| Remove the jack slowly and steadily | Remove the jack while the car is still raised |
| Check that the car is stable on the ground | Rush the removal to finish quickly |
| Store the jack in a safe place after use | Leave the jack under the vehicle |

Credit: www.amazon.ca
Tightening The Lug Nuts
After placing the spare tire on the hub, you need to tighten the lug nuts. Proper tightening keeps the wheel secure while driving.
Use the wrench carefully to avoid loosening the nuts or damaging the wheel. Follow the right pattern to tighten evenly.
Use The Wrench In A Star Pattern
Loosened lug nuts can cause wobbling or accidents. Tighten them in a star or crisscross pattern to keep the wheel balanced.
- Start with one lug nut and tighten it slightly.
- Move to the lug nut directly across from the first one.
- Continue to the next opposite lug nut in the pattern.
- Repeat until all nuts are snug but not fully tight.
- Finally, go around in the same star pattern to fully tighten each nut.
Ensure Secure Fit
After using the star pattern, check each lug nut to confirm it is firmly tightened. This step helps prevent loose wheels.
| Tool | Action | Tip |
| Wrench | Tighten lug nuts in star pattern | Apply steady pressure without forcing |
| Hands | Check each nut’s tightness | Confirm no nuts spin freely |
| Car manual | Verify recommended torque | Use torque wrench if available |
Final Safety Checks
After changing a flat tire, it is important to check everything one last time. These final safety steps help ensure your car is safe to drive.
Take a moment to inspect the tire and tools. This prevents problems on the road ahead.
Check Tire Pressure
Use a tire pressure gauge to check the new tire’s pressure. Make sure it matches the car’s recommended level.
Proper tire pressure helps the car drive smoothly and safely. Low or high pressure can cause accidents.
- Remove the valve cap
- Press the gauge on the valve
- Read the pressure on the gauge
- Add or release air if needed
- Replace the valve cap
Stow Tools And Flat Tire
Put the flat tire and tools back in your car. Store them securely to avoid noise or damage while driving.
Check that the jack, lug wrench, and other tools are in their proper places. This keeps the car organized and ready for emergencies.
- Place the flat tire in the trunk or tire well
- Secure the jack in its holder
- Put the lug wrench and other tools together
- Close all compartments tightly
Credit: www.autocareplus.com
Tips For Preventing Future Flats
Flat tires can happen to anyone. You can lower the chance of getting one by caring for your tires. Small actions help keep your tires safe and working well.
Follow simple steps to stop flats before they start. This saves time and keeps you safe on the road.
Regular Tire Maintenance
Check your tires often for signs of wear or damage. Keep the air pressure at the right level. This helps your tires last longer and avoid flats.
Look for nails, glass, or sharp objects stuck in the tire. Remove small stones or debris from the tire tread. Rotate your tires regularly to spread out wear evenly.
- Check tire pressure monthly using a gauge
- Inspect tires for cuts, cracks, or bulges
- Rotate tires every 5,000 to 7,000 miles
- Replace tires when the tread is low
Avoid Hazardous Road Conditions
Watch the road ahead to avoid sharp objects and potholes. Driving carefully helps protect your tires from damage. Slow down on rough roads or gravel.
Try to stay away from construction zones and debris on the road. Avoid curbs and sharp turns that can scrape or hit your tires.
- Drive slowly on uneven or rough roads
- Steer clear of glass, nails, or metal pieces
- Keep distance from potholes and deep cracks
- Avoid hitting curbs or road edges
Frequently Asked Questions
What Tools Are Needed To Change A Flat Tire?
To change a flat tire, you’ll need a lug wrench, a jack, and a spare tire. Ensure your car’s manual is handy for specific instructions. A flashlight and gloves can also be helpful, especially in low-light conditions.
How Do I Safely Lift My Car?
First, park on a flat surface and engage the parking brake. Place the jack under the car’s jacking point. Slowly lift the car until the flat tire is off the ground. Never position yourself under the car while it’s jacked up.
How Do I Remove The Flat Tire?
Loosen the lug nuts with a lug wrench before jacking up the car. Once lifted, fully remove the nuts and the tire. Keep the nuts in a safe place to avoid losing them.
How Do I Install The Spare Tire?
Align the spare tire with the wheel bolts. Push it onto the hub, and hand-tighten the lug nuts. Once secure, lower the car and tighten the nuts fully with a lug wrench in a crisscross pattern.
Conclusion
Changing a flat tire is easier than many think. Keep your tools ready and follow the steps carefully. Practice makes the process faster and safer. Knowing what to do can save time and stress. Stay calm and work step by step.
Drive safely after fixing the tire. Regularly check your tires to avoid surprises. Being prepared helps you handle flats confidently. You can manage a flat tire with simple skills. Stay safe on the road by staying prepared.