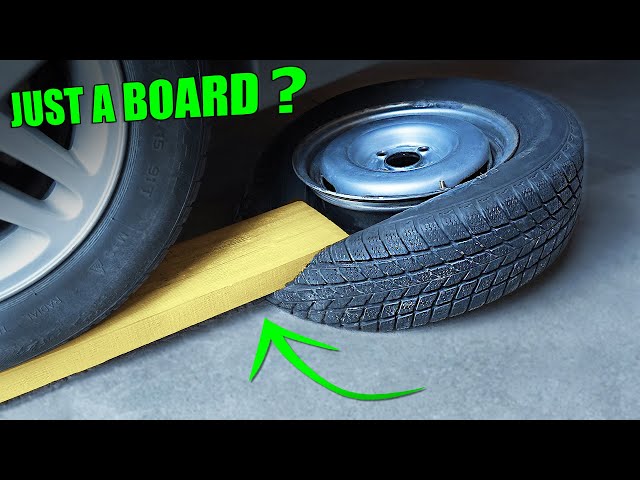
If you own a motorcycle, you know how important it is to keep your tires in top shape. Sometimes, you need to break the bead on your motorcycle tire to replace or repair it.
But how exactly do you do that without causing damage or frustration? You’ll discover simple, effective steps to break a bead safely and easily. Whether you’re a beginner or have some experience, this guide will give you the confidence to handle your tire like a pro.
Keep reading, and you’ll save time, money, and avoid common mistakes every rider should know.
Preparing The Motorcycle
Breaking the bead on a motorcycle tire needs careful preparation. Getting the motorcycle ready helps make the process safe and smooth.
This section covers tools, safety steps, and how to place the motorcycle before starting.
Gathering Necessary Tools
You need specific tools to break a tire bead safely. Having everything ready saves time and effort.
- Tire irons or bead breaker tool
- Air compressor or tire inflator
- Valve core remover
- Lubricant like soapy water
- Protective gloves and eye protection
- Rag or cloth for cleaning
Ensuring Safety Measures
Safety is very important when working with motorcycle tires. Take steps to avoid injuries or damage.
- Wear gloves to protect your hands
- Use eye protection to guard against debris
- Work in a clean, flat area
- Keep tools organized to avoid tripping
- Do not rush the process
Positioning The Motorcycle
Place the motorcycle securely before breaking the bead. Proper positioning prevents accidents and makes the job easier.
- Use a sturdy stand or lift to hold the bike upright
- Ensure the bike will not move or tip over
- Remove any loose items near the work area
- Keep the tire you work on accessible and stable
Removing The Wheel
Removing the wheel is the first step to break a bead on a motorcycle tire. You need to take off the wheel carefully to avoid damage.
This guide covers loosening axle nuts, detaching brake parts, and taking off the wheel safely.
Loosening Axle Nuts
Start by loosening the axle nuts before lifting the motorcycle. This makes wheel removal easier.
- Use the correct size wrench or socket for your axle nuts.
- Place the bike on a stand to keep it stable.
- Turn the wrench counterclockwise to loosen the nuts.
- Do not remove the nuts completely yet; just loosen them.
Detaching Brake Components
Brake parts can block the wheel removal. Detach them carefully to avoid damage.
- Remove the brake caliper bolts using the right tools.
- Gently pull the caliper away from the disc or drum.
- Secure the caliper with a zip tie or strap to avoid strain on the brake hose.
- If your bike has a drum brake, disconnect the brake arm from the wheel.
Taking Off The Wheel
After loosening nuts and detaching brakes, you can remove the wheel from the forks or swingarm.
| Action | Tip |
| Slide out the axle carefully | Support the wheel to prevent it from dropping |
| Remove the wheel from forks or swingarm | Wiggle gently if it feels stuck |
| Check for spacers or washers | Keep them safe for reassembly |
Breaking The Bead
Breaking the bead on a motorcycle tire is a key step in tire removal. The bead is the tight seal between the tire and the rim.
Loosening this seal allows you to remove the tire safely and change or repair it.
Using A Bead Breaker Tool
A bead breaker tool makes the process easier and safer. It applies force evenly to separate the tire from the rim.
- Place the tire on a flat surface.
- Position the bead breaker tool against the tire sidewall near the rim.
- Apply pressure slowly to push the bead down and away from the rim.
- Work around the tire until the bead is fully separated.
Manual Techniques For Bead Breaking
If you do not have a bead breaker tool, manual methods can work with care and patience.
- Lay the tire flat on the ground.
- Use a strong lever, like a tire iron, to press the bead down.
- Apply steady pressure while moving around the tire.
- Be careful not to damage the rim or tire sidewall.
- Repeat until the bead loosens all around the rim.
Applying Lubricants For Easier Separation
Lubricants reduce friction and make bead breaking smoother. Use them before applying force.
| Type of Lubricant | Best Use | Notes |
|---|---|---|
| Soapy Water | General use | Easy to apply and safe for tires |
| Bead Sealer | Hard-to-break beads | Helps maintain seal after installation |
| Light Oil | Stubborn beads | Use sparingly to avoid tire damage |

Credit: www.youtube.com
Handling Stubborn Beads
Breaking a bead on a motorcycle tire can be tough. Some beads stick tightly to the rim. Using the right methods helps make the job easier and safer.
This guide covers ways to handle stubborn beads without harming the tire or rim.
Applying Heat For Flexibility
Heat softens the tire bead, making it easier to break. Use a heat gun or warm water to apply gentle warmth. Avoid direct flames to prevent damage.
- Warm the tire bead evenly around the rim
- Keep heat moderate to avoid melting rubber
- Allow heat to soak in for a few minutes
- Check if the bead moves more freely after heating
Using Leverage Safely
Leverage tools help break the bead without excessive force. Use tire irons or bead breakers carefully to avoid injury or damage.
| Tool | Purpose | Tip |
| Tire Iron | Lift bead over rim edge | Apply steady, even pressure |
| Bead Breaker | Push bead away from rim | Use correct size for tire |
| Lever Bar | Increase force safely | Protect rim with cloth or pad |
Avoiding Rim Damage
Protecting the rim prevents costly repairs. Use simple steps to keep the rim safe while breaking the bead.
- Cover the rim edge with tape or cloth
- Use plastic or nylon tools instead of metal
- Work slowly and avoid sudden force
- Inspect rim for dents or scratches after work
Removing The Tire
Removing a motorcycle tire requires care and the right steps. This guide focuses on the process after breaking the bead.
Proper removal helps avoid damage to the tire and rim. Follow each step carefully to ensure safety.
Prying Off The Tire
Start by placing tire irons between the tire and rim. Work slowly around the edge to lift the tire bead over the rim flange.
Use two or more tire irons to carefully pry off the tire. Avoid sharp tools that can scratch the rim.
- Insert a tire iron under the tire bead
- Push the bead over the rim edge
- Hold the bead in place with one iron
- Use a second iron to pry the next section
- Work around the rim until the tire is loose
Inspecting The Rim And Tire
After removing the tire, check the rim for damage. Look for dents, cracks, or corrosion that can affect performance.
Also inspect the tire bead and sidewalls. Look for signs of wear or damage that may require replacement.
| Item | What to Check |
| Rim | Dents, cracks, corrosion, bends |
| Tire Bead | Cracks, tears, dry rot |
| Tire Sidewall | Bulges, cuts, punctures |
Cleaning Bead Seating Area
Clean the rim’s bead seating area before installing a new tire. Remove dirt, old rubber, and debris for a proper seal.
Use a soft brush or cloth with mild soap and water. Avoid harsh chemicals that may damage the rim’s finish.
Dry the area completely to prevent rust or corrosion.
Reinstalling Or Replacing The Tire
After breaking the bead on a motorcycle tire, you may need to reinstall the same tire or replace it with a new one. This process requires care to ensure safety and proper tire performance.
Follow the steps carefully to prepare, seat, and inflate the tire correctly. This helps avoid leaks and ensures the tire fits snugly on the rim.
Preparing The New Tire
Before mounting a new tire, check it thoroughly. Look for any visible damage or defects. Also, clean the rim surface where the tire will sit.
- Inspect the tire for cuts or deformities.
- Remove dirt and rust from the rim.
- Apply a thin layer of tire lubricant to the bead area.
- Make sure the tire size matches the rim size.
Seating The Bead Correctly
The bead must fit tightly against the rim to hold air. Place the tire on the rim carefully, starting with one side. Then push the other side over the rim edge.
| Common Issues | How to Fix |
|---|---|
| Bead not centered | Adjust tire position and press evenly |
| Bead folded inside | Remove tire and reseat carefully |
| Rim edge damage | Inspect and repair before mounting |
Inflating And Checking For Leaks
Once the bead is seated, inflate the tire slowly. Watch the bead area for even seating. After inflation, check for leaks using soapy water or a leak detector.
- Attach an air hose with a pressure gauge.
- Inflate the tire to the recommended pressure.
- Listen for hissing sounds of escaping air.
- Apply soapy water around the bead and valve stem.
- Look for bubbles indicating leaks.
- Fix any leaks before full use.
Maintenance Tips
Knowing how to break a bead on a motorcycle tire is key for tire changes and repairs. Proper maintenance helps keep your tires safe and lasting longer.
Regular checks and care prevent damage and improve your riding experience. Follow these tips to maintain your motorcycle tires well.
Regular Tire Inspection
Look at your tires often to find any damage or problems early. Check both the tread and sidewalls for cuts or cracks.
- Check for nails, glass, or sharp objects
- Look for uneven wear patterns
- Inspect for cracks or dry rot on sidewalls
- Feel for soft spots or bulges
Proper Tire Inflation
Keep your tires inflated to the correct pressure. Too much or too little air can cause poor handling and faster tire wear.
- Use a reliable tire pressure gauge
- Check pressure before every ride
- Inflate tires to the pressure recommended by the manufacturer
- Adjust pressure for different loads or road conditions
Signs Of Tire Wear
Watch for signs that your tires need replacing. Worn tires reduce grip and increase the risk of accidents.
- Tread depth below 1/16 inch (1.6 mm)
- Visible wear bars across the tread
- Cracks or cuts on tread or sidewalls
- Uneven tire wear or bald spots
- Vibration or wobbling while riding

Credit: www.youtube.com

Credit: www.youtube.com
Frequently Asked Questions
What Does “breaking A Bead” Mean On Motorcycle Tires?
Breaking a bead means separating the tire’s edge from the rim. It’s crucial for replacing or repairing tires. This process ensures a proper seal and safe tire installation on the motorcycle wheel.
How Do I Safely Break A Bead On A Motorcycle Tire?
Use a bead breaker tool or a tire machine designed for motorcycles. Ensure the wheel is secured and avoid damaging the rim or tire during the process.
Can I Break A Bead Without Professional Tools?
Yes, but it requires caution. Use a sturdy tire iron and a lubricant. Improper technique can damage the tire or rim, so professional tools are recommended for safety.
How Long Does It Take To Break A Bead Properly?
Typically, it takes 5 to 15 minutes depending on experience and tools. Rushing can cause damage, so take your time for a safe and effective bead break.
Conclusion
Breaking a bead on a motorcycle tire takes patience and care. Use the right tools and follow safety steps. Avoid rushing to prevent damage or injury. Practice helps you get better with each try. Remember, proper technique makes the job easier.
Now, you can handle this task confidently. Keep your bike ready for the road. Stay safe and enjoy your ride.