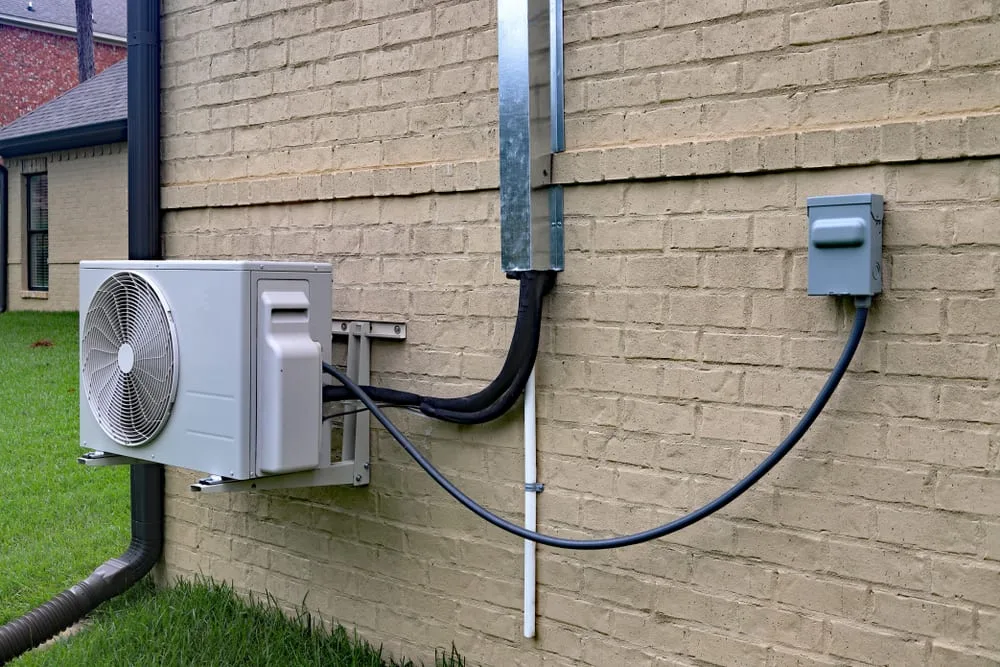
Are you tired of dealing with bulky air conditioners that take up space and leave your rooms unevenly cooled? A ductless air conditioner might be the perfect solution for your home.
Installing one yourself can save you money and give you control over your comfort. In this guide, you’ll learn step-by-step how to install a ductless air conditioner quickly and safely. By the end, you’ll have the confidence to enjoy cool, fresh air without the hassle of complicated setups or costly professionals.
Let’s get started and make your space more comfortable today!
Choosing The Right Ductless Ac
Choosing the right ductless air conditioner is key to keeping your room cool and comfortable. Many factors affect the choice, such as room size, cooling needs, and energy use.
Understanding these factors helps you pick a unit that works well and saves energy.
Assessing Room Size And Cooling Needs
Measure the room to find its square footage. This helps determine the cooling power you need. Consider how much sunlight the room gets and if many people use it.
- Measure room length and width in feet
- Multiply length by width for square footage
- Note if the room faces the sun most of the day
- Count the average number of people using the room
Selecting The Appropriate Btu Capacity
BTU stands for British Thermal Unit. It shows how much heat the AC can remove per hour. Choose a BTU size that matches your room size for best cooling.
| Room Size (sq ft) | Recommended BTU |
| Up to 150 | 6,000 |
| 150 – 250 | 8,000 |
| 250 – 350 | 10,000 |
| 350 – 450 | 12,000 |
| 450 – 550 | 14,000 |
Considering Energy Efficiency Ratings
Look at the energy efficiency rating before buying. Higher ratings mean the AC uses less power to cool the room. This saves money and helps the environment.
- Check the SEER rating on the unit
- Look for Energy Star certified models
- Higher SEER means better energy savings
- Energy-efficient units may cost less to run
Gathering Required Tools And Materials
Installing a ductless air conditioner needs the right tools and parts. Gathering these before you start saves time.
Check this list carefully so you have everything for a smooth installation.
List Of Essential Tools
You need some basic tools to install your ductless air conditioner properly. These tools help with cutting, drilling, and connecting parts.
- Drill with various drill bits
- Screwdrivers (Phillips and flathead)
- Hole saw for wall opening
- Measuring tape
- Level tool
- Wrench set
- Pipe cutter
- Vacuum pump
- Refrigeration gauges
- Electrical tester
Necessary Installation Components
Your air conditioner kit includes many parts, but some extra materials are needed for a safe and secure setup. These parts connect the indoor and outdoor units.
- Indoor air handler unit
- Outdoor compressor unit
- Refrigerant tubing set
- Drain hose
- Insulation for pipes
- Electrical wiring and connectors
- Wall mounting bracket
- Sealant or caulk for wall holes
- Remote control (usually included)
Preparing The Installation Site
Installing a ductless air conditioner starts with preparing the right site. Proper preparation helps the unit work well and last longer.
This guide covers key points for choosing the indoor and outdoor unit locations. It also explains how to ensure good clearance and ventilation.
Selecting Indoor Unit Location
Pick a spot inside that cools the room evenly. The unit should be high on the wall, away from direct sunlight or heat sources.
Choose a place where the unit can easily connect to the outdoor part. Avoid areas with too much dust or moisture.
- Mount the unit 7-8 feet above the floor
- Avoid placing near windows or doors
- Keep away from kitchens or heat sources
- Ensure easy access for cleaning and maintenance
Choosing Outdoor Unit Placement
Place the outdoor unit where air flows freely. It should be on a stable, level surface like a concrete pad or wall bracket.
Keep the outdoor unit away from direct sunlight and heavy rain if possible. Avoid dusty or sandy areas for better performance.
- Place unit near the indoor unit to reduce pipe length
- Use a firm, flat base to reduce vibrations
- Keep away from areas with heavy foot traffic
- Make sure it is easy to reach for service
Ensuring Proper Clearance And Ventilation
Clearance around both units helps air move freely. It prevents the system from overheating and keeps it efficient.
Check the manufacturer’s recommended space around each unit. Do not block airflow with furniture, plants, or walls.
- Leave at least 12 inches of clearance on all sides of the indoor unit
- Keep 24 inches of space around the outdoor unit
- Ensure no objects block air intake or exhaust vents
- Maintain good ventilation to avoid moisture build-up
Mounting The Indoor Unit
Mounting the indoor unit is a key part of installing a ductless air conditioner. It needs a strong wall and careful setup to work well.
This guide covers installing the mounting plate, drilling the hole for refrigerant lines, and securing the indoor unit.
Installing The Mounting Plate
First, choose a flat wall that can hold the unit’s weight. Use a level tool to make sure the mounting plate is straight.
- Mark the spots for screws using the mounting plate as a template.
- Drill holes at the marked points.
- Insert wall anchors if needed for extra support.
- Attach the mounting plate with screws tightly.
Drilling The Hole For Refrigerant Lines
Drill a hole in the wall for the refrigerant lines, drain hose, and power cable. The hole should angle slightly downward outside to prevent water buildup.
| Hole Diameter | 3 inches (7.5 cm) |
| Hole Angle | 5 degrees downward |
| Location | Near the mounting plate’s center |
Securing The Indoor Unit
After mounting the plate and drilling the hole, hang the indoor unit on the plate. Make sure it fits snugly and locks in place.
- Align the indoor unit hooks with the mounting plate slots.
- Lift the unit carefully and hang it on the plate.
- Check if the unit is level and stable.
- Connect refrigerant lines and cables through the hole.
Setting Up The Outdoor Unit
Installing the outdoor unit of a ductless air conditioner is a key step. Proper setup ensures the system works well and lasts long.
This guide covers how to position the unit, connect lines and wiring, and seal the hole for the refrigerant lines.
Positioning The Unit On A Stable Surface
Place the outdoor unit on a flat and solid surface like concrete or a sturdy metal bracket. The surface must support the unit’s weight.
Keep the unit level to avoid damage and allow proper drainage. Leave space around it for airflow and easy maintenance.
- Choose a location away from heavy foot traffic
- Keep at least 12 inches clearance on all sides
- Ensure the spot is not shaded by trees or buildings
- Mount the unit 4 to 6 inches above the ground
Connecting Refrigerant Lines And Wiring
Connect the refrigerant lines carefully between the indoor and outdoor units. Use proper tools to avoid leaks and damage.
Attach the electrical wiring according to the manufacturer’s instructions. Turn off power before working on wiring to ensure safety.
- Use a vacuum pump to remove air from refrigerant lines
- Tighten flare nuts securely but do not over-tighten
- Match wire colors and connect to correct terminals
- Check for leaks with soapy water or a leak detector
Sealing The Line Hole
Seal the hole in the wall where refrigerant lines pass through. This prevents air, water, and pests from entering your home.
Use weatherproof caulk or foam to fill the gap tightly. Make sure the seal is neat and complete for best protection.
- Clean the hole edges before sealing
- Apply caulk evenly around the lines
- Allow the sealant to dry as recommended
- Inspect the seal regularly for cracks or gaps

Credit: www.thisoldhouse.com
Connecting Electrical Components
Installing a ductless air conditioner needs careful electrical work. Proper connections keep the system safe and working well.
This guide explains how to connect electrical parts for your indoor and outdoor units.
Wiring The Indoor And Outdoor Units
Start by matching the wires from the indoor unit to the outdoor unit. Follow the color codes in the manual to avoid mistakes.
Use wire nuts or connectors to join wires tightly. Loose wires cause problems and can be dangerous.
- Turn off power before starting wiring
- Connect wires by color and label
- Secure connections with wire nuts
- Check that wires do not touch metal parts
Ensuring Proper Grounding
Grounding protects you and the system from electrical shocks. Connect the ground wire to the metal frame of the unit.
Use a grounding screw or clamp to attach the ground wire firmly. This prevents electrical faults.
- Locate the grounding point on each unit
- Use a green or bare copper wire for grounding
- Secure the wire tightly to the grounding point
- Check that grounding wires are not damaged
Testing Electrical Connections
After wiring, test all electrical connections to ensure they work correctly. Use a multimeter to check voltage and continuity.
Turn on the power and observe if the units start without issues. If you see sparks or smell burning, turn off power and recheck wiring.
- Test voltage on power wires
- Check continuity on control wires
- Inspect for loose or exposed wires
- Confirm units run smoothly without error
Vacuuming And Charging The System
Installing a ductless air conditioner requires careful vacuuming and charging. These steps ensure the system runs efficiently and lasts longer.
Removing air and moisture from the lines is important before charging. Checking for leaks keeps the system sealed. Releasing refrigerant must be done carefully for safety.
Removing Air And Moisture From Lines
Use a vacuum pump to remove air and moisture inside the refrigerant lines. Moisture can cause damage and reduce cooling power.
- Connect the vacuum pump to the service port of the indoor unit.
- Turn on the pump and run it for at least 30 minutes.
- Check the vacuum gauge to ensure it reaches 500 microns or lower.
- Close the valves and turn off the pump once the vacuum level is stable.
Checking For Leaks
Leaks can cause refrigerant loss and reduce system efficiency. Test the system carefully for leaks before charging.
| Leak Detection Method | Description |
|---|---|
| Soap Bubble Test | Apply soap solution to joints; bubbles indicate leaks. |
| Electronic Leak Detector | Use a device to sense refrigerant escaping from lines. |
| Pressure Test | Pressurize lines with nitrogen and watch for pressure drops. |
Releasing Refrigerant
Releasing refrigerant into the system must follow safety rules and manufacturer guidelines. Charge only the required amount for best performance.
- Connect the refrigerant cylinder to the service port.
- Open the valve slowly to allow refrigerant to flow into the system.
- Use a scale to measure the exact refrigerant amount added.
- Close the valve and check system pressure with gauges.
- Ensure no refrigerant leaks during and after charging.
Testing The Air Conditioner
After installing a ductless air conditioner, testing it ensures proper operation. This process helps catch any issues early.
Testing includes powering on the system, adjusting controls, and checking cooling performance. Each step confirms the unit works correctly.
Powering On The System
Start by turning on the main power supply to the air conditioner. Then, use the remote or control panel to switch the unit on.
Listen for any unusual noises and check that the indoor and outdoor units start running smoothly.
Adjusting Settings And Controls
Set the air conditioner to cooling mode and adjust the temperature. Use the fan speed and timer settings to test all functions.
- Set temperature 5 degrees lower than room temperature
- Change fan speed from low to high
- Activate timer to turn off after 30 minutes
- Switch between cooling and fan-only modes
Verifying Cooling Performance
Check if the air coming from the indoor unit is cold. Measure the temperature difference between the room air and the cooled air.
| Measurement | Expected Range |
| Room Air Temperature | 75°F to 85°F |
| Cooled Air Temperature | 55°F to 65°F |
| Temperature Difference | 10°F to 20°F |
If the temperature difference is less than 10 degrees, check for installation errors or refrigerant leaks.
Maintaining Your Ductless Ac
Keeping your ductless air conditioner in good shape helps it run longer. Regular care saves money and keeps your home comfortable.
Simple tasks like cleaning and checks prevent problems. Learn how to maintain your ductless AC easily.
Cleaning Filters Regularly
Dirty filters reduce air flow and cooling power. Clean filters every month or more if needed. This helps your AC work well and keeps air fresh.
- Turn off the power before cleaning
- Remove the filters gently
- Wash filters with warm water and mild soap
- Let filters dry completely before reinstalling
- Check for damage and replace if torn
Scheduling Professional Inspections
Experts can find issues early and fix them. Schedule an inspection once a year to keep your AC safe and efficient. They check refrigerant levels, electrical parts, and clean inside parts.
| Inspection Task | Why It Matters |
| Check refrigerant levels | Ensures proper cooling |
| Inspect electrical connections | Prevents breakdowns |
| Clean coils and fans | Improves airflow |
| Test thermostat | Keeps temperature accurate |
Troubleshooting Common Issues
Some problems you can fix yourself. Try these tips before calling a technician.
- AC won’t start: check power and reset breaker
- Weak cooling: clean filters and check vents
- Strange noises: tighten loose parts and clear debris
- Water leaks: clear drain line and check tilt of indoor unit

Credit: www.youtube.com

Credit: www.youtube.com
Frequently Asked Questions
What Tools Are Needed For Installation?
To install a ductless air conditioner, you’ll need basic tools like a drill, screwdriver, level, and measuring tape. Additionally, you’ll require a hole saw for creating the necessary wall opening. It’s also essential to have safety gear such as gloves and goggles to protect yourself during the installation process.
How Long Does Installation Take?
Installing a ductless air conditioner typically takes about 4 to 8 hours. This time can vary based on the complexity of your setup and the installer’s experience. For a smoother process, ensure all necessary tools and components are on hand before starting the installation.
Can I Install A Ductless Ac Myself?
Yes, you can install a ductless AC yourself if you have basic DIY skills. However, professional installation is recommended for optimal performance and warranty protection. Incorrect installation can lead to inefficiencies or damage, so consider consulting an expert if unsure.
Where Should I Place The Indoor Unit?
Place the indoor unit high on a wall, away from direct sunlight and heat sources. Ensure unobstructed airflow by avoiding placement near furniture or curtains. Proper positioning enhances efficiency and comfort. Consult the manufacturer’s guidelines for specific placement recommendations to optimize performance.
Conclusion
Installing a ductless air conditioner can save space and energy. Follow the steps carefully for a smooth setup. Check all parts before starting to avoid problems. Use the right tools to make the job easier. Take your time and work safely throughout the process.
Once installed, enjoy cool air without the hassle of ducts. Regular maintenance will keep your unit running well. You can do this with patience and simple instructions. Stay comfortable all year with your new air conditioner.