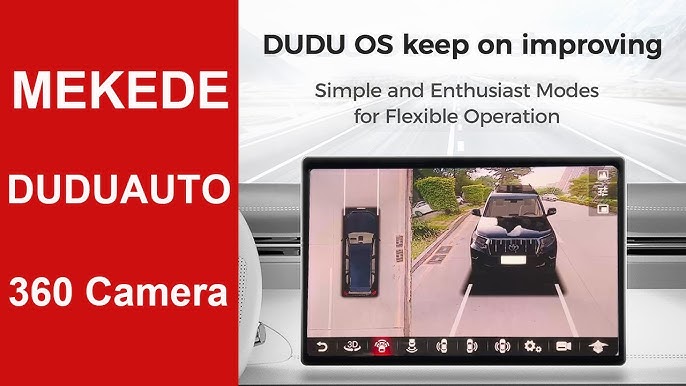
Want to see every angle around your car and park with confidence? Installing a 360 camera in your car can make driving safer and easier.
You might think it’s complicated or expensive, but it doesn’t have to be. In this guide, you’ll learn simple, step-by-step instructions to install a 360 camera yourself. By the end, you’ll enjoy a clear view of your surroundings and feel more in control on the road.
Ready to upgrade your driving experience? Let’s get started!
Choosing The Right 360 Camera
Installing a 360 camera in your car improves safety and parking ease. Picking the right camera means understanding your needs and options.
This guide covers camera types, key features, and budget choices to help you decide.
Types Of 360 Cameras
There are several types of 360 cameras for cars. Each type offers different views and installation needs.
- Single-Lens Cameras:Capture a full 360-degree view with one lens. Simple to install and use.
- Multi-Lens Systems:Use several cameras around the car. Provide detailed views from all sides.
- Integrated Cameras:Built into the car’s system. Usually found in newer models and work seamlessly.
Key Features To Consider
Choose a camera with features that fit your driving style and car model. Here are important features to check.
| Feature | Why It Matters |
| Resolution | Higher resolution gives clearer images for safer driving. |
| Night Vision | Helps see clearly in the dark or low light conditions. |
| Waterproof Rating | Protects the camera from rain and car wash damage. |
| Field of View | Wide view covers all angles around your car. |
| Compatibility | Works smoothly with your car’s display and system. |
Budget And Brand Options
Prices for 360 cameras vary by brand and features. Choose one that fits your budget but does not skip quality.
- Set a budget range before shopping to avoid overspending.
- Look for brands with good customer reviews and support.
- Check warranty and return policy for peace of mind.
- Consider local sellers for easier installation help.
Tools And Materials Needed
Installing a 360 camera in your car can improve safety and visibility. To start the installation, you need specific tools and materials.
Make sure you have everything ready before you begin. This guide will help you gather the essential items.
Essential Installation Tools
Using the right tools is crucial for a smooth installation. These tools will help you fit and secure the 360 camera in your car.
- Screwdrivers
- Wire Strippers
- Electric Drill
- Multimeter
- Socket Wrench
Additional Accessories
Some accessories enhance the camera’s performance and installation process. Consider these additional items for a better setup.
| Accessory | Description |
| Extension Cables | To reach power sources |
| Mounting Brackets | For secure attachment |
| Adhesive Pads | To fix cables neatly |
Preparing Your Car
Installing a 360 camera in your car needs some preparation. Getting your car ready helps the installation go smoothly.
This guide focuses on cleaning and accessing areas and disconnecting the battery before you start.
Cleaning And Accessing Installation Areas
Clean the spots where you will place the camera and wires. Dirt or grease can stop the camera from sticking well.
Check the areas where you will run the wires. Make sure you have clear access to these parts of your car.
- Use a soft cloth and mild cleaner to wipe surfaces.
- Remove any dust or debris from mounting spots.
- Open panels or covers to check wiring paths.
- Clear obstacles that block access to these areas.
Disconnecting The Battery
Disconnect the car battery to avoid electrical shock or damage. This step keeps you safe while working on the car.
Find the negative terminal of the battery first. Use a wrench to loosen the bolt and remove the cable.
- Turn off the car and remove the keys.
- Locate the battery under the hood.
- Use a wrench to loosen the negative terminal.
- Remove the negative cable and place it away from the battery.
- Do not touch any metal parts with the cable.
Mounting The Cameras
Installing a 360 camera system in your car needs careful camera mounting. Proper placement ensures clear views all around the vehicle. This guide covers where to mount front, rear, and side cameras.
Each camera has a best position to capture the right angles. Follow the tips below for a secure and effective setup.
Front Camera Placement
Mount the front camera near the car’s grille or just above the license plate. It should face straight ahead without obstruction. Avoid placing it too low to prevent dirt buildup or damage from road debris.
- Clean the mounting surface well before installation.
- Use the included bracket or adhesive for a firm hold.
- Check the camera angle to cover the full front view.
- Hide wires safely under the hood or trim panels.
Rear Camera Placement
The rear camera usually fits above the rear license plate or inside the rear window. It must capture a wide area behind the car. Keep it at a height that avoids water spray and dirt.
| Mount Location | Advantages |
| Above License Plate | Clear view, easy wiring |
| Rear Window Inside | Protected from weather |
| Rear Bumper Edge | Close to ground, shows curb |
Side Camera Installation
Side cameras mount near the side mirrors or lower on the car doors. They help cover blind spots and improve side visibility. Make sure the cameras are secure and waterproof.
Checklist for side camera mounting:
- Place cameras where they see the side lanes clearly.
- Use weatherproof covers to protect from rain.
- Route cables inside the door panels to avoid damage.
- Test camera views before finalizing the mount.
Running The Wiring
Running the wiring for a 360 camera in your car needs care and planning. Proper wiring keeps the system safe and working well.
Below are key steps to hide, secure, and connect the wires to power. Follow these to get a clean and reliable setup.
Hiding And Securing Wires
Hide the wires so they do not interfere with driving or the car’s look. Secure wires tightly to avoid damage or noise.
- Remove car panels carefully to access wiring paths
- Use zip ties to bundle wires together neatly
- Route wires along existing wire channels or under carpets
- Avoid sharp edges or moving parts that can cut wires
- Use electrical tape or wire loom to protect exposed sections
Connecting To Power Source
Connect the camera wiring to a stable power source. This is usually the car’s fuse box or an accessory power line.
| Power Source | Connection Tip | Notes |
| Fuse Box | Use an add-a-circuit fuse tap | Provides safe, fuse-protected power |
| Accessory Power | Tap into ignition-switched line | Camera powers only when car is on |
| Battery | Connect with inline fuse | Use only if other sources unavailable |
Connecting To The Display Unit
After installing the 360 camera in your car, you need to connect it to the display unit. This allows you to see the camera views on your car’s monitor.
You can connect the camera using wires or wirelessly. Each way has its own steps and tools.
Wiring To The Monitor
Wiring the 360 camera to the monitor uses cables to send video signals. This connection is stable and does not lose signal.
Follow these steps to wire the camera:
- Locate the video output cable from the 360 camera.
- Find the video input port on your car’s monitor.
- Connect the camera’s video cable to the monitor’s input port.
- Secure the cables to avoid loose connections.
- Use power cables to connect the camera to the car’s electrical system.
Make sure all connections are tight. Test the system by turning on the car and checking the display.
Wireless Connection Options
Some 360 cameras offer wireless connections. These connect to the display unit using Wi-Fi or Bluetooth.
Wireless setups reduce cable clutter but need stable signals.
- Turn on the camera’s wireless mode.
- Activate Wi-Fi or Bluetooth on the car’s display unit.
- Search for the camera’s signal on the monitor.
- Select the camera and pair the devices.
- Check the video feed on the display to confirm connection.
Keep the camera and display close during setup for better signal strength. Avoid metal objects that block wireless signals.
Testing The System
After installing the 360 camera in your car, testing is crucial. You need to ensure the system works well and shows clear images.
Testing involves powering on the system, calibrating it, and adjusting the camera angles. Each step helps improve the camera’s performance.
Powering On And Calibration
Start by turning on your car and the 360 camera system. Wait for the system to boot up fully before testing the views.
- Turn the ignition key to power the car’s electrical system.
- Switch on the 360 camera system using the designated button or touchscreen.
- Wait for the system to finish its self-check and calibration process.
- Watch the display for any error messages or warnings.
- Confirm the system shows a full 360-degree view around your car.
Calibration may require you to drive the car slowly in a circle. This helps the cameras align and stitch images correctly.
Adjusting Camera Angles
Proper camera angles are key for a clear and useful 360 view. You may need to fine-tune each camera to avoid blind spots.
| Camera Location | Adjustment Tip | Expected Result |
| Front Camera | Angle slightly downward | Clear view of road ahead |
| Rear Camera | Align with center of bumper | Full rear view for backing up |
| Side Cameras | Level with side mirrors | Wide side coverage without distortion |
After adjusting, test the system again. Drive slowly and check all camera views on the display. Make small changes as needed.

Credit: www.youtube.com
Troubleshooting Common Issues
Installing a 360 camera in your car can improve safety and parking. Sometimes, the camera may not work as expected. This guide helps fix common problems.
We will look at two common issues: image quality problems and connectivity errors. Simple checks can solve these problems quickly.
Image Quality Problems
Blurry or dark images reduce the camera’s usefulness. Dirt, poor settings, or damage can cause image issues. Check the lens and adjust settings to improve quality.
- Clean the camera lens with a soft cloth to remove dirt or water spots.
- Adjust the brightness and contrast in the camera settings menu.
- Check for scratches or cracks on the lens that might need repair.
- Ensure the camera is properly aligned and not blocked by objects.
- Update the camera’s firmware to fix software bugs affecting image quality.
Connectivity Errors
Connectivity errors stop the camera feed from showing on your screen. They happen due to wiring issues or signal problems. Use the table below to find common causes and fixes.
| Issue | Possible Cause | Fix |
| No video signal | Loose or disconnected cables | Check and reconnect all cables firmly |
| Intermittent video feed | Damaged wiring or poor connection | Inspect wires and replace if needed |
| Camera not powering on | Blown fuse or faulty power supply | Replace fuse and check power source |
| Screen shows error message | Software glitch or incompatible system | Restart system or update software |
Maintenance Tips
Keeping your 360 camera in good shape helps it work well for a long time. Regular care stops problems early.
Follow simple steps to clean and check your system often. This keeps your views clear and safe.
Cleaning The Cameras
Dirty lenses make images blurry. Clean each camera lens gently with a soft cloth.
Avoid strong chemicals. Use water or lens cleaner to remove dirt and smudges carefully.
- Turn off the car before cleaning
- Use a microfiber cloth to avoid scratches
- Clean regularly, especially after rain or dust
- Check for cracks or damage while cleaning
Regular System Checks
Check the camera system often to find any problems early. Look for screen issues or lag.
Test all cameras and sensors to make sure they work. Fix any errors quickly to stay safe.
- Turn on the system and check each camera view
- Listen for unusual sounds from the system
- Update the software when updates are available
- Inspect wiring for loose or damaged parts

Credit: www.youtube.com
Credit: www.fjcruiserforums.com
Frequently Asked Questions
What Tools Are Needed To Install A 360 Camera In A Car?
You need a screwdriver, wire strippers, electrical tape, and a drill. A multimeter helps check connections. A mounting kit is often included with the camera.
How Do I Connect A 360 Camera To My Car’s Power?
Tap into the reverse light power wire for automatic activation. Use a fuse tap or connect directly to the fuse box safely. Ensure all connections are secure and insulated.
Where Should I Mount The 360 Camera For Best Views?
Mount cameras at front, rear, and both side mirrors. Position them to cover blind spots and eliminate overlaps. Ensure lenses are clean and unobstructed for clear views.
Can I Install A 360 Camera System Without Professional Help?
Yes, with basic tools and patience, DIY installation is possible. Follow the user manual carefully for wiring and mounting instructions. If unsure, seek professional assistance to avoid damage.
Conclusion
Installing a 360 camera in your car is easier than it seems. Follow each step carefully for best results. Double-check connections to avoid mistakes. Test the camera to ensure clear views all around. This upgrade helps you park and drive safely every day.
Take your time and enjoy the improved visibility. A little effort brings big benefits on the road.