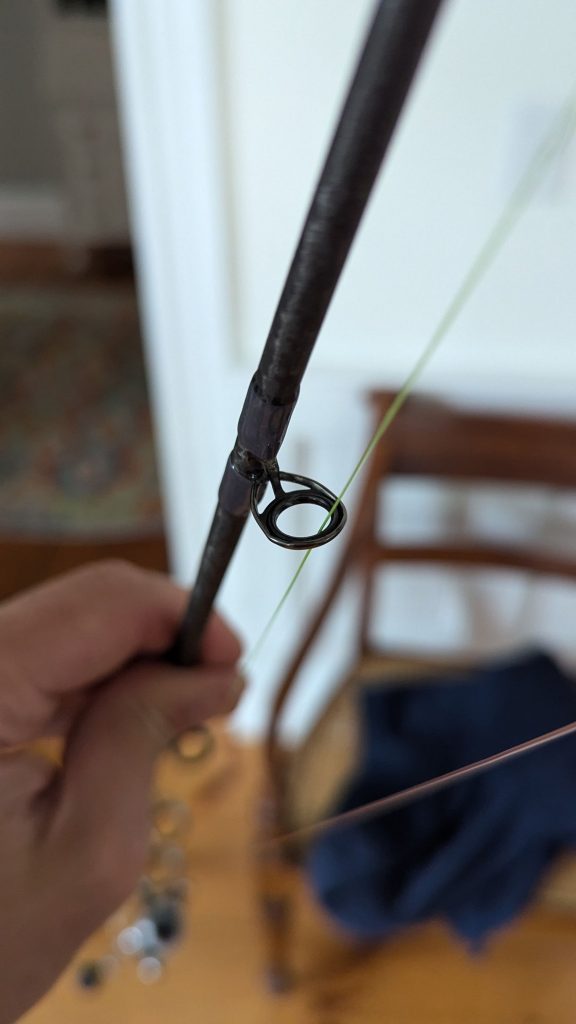
Are you frustrated with a damaged eyelet on your favorite fishing rod? Don’t worry; you’re not alone.
Whether you’re an avid angler or a weekend warrior, the wear and tear on your gear is inevitable. But here’s the good news: replacing an eyelet is easier than you might think, and you can do it yourself with just a few simple tools.
Imagine feeling the satisfaction of restoring your rod to its former glory, ready to tackle any adventure you throw its way. You’ll not only save money but also gain a handy new skill. Stick with us, and we’ll guide you through the step-by-step process to ensure your rod is back in action, enhancing your fishing experience. Let’s dive in!
Tools And Materials Needed
Replacing an eyelet on a fishing rod needs the right tools. Using proper materials makes the job easier and lasts longer.
Gather your tools before starting. This helps you work safely and efficiently.
Essential Tools
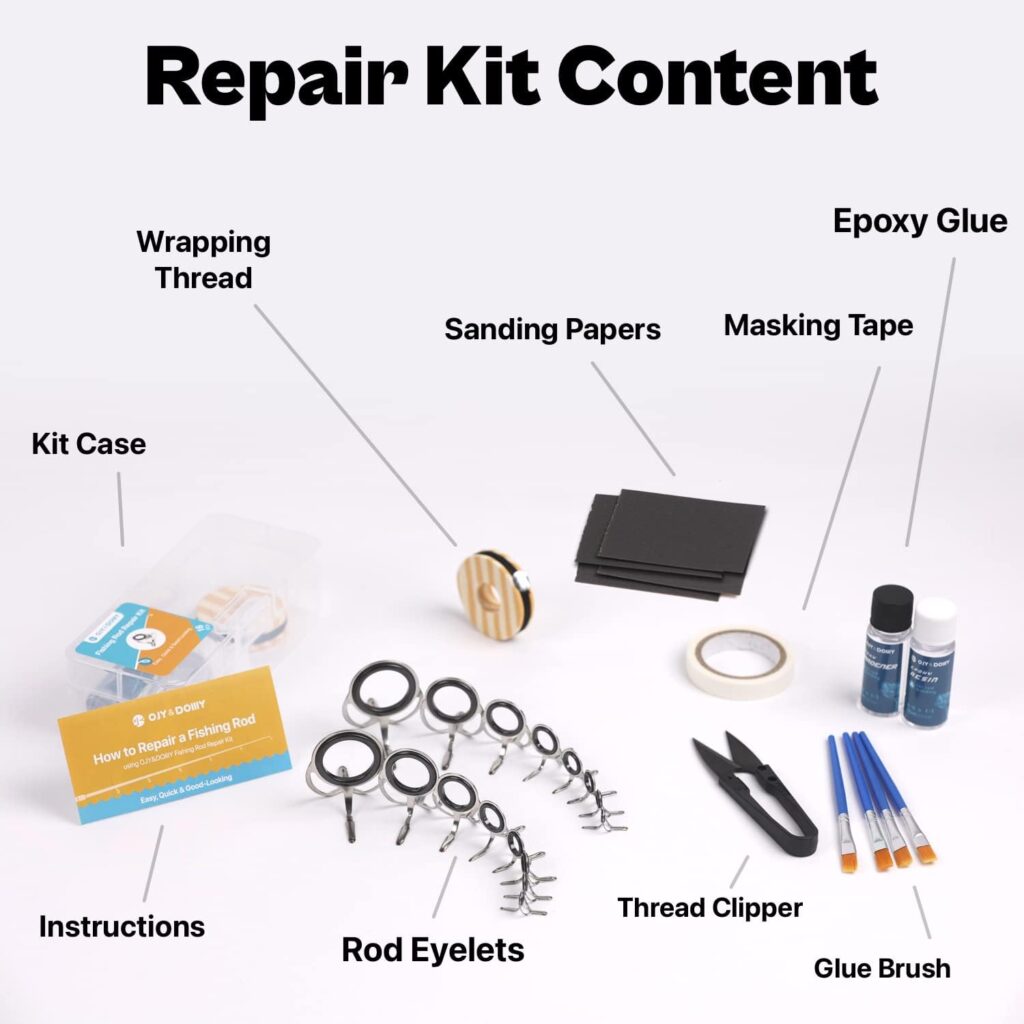
You will need some basic tools to remove the old eyelet and attach the new one correctly.
- Small screwdriver or knife to remove wraps
- Heat gun or lighter to soften glue
- Needle-nose pliers for gripping parts
- Fine sandpaper to smooth the rod surface
- Epoxy resin or rod-building glue
- Paintbrush for applying glue
- New eyelets of the correct size
- Masking tape to protect rod sections
Choosing Replacement Eyelets
Replacement eyelets come in different sizes and materials. Picking the right type helps your rod perform well.
| Eyelet Type | Best Use | Material |
| Single-foot | Lightweight rods | Stainless steel or ceramic |
| Double-foot | Heavy rods, high stress | Stainless steel or titanium |
| Striped (Ceramic ring) | Reduce line friction | Ceramic or silicon carbide |
| Snake guides | Fly fishing rods | Stainless steel |
Credit: collegeofems.com
Removing The Old Eyelet
Replacing an eyelet on a fishing rod starts with removing the old one carefully. This process requires patience and the right steps to avoid damaging the rod.
Follow simple steps to prepare the rod and soften the thread wrap before removing the eyelet. Each step helps make the job easier and safer.
Preparing The Rod
Start by cleaning the rod around the eyelet area. Remove dirt and debris to see the wraps clearly. Place the rod on a stable surface to keep it steady.
Soften The Thread Wrap
The thread wrap holds the eyelet in place. Soften the thread by applying heat slowly. Use a heat gun or hairdryer to warm the wrap evenly.
- Keep the heat source moving to avoid burning
- Heat for about 1-2 minutes
- Check if the glue feels soft by touching lightly
Careful Eyelet Removal
Use a small blade or razor to lift the thread wrap gently. Avoid cutting the rod blank. Once the wrap is loose, slide the eyelet off carefully.
| Tool | Purpose |
|---|---|
| Heat Gun | Softens thread glue |
| Small Blade | Lifts thread wrap |
| Tweezers | Removes eyelet safely |
Cleaning The Rod Surface
Cleaning the fishing rod surface is important before replacing the eyelet. Dirt and old glue can stop the new eyelet from sticking well. A clean surface helps the repair last longer.
This guide explains how to remove residue and sand the rod for smoothness. Follow these steps carefully to prepare the rod.
Removing Residue
Start by removing any old glue or dirt from the rod. Use rubbing alcohol or a mild solvent on a cloth. Gently wipe the area to clear off all residue. Avoid using harsh chemicals that can damage the rod.
- Apply rubbing alcohol to a clean cloth
- Wipe the rod surface thoroughly
- Use a plastic scraper for stubborn glue
- Let the area dry completely before sanding
Sanding For Smoothness
After cleaning, sand the rod surface to make it smooth. Use fine-grit sandpaper to avoid scratches. Sand lightly until the surface feels even. This helps the new eyelet fit well and stick firmly.
| Sandpaper Grit | Purpose |
|---|---|
| 400-600 | Remove rough glue spots |
| 800-1000 | Smooth the rod surface |
| 1200+ | Final polishing for a clean finish |

Credit: www.reddit.com
Attaching The New Eyelet
Replacing the eyelet on your fishing rod is a useful skill. Attaching the new eyelet correctly ensures smooth fishing.
This guide covers how to position the eyelet and secure it with a thread wrap.
Positioning The Eyelet
Place the new eyelet exactly where the old one was. The alignment must be straight with other guides. This helps the fishing line move freely.
Check the distance between eyelets to keep the rod balanced. Make sure the foot of the eyelet sits flat on the rod blank.
- Match the eyelet position to the old one
- Align it straight with other eyelets
- Keep the foot flat on the rod surface
- Check spacing for balance
Securing With Thread Wrap
Use nylon or polyester thread to wrap the eyelet foot tightly. This holds the eyelet firmly in place and prevents damage.
| Material | Purpose | Tip |
| Nylon Thread | Strong and flexible wrap | Use thin, smooth thread |
| Polyester Thread | Durable and water resistant | Choose color close to rod |
| Epoxy Resin | Seals and protects wrap | Apply thin, even coat |
Start wrapping a little before the eyelet foot. Wind the thread tightly and evenly over the foot. Finish wrapping a bit past the eyelet.
Finally, coat the thread wrap with epoxy. Let it dry fully to ensure a strong hold.
Applying Finish And Sealant
After replacing an eyelet on a fishing rod, you need to protect the repair area. Applying a finish and sealant helps keep the eyelet secure. It also stops water from damaging the rod.
The finish adds a smooth look and strengthens the rod. Sealant stops rust and wear. Use the right materials and apply them carefully for best results.
Choosing The Right Finish
Pick a finish that fits your rod’s material and use. Some finishes dry fast, while others are stronger. Check that the finish is clear and will not crack or peel.
Common finishes include epoxy, varnish, and polyurethane. Epoxy is tough and waterproof. Varnish offers a glossy look. Polyurethane resists scratches and sun damage.
- Epoxy: strong and waterproof
- Varnish: shiny and protective
- Polyurethane: durable and UV resistant
Applying Coating Evenly
Spread the finish smoothly over the repair area. Use a small brush or applicator for control. Avoid thick layers to prevent dripping and bubbles.
Apply thin coats and let each dry fully before adding another. This builds a strong, even seal. Lightly sanding between coats helps the next layer stick well.
- Use a small brush for precision
- Apply thin, even coats
- Let each coat dry completely
- Sand lightly between coats
- Avoid drips and bubbles
Drying And Curing Time
Replacing an eyelet on a fishing rod needs careful drying and curing. This step helps the glue or epoxy hold firmly. It also keeps the rod strong and ready for fishing.
Proper drying time ensures the repair will last long. Rushing the process can cause weak joins or damage to the rod.
Ideal Drying Conditions
To get the best results, keep the rod in a dry, warm place. Avoid dust and direct sunlight. The temperature should be steady without sudden changes.
- Keep the rod horizontal or in the position you want the eyelet to stay.
- Keep the room temperature between 65°F and 75°F (18°C to 24°C).
- Make sure there is good air circulation but no strong wind.
- Allow at least 24 hours for the glue or epoxy to dry fully.
- Wait 48 hours if the weather is cold or humid.
Avoiding Common Mistakes
Many people rush the drying time or place the rod in poor conditions. This causes weak repairs and may waste time and materials.
| Mistake | Effect | How to Avoid |
| Drying in cold or humid places | Glue stays soft, weak bond | Choose a warm, dry room |
| Moving the rod before curing | Eyelet shifts, crooked fit | Keep rod still until fully dry |
| Using too much adhesive | Longer drying time, mess | Apply thin, even layer |
| Exposing to direct sunlight | Surface dries, inner glue stays wet | Dry in shade with good airflow |
Testing The Repair
After replacing the eyelet on your fishing rod, testing the repair is important. This ensures the eyelet works well and is safe to use.
Check the alignment and durability carefully. These checks help prevent damage during fishing.
Checking Eyelet Alignment
Make sure the new eyelet lines up with the other guides on the rod. Poor alignment can cause the fishing line to wear out faster.
- Look down the rod from the handle to the tip.
- Check if the eyelet sits straight with the other guides.
- Adjust the eyelet if it tilts or sits off center.
- Move the rod gently to see if the line flows smoothly through the eyelet.
Ensuring Durability
Test how strong the repaired eyelet is. It should hold pressure and weight without moving or breaking.
| Test Type | What to Do | Expected Result |
| Pressure Test | Press gently on the eyelet with your fingers. | The eyelet should stay firm and not wiggle. |
| Line Pull Test | Pull the fishing line through the eyelet with normal force. | The eyelet stays in place and does not loosen. |
| Rod Flex Test | Bend the rod slowly while the line is in the eyelet. | The eyelet holds tight and the line moves freely. |
Maintenance Tips
Keeping your fishing rod in good shape helps it last longer. Replacing eyelets is a part of this care.
Regular checks and simple care can stop big problems from starting. This guide covers key maintenance tips.
Regular Inspection
Look over your fishing rod often. Check the eyelets for cracks or bends. These can damage your fishing line.
Pay close attention after a fishing trip. Dirt or salt can wear out eyelets if not cleaned.
- Check for cracks or chips on eyelets
- Make sure eyelets are straight and secure
- Look for rust or corrosion on metal parts
- Clean eyelets after each use
Preventive Care
Keep your fishing rod dry and clean to prevent damage. Use a soft cloth to wipe it down after fishing.
Store your rod in a safe place. Avoid putting heavy items on top of it to keep eyelets from bending.
- Wipe eyelets with a dry cloth after use
- Use rod covers or cases for storage
- Avoid dropping or banging the rod
- Replace eyelets at the first sign of damage

Credit: www.reddit.com
Frequently Asked Questions
How Do I Remove A Broken Eyelet From A Fishing Rod?
To remove a broken eyelet, first cut the thread wraps carefully. Then, heat the eyelet gently to loosen the adhesive and pull it off slowly without damaging the rod blank.
What Tools Are Needed To Replace A Fishing Rod Eyelet?
You need a replacement eyelet, thread wraps, rod glue or epoxy, a heat source like a lighter, scissors, and a fine brush for applying glue.
How Do I Align A New Eyelet Correctly On A Rod?
Align the new eyelet by matching it with the existing guide line on the rod. Ensure it is straight and in line with other guides for proper casting.
Can I Replace A Fishing Rod Eyelet At Home?
Yes, you can replace an eyelet at home using basic tools and materials. Careful handling and patience are key for a professional finish.
Conclusion
Replacing an eyelet on your fishing rod keeps it in good shape. A proper eyelet helps your line run smoothly. Take your time to remove the old one carefully. Choose the right size and type for your rod. Attach the new eyelet firmly and check for alignment.
This simple fix saves money and extends rod life. Regular care makes fishing more enjoyable and less frustrating. Now, you are ready to fish with confidence again.