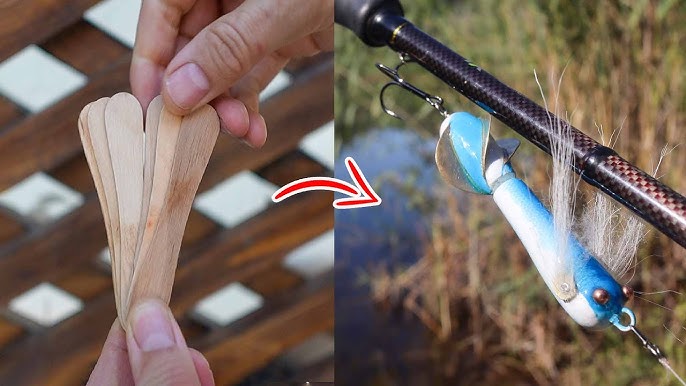
If you love fishing, making your own lures can change the game. Imagine catching more fish with lures you built yourself—designed just the way you want.
It’s easier than you think, and it saves money while adding fun to your fishing trips. In this guide, you’ll learn simple steps to create effective, homemade fishing lures that really work. Ready to boost your fishing skills and impress your friends?
Let’s dive in and start crafting!
Materials Needed
Making fishing lures at home needs some basic materials. These supplies help you create lures that attract fish well.
Knowing what tools and materials to use makes the process smoother and more fun.
Basic Supplies
Start with these simple materials to make your fishing lures effective and durable.
- Wood blocks or plastic blanks for lure bodies
- Hooks in various sizes
- Split rings to attach hooks
- Paints and brushes for coloring
- Clear coat or sealant to protect paint
- Sandpaper for smoothing surfaces
Optional Tools
These tools are not required but can make crafting easier and more precise.
| Tool | Use |
| Drill | Make holes for hooks and eyes |
| Wire cutters | Trim split rings and wires |
| Files | Shape and smooth lure edges |
| Airbrush | Apply paint evenly |
| Heat gun | Dry paint and sealant faster |
Choosing The Right Materials
Pick materials that match the type of fishing and fish you want to catch. Weight and color matter a lot.
- Use wood for a natural look and buoyancy.
- Plastic works well for detailed shapes and durability.
- Choose hooks that fit the size of your target fish.
- Bright paints attract fish in clear water.
- Dark colors work better in murky water.
Designing Your Lure
Designing a homemade fishing lure starts with good planning. A well-designed lure can attract more fish.
Focus on the look and movement of the lure. This helps it to stand out in the water.
Selecting Lure Types
Different lure types work best for certain fish and water conditions. Choose a type that fits your needs.
Common lure types include spoons, jigs, crankbaits, and soft plastics. Each has a unique action.
- Spoons: Flash and wobble to catch attention
- Jigs: Bounce on the bottom to mimic prey
- Crankbaits: Dive and swim with a natural motion
- Soft plastics: Flexible and lifelike in water
Color And Pattern Ideas
Colors help your lure blend or stand out in water. Choose colors based on water clarity and light.
Patterns add realism or attract fish by mimicking prey or creating contrast.
- Bright colors for murky water
- Natural colors for clear water
- Striped or spotted patterns for small fish mimicry
- Reflective finishes to catch light
Size And Shape Considerations
Match your lure size to the fish you want to catch. Small fish need smaller lures.
The shape affects how the lure moves. Slim shapes swim fast, round shapes wobble more.
- Small and slim for quick movements
- Large and round for slow, wobbling action
- Flat shapes create surface disturbance
- Curved shapes mimic injured prey
Crafting The Body
Making the body of a fishing lure is a key step. The shape and weight affect how it moves in water.
Careful crafting helps create lures that attract fish well. Let’s look at shaping, sanding, and adding weight.
Shaping Techniques
Start shaping the lure body using soft wood or foam. Use a knife or carving tools to cut the rough shape.
Make the shape smooth and rounded or slim and pointy. This helps the lure move like real bait.
- Draw the outline on material before cutting
- Carve slowly to avoid mistakes
- Use files to refine edges
Sanding And Smoothing
After shaping, sand the lure body to remove rough spots. Use sandpaper with fine grit for best results.
Sanding makes the surface smooth. This helps paint stick well and improves water movement.
- Start with medium grit sandpaper (around 120)
- Finish with fine grit sandpaper (around 220 or higher)
- Sand evenly to keep the shape balanced
Adding Weight For Balance
Add weight inside the lure to help it sink or swim correctly. Use small metal pieces like lead or steel.
Place weights where the lure balances well. This keeps it stable and natural in water.
- Use split shot weights or small ball bearings
- Test balance by floating the lure in water
- Adjust weight placement for desired action

Credit: www.amazon.com
Painting And Finishing
Painting and finishing are important steps in making homemade fishing lures. They help your lure look real and last longer in water.
Good painting and finishing also protect the lure from damage. This guide shows how to paint and finish your lures well.
Base Coating Tips
Start with a smooth base coat on your lure. It helps the paint stick better and looks clean.
Use light, even layers. Let each layer dry before adding the next one. This avoids drips and uneven spots.
- Sand the lure surface lightly before painting
- Apply primer if using bare wood or plastic
- Use spray paint or airbrush for smooth base coats
- Let the base coat dry completely before painting details
Detail Painting Methods
Paint details like eyes, scales, and stripes carefully. These make your lure look real and attract fish.
Use small brushes or fine-tipped tools for detail work. Thin your paint if needed to avoid clumps.
- Start with lighter colors and add darker shades last
- Use a toothpick or fine brush for tiny spots and lines
- Try layering colors to create depth and texture
- Allow each detail layer to dry before adding another
Applying Protective Coatings
Protective coatings keep your paint safe and your lure durable. They stop water from harming the paint.
Use clear coats like epoxy or varnish. Apply thin layers and let each dry well before the next.
- Use marine-grade epoxy for strong, waterproof finish
- Apply clear spray varnish for quick drying
- Sand lightly between coats for smooth finish
- Apply 2-3 coats for best protection
Attaching Hooks And Hardware
Attaching hooks and hardware is a key step in making fishing lures. This step makes your lure ready to catch fish.
You need to choose the right hooks and attach them safely. Adding split rings and eyes helps connect hooks and other parts.
Choosing Hook Types
Pick hook types based on the fish you want to catch. Different hooks work better for different fish sizes and styles.
Common hooks include treble hooks, single hooks, and double hooks. Each has its own shape and use.
- Treble hooks:Three points, good for big fish.
- Single hooks:One point, easier to remove.
- Double hooks:Two points, balance strength and ease.
Securing Hooks Safely
Secure hooks tightly to avoid losing fish. Use strong knots or attach hooks with split rings.
Check the hook placement to avoid hurting yourself. Always handle hooks carefully to stay safe.
- Tie knots firmly if using line or wire.
- Test hook strength before fishing.
- Wear gloves when handling sharp hooks.
Adding Split Rings And Eyes
Split rings connect hooks to lures and allow movement. Eyes are metal loops attached to lure bodies.
Use pliers to open split rings carefully. Attach eyes in spots where hooks or lines will connect.
- Choose split rings that fit your hook size.
- Attach eyes securely to hold weight and pressure.
- Use rust-resistant hardware for longer lure life.

Credit: www.battlbox.com
Testing And Adjusting
Testing your homemade fishing lures helps ensure they work well in the water. Adjusting them improves their action and depth to attract more fish.
Try simple tests and make small changes until the lure performs as you want. This process saves time and increases your catch chances.
Water Testing Tips
Test your lure in calm water before fishing. Watch how it moves and sinks. Check if it swims straight or spins.
- Use a clear container or shallow pond for testing.
- Pull the lure slowly and observe its movement.
- Let it sink and see how deep it goes.
- Try different speeds to check lure action.
- Note any unwanted spinning or diving.
Adjusting For Action And Depth
Change your lure’s shape or weight to improve action and depth. Adding weight makes it dive deeper. Adjusting fins or lips changes movement.
| Adjustment | Effect on Lure |
|---|---|
| Add split rings | More wobble and action |
| Attach heavier hooks | Dives deeper |
| Bend the lip downward | Increases diving angle |
| Trim the lip | Reduces diving depth |
| Add tail feathers | Creates vibration |
Troubleshooting Common Issues
If your lure does not swim right, check these common problems. Fixing small issues improves lure performance.
- Lure spins in water: Adjust the hook placement or add weight to balance.
- Lure sinks too fast: Remove some weight or shorten the lip.
- Lure floats too high: Add weight or lengthen the lip.
- Lure moves too slow: Try smaller hooks or reduce drag parts.
- Lure wiggles too much: Tighten connections or reduce lip size.
Storing And Maintaining Lures
Keeping your homemade fishing lures in good shape helps them last longer. Proper storage and cleaning stop damage and rust. This guide covers easy ways to care for your lures.
Taking time to maintain lures means better fishing trips. A little effort after each use protects your work and saves money.
Proper Storage Solutions
Store lures in dry, cool places to avoid rust and warping. Use tackle boxes with compartments to keep them separated. Avoid mixing lures to stop hooks from tangling.
- Choose tackle boxes with adjustable dividers
- Keep lures away from direct sunlight
- Use silica gel packs to absorb moisture
- Separate metal and wooden lures
- Store soft plastic lures in airtight containers
Cleaning After Use
Rinse lures with fresh water after fishing. Salt, dirt, and debris can damage paint and hooks. Dry them fully before storing to prevent rust.
| Cleaning Step | Action |
| Rinse | Use fresh water to wash off salt and dirt |
| Dry | Pat with cloth and air dry completely |
| Inspect | Check for rust or damage on hooks and body |
| Oil | Apply light oil to hooks to stop rust |
Extending Lure Lifespan
Proper care can extend how long your lures work well. Repair small damages quickly and avoid storing lures with wet hooks.
- Sharpen dull hooks regularly
- Touch up paint chips with waterproof paint
- Replace rusty hooks promptly
- Keep lures dry and clean at all times
- Store lures separately to avoid scratches

Credit: www.youtube.com
Frequently Asked Questions
What Materials Are Best For Homemade Fishing Lures?
Common materials include wood, plastic, metal, and silicone. Choose based on the desired lure type and target fish. Lightweight wood like balsa is ideal for floating lures, while metal suits spoons and spinners. Silicone works well for soft plastic baits.
How Do I Shape Fishing Lures At Home?
Use carving tools or a hobby knife for wooden lures. Sand the edges smooth for better water movement. For plastic lures, molds and heat shaping work well. Precise shaping mimics real bait, attracting more fish.
What Paint Should I Use On Fishing Lures?
Use waterproof, non-toxic acrylic or enamel paints. These paints resist water damage and maintain color underwater. Seal the paint with a clear coat to protect the finish and increase lure durability.
How Can I Add Hooks To Homemade Lures Safely?
Attach hooks using split rings and strong, corrosion-resistant wire. Secure connections prevent losing hooks while fishing. Always wear gloves when handling hooks to avoid injuries.
Conclusion
Crafting homemade fishing lures can be a rewarding hobby. It allows you to personalize your fishing gear. You gain a deeper understanding of fish behavior. Plus, it can save you money. Experiment with different materials and designs. Each lure can teach you something new.
Remember to prioritize safety during the process. Enjoy the creativity and patience involved. Share your creations with fellow fishing enthusiasts. They may offer helpful feedback. Dive into this hobby and relish the satisfaction. Happy fishing!