If you love camping, you know how important it is to keep your tent dry and comfortable. One of the biggest challenges is dealing with those tiny gaps where water can sneak in—the seams.
If you don’t seal them properly, a rainy night can turn your adventure into a soggy mess. But don’t worry, sealing your tent’s seams is easier than you think. You’ll learn simple, step-by-step tips to protect your tent and stay dry no matter the weather.
Keep reading, and you’ll discover how a small fix can make a huge difference on your next outdoor trip.
Why Seam Sealing Matters
Seam sealing is a key step in preparing your tent for camping trips. It protects the tent by covering the tiny holes made during stitching.
If you skip sealing the seams, water can leak inside. This damages the tent and makes camping uncomfortable.
Preventing Water Leaks
Seams are weak spots where water can enter. Sealing these stops rain from getting inside your tent.
A good seal keeps the inside dry even in heavy rain. This helps protect your gear and clothes.
Extending Tent Lifespan
Seam sealing helps your tent last longer. Water that seeps in can cause mold and fabric damage.
By sealing seams, you reduce wear and tear. This keeps your tent strong for many camping seasons.
Enhancing Camping Comfort
A sealed tent feels more comfortable. You stay dry and warm inside during rain or damp weather.
Seam sealing also reduces drafts. This creates a better shelter for a good night’s sleep outdoors.
Choosing The Right Sealant
Sealing the seams on a tent helps keep water out. Choosing the right sealant is very important.
A good sealant protects your tent and makes camping more comfortable. Learn what sealants work best.
Types Of Seam Sealants
There are several types of seam sealants. Each type has different uses and benefits.
- Liquid seam sealants: Easy to apply and flexible when dry.
- Seam tape: Strips that stick over seams to block water.
- Silicone-based sealants: Waterproof and durable but may not stick to all fabrics.
- Polyurethane-based sealants: Good for nylon tents and strong against wear.
Compatibility With Tent Fabrics
Sealants must match the type of tent fabric. Using the wrong sealant can cause damage.
Check your tent’s fabric type before picking a sealant. Common fabrics include nylon, polyester, and canvas.
- Nylon: Works well with polyurethane or silicone sealants.
- Polyester: Compatible with most liquid sealants and tapes.
- Canvas: Needs special seam sealers made for heavy fabrics.
- Silicone-coated fabrics: Use silicone-based sealants only.
Tools And Accessories Needed
Gather the right tools before sealing your tent seams. These tools make the job easier.
- Brush or applicator: For spreading liquid sealant evenly.
- Seam roller: Presses tape or sealant firmly into seams.
- Cleaning cloth: Removes dirt and old sealant before application.
- Masking tape: Protects areas around seams from excess sealant.
- Gloves: Keeps hands clean and safe from chemicals.
Preparing Your Tent For Sealing
Sealing the seams on your tent helps keep water out and extends its life. Before sealing, prepare the tent properly. This makes sure the sealant sticks well.
Follow these steps to get your tent ready. Clean, dry, and check the seams carefully for damage.
Cleaning The Tent Surface
Remove dirt and dust from the tent fabric before sealing. Clean seams allow the sealant to bond better and last longer.
- Use a soft brush to remove loose dirt.
- Wipe seams gently with a damp cloth.
- Use mild soap and water if needed.
- Do not use harsh chemicals or bleach.
- Allow the tent to dry completely after cleaning.
Drying And Setting Up
Make sure your tent is fully dry before sealing. Moisture can stop the sealant from sticking and cause mold.
| Drying Tip | Why It Matters |
| Air dry in shade | Prevents fabric damage from sun |
| Set up tent taut | Allows easy access to seams |
| Check for damp spots | Sealant works better on dry fabric |
Inspecting Seams For Damage
Look over all tent seams closely. Check for holes, cracks, or loose stitching. These need repair before sealing.
Use this checklist while inspecting seams:
- Look for fabric tears near seams
- Check if stitching is intact
- Note any worn or thin areas
- Mark spots that need patching

Credit: www.amazon.ca
Step-by-step Seam Sealing Process
Sealing the seams on a tent keeps water out and protects you from rain. This process helps extend the life of your tent.
Follow these clear steps to seal your tent seams correctly. It will make your tent stronger and more weatherproof.
Applying Sealant To Seams
Start by cleaning the seams with a damp cloth. Let the seams dry completely before applying sealant.
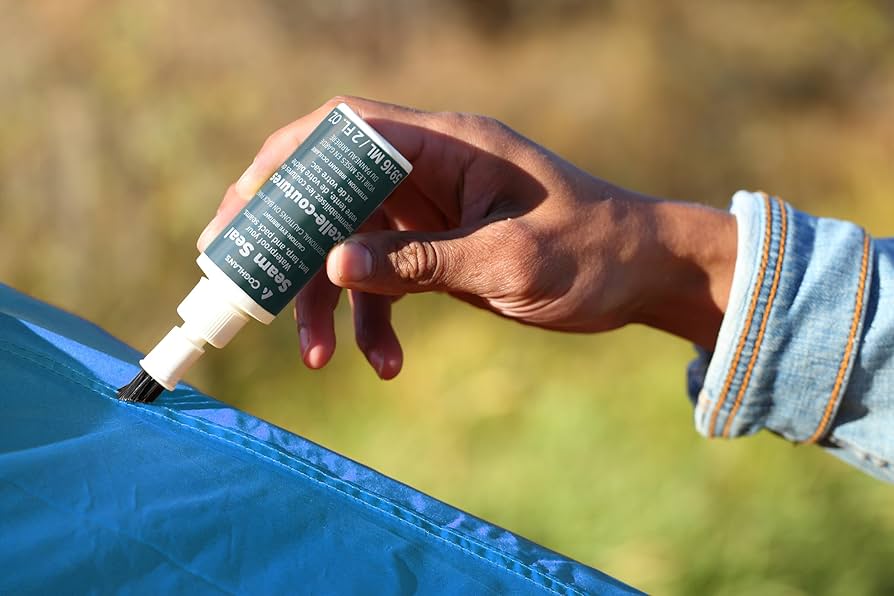
Use a brush or applicator to apply a thin layer of seam sealant directly on the stitches and fabric folds.
- Work in small sections for better control
- Cover all stitch holes evenly
- Avoid applying too much sealant
Smoothing And Spreading Techniques
After applying sealant, smooth it out with a clean brush or your finger. This helps the sealant fill all gaps.
Spread the sealant evenly along the seam. Make sure there are no thick or thin spots for best protection.
- Use gentle pressure to avoid damaging fabric
- Work the sealant into stitch holes carefully
- Remove excess sealant to prevent lumps
Drying And Curing Time
Let the sealed seams dry in a cool, shaded place. Avoid direct sunlight or heat sources during drying.
Drying time can take 12 to 24 hours. Make sure the sealant is fully cured before using the tent again.
- Check the sealant feels dry and firm
- Do not fold or pack the tent while drying
- Follow the sealant product’s specific instructions
Tips For Maintaining Waterproof Seams
Keeping your tent seams waterproof is key to staying dry outdoors. Proper care helps your tent last longer and perform well in rain.
Follow simple steps to check and maintain the seams. This guide covers inspection, sealant use, and storage tips.
Regular Inspections
Check your tent seams often, especially before and after trips. Look for cracks, loose threads, or worn spots where water can enter.
- Inspect all seam tape and stitching closely
- Feel for soft or peeling areas on the seam tape
- Look for holes or damage caused by sharp objects
- Check the inside and outside of the tent
Reapplying Sealant When Needed
Sealant keeps seams waterproof but wears off with time and use. Apply new sealant to maintain protection.
| Sealant Application Tips | Details |
| Clean the seam | Remove dirt and old sealant with rubbing alcohol |
| Dry completely | Let the seam air dry before applying sealant |
| Use correct sealant | Choose sealant made for your tent material |
| Apply evenly | Brush on a thin, smooth layer over all seams |
| Let cure | Wait at least 24 hours before packing the tent |
Storage And Handling Best Practices
How you store and handle your tent affects its seams. Follow these tips to avoid damage and keep seams sealed.
- Store the tent dry to prevent mold and sealant breakdown
- Keep tent loosely folded or rolled, not tightly packed
- Avoid placing heavy objects on stored tents
- Set up the tent on soft ground to protect seams from abrasion
- Handle zippers and poles gently to avoid stressing seams

Credit: www.yahoo.com
Common Mistakes To Avoid
Sealing the seams on a tent protects it from water leaks. Many people make simple mistakes that ruin the job. Avoid these errors to keep your tent dry and strong.
Seam sealing requires care and the right products. Using wrong methods can cause damage or poor results. Learn the common mistakes to avoid.
Using Incompatible Products
Not all seam sealers work with every tent fabric. Using the wrong product can cause the fabric to weaken or sealant to peel off.
Always choose a sealer that matches your tent’s material. Check if it is designed for nylon, polyester, or canvas.
- Do not use silicone-based sealers on polyurethane coatings
- Avoid rubber-based sealers on silicone fabrics
- Use sealers recommended by your tent’s brand
Sealing Over Dirty Or Wet Seams
Applying sealer on dirty or wet seams stops it from sticking properly. Dirt and moisture block the sealant from bonding with the fabric.
Clean and dry the seams before you start. Use a mild soap and water to remove dirt, then let the seams dry completely.
- Wipe off dust and mud before sealing
- Let seams dry in the sun or air for several hours
- Do not seal if seams feel damp or cold
Ignoring Manufacturer Guidelines
Each tent brand has specific instructions for seam sealing. Ignoring these rules can damage your tent or void warranties.
Read the tent manual carefully. Follow their advice on what sealer to use and how to apply it.
- Check drying times recommended by the maker
- Use the suggested tools like brushes or applicators
- Follow safety tips and ventilation instructions
When To Seek Professional Help
Sealing tent seams is often a task you can handle on your own. Sometimes, the damage or material needs expert attention. Knowing when to get professional help saves time and protects your tent.
This guide explains situations that require skilled repair work. It covers severe seam damage, specialty materials, and warranty repairs.
Severe Seam Damage
If the seams have large tears, holes, or fabric damage, you should see a professional. DIY kits may not fix deep or wide damage well. Professionals have tools and materials to restore strength and waterproofing.
- Seams with long splits or multiple tears
- Fabric around the seams that is frayed or worn out
- Seams that leak water after home repairs
- Damage caused by accidents or harsh weather
Specialty Tent Materials
Some tents use special fabrics or coatings that need expert care. Wrong products or methods can ruin the material or reduce its life.
| Material Type | Reason for Professional Help |
|---|---|
| Silicone-coated nylon | Needs specific sealants and heat application |
| Polyurethane-coated polyester | Sealants must match coating to avoid damage |
| Canvas tents | Require special waterproofing and stitching |
If your tent uses these materials, ask an expert about repairs. This avoids costly mistakes and keeps your tent strong.
Warranty And Repairs
Check your tent’s warranty before fixing seams yourself. Some warranties need repairs by authorized professionals only. Doing the work yourself might void the warranty.
- Read warranty terms carefully
- Contact the manufacturer for repair guidance
- Use authorized repair services if required
- Keep receipts and repair records for warranty claims

Credit: www.yahoo.com
Frequently Asked Questions
How Do You Prepare Tent Seams For Sealing?
Clean the seams thoroughly with mild soap and water. Allow them to dry completely. Remove any old seam tape or sealant for best adhesion.
What Type Of Seam Sealer Is Best For Tents?
Use a silicone or polyurethane-based seam sealer. They provide durable, waterproof protection and remain flexible after drying. Always choose one compatible with your tent fabric.
How Long Does Tent Seam Sealer Take To Dry?
Seam sealer typically dries within 12 to 24 hours. Drying time depends on temperature and humidity. Ensure seams are fully dry before packing the tent.
Can I Seal Tent Seams Myself At Home?
Yes, sealing tent seams is a simple DIY task. Just clean the seams, apply sealer evenly, and let it dry. Follow manufacturer instructions for best results.
Conclusion
Sealing tent seams ensures durability and comfort during camping trips. Water won’t seep in. You stay dry and cozy inside. Use a reliable sealant for best results. Regular checks help maintain tent quality. Practice makes it easier each time. Gather all tools before you start sealing.
Follow instructions carefully for effective sealing. Your tent will be ready for any weather. Enjoy worry-free nights under the stars. Sealing seams is a simple but important task. Happy camping and safe adventures ahead!