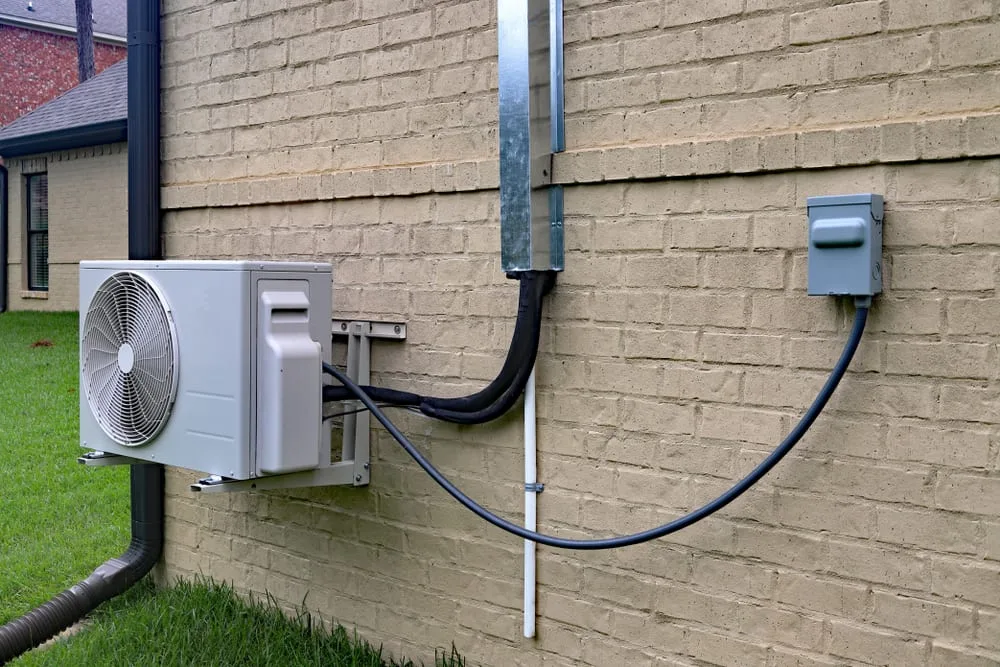
Are you ready to beat the heat and enjoy cool, refreshing air right in your home? Installing a split unit air conditioner might sound tricky, but with the right steps, you can do it yourself and save money.
Imagine stepping into your room and feeling instant comfort without waiting for a technician. In this guide, you’ll discover simple, clear instructions that make the process easy to follow. Keep reading, and by the end, you’ll have the confidence to install your split unit air conditioner like a pro.
Tools And Materials Needed
Installing a split unit air conditioner requires specific tools and materials. Having everything ready helps the job go smoothly.
This guide covers the essential items you need before starting the installation.
Basic Tools
- Electric drill with bits
- Screwdrivers (flathead and Phillips)
- Pipe cutter
- Wrench set
- Spirit level
- Measuring tape
- Hammer
- Utility knife
Installation Materials
You need specific materials to connect and mount the air conditioner parts properly.
| Material | Purpose |
| Mounting brackets | Support outdoor unit |
| Copper refrigerant pipes | Connect indoor and outdoor units |
| Insulation tape | Prevent heat loss on pipes |
| Electrical cables | Power supply connections |
| Drain pipe | Remove condensation |
| Sealant | Seal holes and gaps |
| Wall sleeves | Protect pipe entry points |
Safety Equipment
Safety gear keeps you protected during installation. Do not skip these items.
- Safety goggles
- Work gloves
- Face mask
- Protective clothing
- Non-slip shoes
Choosing The Right Location
Installing a split unit air conditioner needs careful planning. The location affects its efficiency and lifespan.
This guide covers how to pick the best spot for both indoor and outdoor units.
Indoor Unit Placement
Place the indoor unit where air can flow freely. Avoid corners or places blocked by furniture.
- Install high on the wall for better cooling.
- Keep it away from heat sources like ovens or direct sunlight.
- Ensure easy access for cleaning and maintenance.
- Avoid placing it above electronic devices.
Outdoor Unit Placement
The outdoor unit should have good air circulation and be protected from rain and direct sun.
| Factor | Recommendation |
| Surface | Flat and stable ground or platform |
| Clearance | At least 12 inches from walls or plants |
| Protection | Shade from sun and shelter from rain |
| Noise | Away from bedrooms or quiet areas |
Preparing The Installation Site
Proper site preparation is key to installing a split unit air conditioner. It ensures the unit works efficiently and lasts longer. This guide covers how to prepare for mounting the indoor unit and setting up the outdoor unit.
Follow these instructions carefully to avoid common installation problems. Choose locations that suit both units and allow easy access for maintenance.
Mounting The Indoor Unit
Select a place on the wall that is strong enough to hold the unit’s weight. Avoid spots near heat sources or direct sunlight. The site should have enough space for airflow and servicing.
- Pick a wall at least 7 feet above the floor
- Ensure no obstacles block air circulation
- Keep the unit away from electronic devices
- Allow 6 inches of space above the unit
- Check that the wall can support the mounting bracket
Mark the drilling points carefully using the mounting plate. Use a level tool to keep the unit straight. Prepare the hole for piping and wiring through the wall.
Setting Up The Outdoor Unit
Place the outdoor unit on a flat and stable surface. It must have good airflow and be away from direct sunlight or heavy dust. Avoid locations near noisy equipment to reduce sound issues.
| Criteria | Recommended Distance |
| From walls or obstacles | At least 12 inches |
| From ground (if on ground) | Raise 4 inches to prevent water damage |
| From other units | At least 24 inches |
| Near windows or doors | Keep clear to reduce noise inside |
Use a concrete pad or metal brackets to secure the outdoor unit. Make sure it is level to avoid vibration. Plan the route for refrigerant pipes and electrical cables carefully.
Drilling And Wiring
Installing a split unit air conditioner requires careful drilling and wiring. These steps help connect indoor and outdoor units properly.
Follow safety rules and use the right tools for drilling and electrical work. This ensures the system works well and lasts long.
Creating The Hole For Piping
First, choose the best spot for the hole near the indoor unit. The hole lets refrigerant pipes, drainage pipes, and wires pass through the wall.
Use a drill with a hole saw bit that matches the pipe size. Drill slowly to avoid wall damage and keep the hole clean.
- Mark the drilling spot carefully
- Use a level to keep the hole straight
- Drill from inside to outside for better control
- Clear dust and debris from the hole
- Seal around the pipes to stop air and water leaks
Electrical Connections
Electrical work connects the indoor and outdoor units and powers the air conditioner. Always switch off power before starting.
Run the power cable and control wires through the hole. Connect wires to the terminals following the unit’s wiring diagram.
- Use correct wire size for safety and performance
- Connect live, neutral, and ground wires properly
- Tighten all terminal screws firmly
- Check connections to avoid loose wiring
- Test the power supply before final assembly
Connecting The Refrigerant Lines
Connecting the refrigerant lines is a key part of installing a split unit air conditioner. These lines carry the refrigerant between the indoor and outdoor units. Proper connection ensures the system works efficiently and safely.
It is important to follow the correct steps and use the right tools. This will help avoid leaks and damage to the system.
Prepare The Refrigerant Lines
Start by measuring the distance between the indoor and outdoor units. Cut the copper pipes to the needed length. Remove any dirt or oil from the pipe ends with a clean cloth. This helps create a tight seal.
Attach The Flare Nuts
Slide the flare nuts onto each copper pipe before making any connections. The flare nuts will help secure the pipes to the air conditioner fittings. Make sure the nuts face the correct direction.
Connect And Tighten The Lines
Align the copper pipes with the indoor and outdoor unit connectors. Use a flare tool to create a flare at the end of each pipe if not already done. Screw the flare nuts onto the unit fittings by hand first, then tighten with two wrenches. One wrench holds the fitting, and the other turns the flare nut.
- Check the flare for any cracks or damage before connection.
- Hand-tighten the flare nuts initially to avoid cross-threading.
- Use wrenches to firmly tighten without over-tightening.
- Inspect connections for leaks with soapy water after tightening.
Insulate The Refrigerant Lines
After connecting, wrap the refrigerant lines with insulation foam. This prevents energy loss and protects the pipes from weather damage. Secure the insulation with tape or zip ties.
| Material | Purpose |
| Copper Pipe | Transports refrigerant |
| Flare Nut | Secures the pipe connection |
| Flare Tool | Shapes pipe ends for fitting |
| Insulation Foam | Keeps pipes cool and protected |
Sealing And Insulating
Sealing and insulating are key steps when installing a split unit air conditioner. They keep the cold air inside and stop warm air from entering.
Good sealing and insulation improve the air conditioner’s efficiency. This helps save energy and keeps your room comfortable.
Seal The Refrigerant Pipes
After running the refrigerant pipes through the wall, seal the gaps well. Use expanding foam or weatherproof caulk to close any holes around the pipes.
Insulate The Pipes
Wrap the refrigerant pipes with foam insulation sleeves. This prevents heat from entering and keeps the refrigerant cool.
- Measure the length of the pipes to cover
- Cut foam insulation to the right size
- Wrap the foam tightly around each pipe
- Seal the foam edges with tape
Insulate The Electrical Wiring
Cover the electrical wiring with protective insulation tape. This stops air leaks and protects the wires from damage.
Use A Vapor Barrier
Place a vapor barrier over the insulated pipes before closing the wall. This stops moisture from entering and causing damage.
| Material | Purpose |
|---|---|
| Expanding Foam | Seals gaps around pipes |
| Foam Insulation Sleeves | Prevents heat transfer on pipes |
| Insulation Tape | Protects electrical wires and seals air leaks |
| Vapor Barrier | Stops moisture from entering walls |
Vacuuming And Testing The System
Vacuuming and testing the split unit air conditioner is key for proper installation. It removes air and moisture from the system.
Testing ensures the unit works well and cools efficiently. Follow these steps carefully.
Vacuuming The System
Connect a vacuum pump to the service port on the outdoor unit. Turn on the pump to start removing air and moisture.
Run the vacuum for at least 30 minutes. This ensures the inside of the pipes is clean and dry.
- Check for leaks by closing valves and watching the vacuum gauge.
- If the gauge holds steady, the system is sealed well.
- If the gauge rises, find and fix leaks before continuing.
Testing The System
After vacuuming, open the valves to release refrigerant into the system. Turn on the air conditioner to start testing.
Check the system for cool air flow and listen for unusual sounds. Use a temperature gauge to measure cooling efficiency.
- Ensure indoor air feels cooler within a few minutes.
- Monitor pressure readings on the gauges to match manufacturer specs.
- Look for any leaks or frost on pipes that may indicate problems.

Credit: www.youtube.com
Final Checks And Troubleshooting
After installing a split unit air conditioner, it is important to perform final checks. These checks ensure the unit works properly and safely.
If you find any issues, use troubleshooting tips to fix them. This helps avoid damage and keeps the unit running well.
Check Electrical Connections
Make sure all electrical connections are tight and secure. Loose wires can cause the air conditioner to stop working or create a safety hazard.
Verify Refrigerant Levels
Proper refrigerant levels are key for cooling efficiency. Too little refrigerant lowers cooling, while too much may cause damage.
- Check the pressure gauge on the outdoor unit.
- Look for any signs of leaks or oil stains.
- If unsure, call a professional to measure and recharge refrigerant.
Test Airflow And Temperature
Good airflow and correct temperature confirm the unit works well. Blocked vents or dirty filters reduce airflow.
| Check Point | What to Look For | Action if Problem Found |
|---|---|---|
| Indoor Unit Airflow | Strong, steady airflow | Clean or replace air filters |
| Outdoor Unit Fan | Fan spins freely without noise | Remove debris or repair fan motor |
| Temperature Output | Cool air matches thermostat setting | Check thermostat and sensors |
Listen For Unusual Noises
Strange sounds may mean loose parts or mechanical faults. Common noises include rattling, buzzing, or grinding.
- Turn off the unit before inspection.
- Tighten loose screws or panels.
- Call a technician for motor or compressor noises.
Reset The System If Needed
If the unit does not respond or shows error codes, try a system reset:
- Switch off the air conditioner and unplug it.
- Wait for about 5 minutes.
- Plug it back in and turn on the unit.
- Check if the problem remains.
Maintenance Tips For Longevity
Installing a split unit air conditioner is just the first step. Proper care helps it last longer. Regular maintenance keeps the system running smoothly.
Follow these tips to protect your unit. Simple actions can prevent costly repairs and improve efficiency.
Clean Or Replace Air Filters Regularly
Dirty filters block airflow and reduce cooling power. Clean filters every month during heavy use. Replace them if damaged or very dirty.
- Turn off the unit before removing filters
- Wash filters with mild soap and water
- Let filters dry completely before reinstalling
- Replace filters every 3 to 6 months
Keep Outdoor Unit Clear Of Debris
Leaves, dirt, and plants can block airflow around the outdoor unit. Clear debris to help the unit work efficiently. Check the area weekly.
- Remove leaves and branches near the unit
- Trim plants at least 2 feet away
- Keep the area clean and dry
- Check for animal nests or debris inside the unit
Inspect And Clean The Condenser Coils
Condenser coils release heat outside. Dirt on coils reduces cooling and increases energy use. Clean coils at least once a year.
Use a soft brush or coil cleaner to remove dirt. Avoid damaging the fins on the coils.
Check Drainage And Clear The Drain Line
The drain line removes moisture from the unit. Blocked drains cause water leaks and damage. Inspect and clear the drain line regularly.
- Look for water pooling near the indoor unit
- Use a wet/dry vacuum to clear the drain pipe
- Pour a small amount of bleach or vinegar to prevent mold
Schedule Professional Maintenance Checks
Technicians can spot problems early. They check refrigerant levels and clean inside parts. Have a pro inspect your unit yearly.
Regular service keeps your air conditioner efficient and extends its life.

Credit: extrordinair.com.au

Credit: www.youtube.com
Frequently Asked Questions
How Do I Prepare For Split Ac Installation?
First, choose a suitable location for indoor and outdoor units. Ensure power supply and wall strength. Clear the installation area for easy access and proper airflow.
What Tools Are Needed For Split Ac Installation?
You need a drill, wrench, screwdriver, vacuum pump, refrigerant gauge, and pipe cutter. These tools help secure units, connect pipes, and evacuate air from the system.
How Long Does Split Ac Installation Take?
Installation typically takes 2 to 4 hours. Time varies based on unit size, wall type, and installer experience. Proper installation ensures efficient cooling and system longevity.
Can I Install A Split Ac Myself?
DIY installation is possible but not recommended without experience. Professional installers ensure correct setup, refrigerant handling, and safety compliance. Incorrect installation may damage the unit or void warranty.
Conclusion
Installing a split unit air conditioner is simple with the right steps. Follow the guide carefully for a smooth process. Ensure all parts fit securely and connections are tight. Safety should be your priority during installation. Double-check everything before turning it on.
Seek professional help if unsure. Regular maintenance keeps your unit efficient. Clean filters and check for leaks often. Enjoy a cooler and more comfortable space. Your home deserves the best comfort. Now, you can relax and enjoy the cool air.
Stay cool and save energy too!