Is your Carrier air conditioner not cooling like it used to? You might be surprised to learn that a simple cleaning can make a big difference.
When dust and dirt build up, your AC struggles to work efficiently, costing you more on energy bills and leaving your home less comfortable. In this guide, you’ll discover easy steps to clean your Carrier air conditioner yourself. By taking a little time now, you’ll save money, improve air quality, and enjoy a cooler, fresher space.
Keep reading to find out how to make your AC run like new again.

Credit: www.youtube.com
Tools And Materials Needed
Cleaning your Carrier air conditioner keeps it working well. Using the right tools makes the job easier and safer.
Gather everything you need before you start. This saves time and helps you clean better.
Basic Cleaning Tools
You need simple tools to clean dust and dirt from the air conditioner parts. These tools help you reach tight spaces and protect the unit.
- Soft brush to remove dust
- Vacuum cleaner with a brush attachment
- Microfiber cloths for wiping surfaces
- Screwdriver to open panels
Cleaning Agents
Use safe and effective cleaning agents to remove grime without harming the air conditioner parts.
- Mild detergent or dish soap mixed with water
- Fin comb cleaner for the condenser fins
- Disinfectant spray to kill bacteria and mold
- Spray bottle for easy application
Protective Gear
Wear gear to protect yourself from dust and chemicals during cleaning. Safety is important to avoid irritation or injury.
| Item | Purpose |
| Gloves | Protect hands from dirt and chemicals |
| Safety glasses | Protect eyes from dust and sprays |
| Mask | Prevent inhaling dust and fumes |
Additional Supplies
Some extra items help you clean deeper and maintain your Carrier air conditioner well.
- Bucket for mixing cleaning solution
- Garden hose with gentle spray setting
- Flashlight to see inside dark areas
- Replacement filters if needed
Credit: www.carrier.com
Safety Precautions
Cleaning a Carrier air conditioner requires careful safety steps. Follow these rules to avoid accidents and damage.
Always prepare your workspace and tools before you start cleaning. Safety is key to protect yourself and the unit.
Turn Off Power Supply
Before cleaning, switch off the air conditioner at the main power source. This stops electric shocks and damage.
Wear Protective Gear
Use gloves and safety glasses to protect your hands and eyes from dirt and cleaning chemicals.
Use The Right Cleaning Materials
- Choose soft cloths to avoid scratching the unit.
- Use mild detergents recommended by the manufacturer.
- Avoid harsh chemicals that may damage parts.
Handle Components Carefully
Remove filters and panels gently. Avoid bending or breaking small parts during cleaning.
Keep Water Away From Electrical Parts
| Do | Don’t |
|---|---|
| Use a damp cloth for cleaning surfaces | Spray water directly on the unit |
| Dry parts fully before reassembly | Allow water to touch circuit boards |
| Unplug unit before rinsing filters | Clean while unit is powered on |
Turn Off And Unplug Unit
Before cleaning your Carrier air conditioner, always turn off the power. This step helps keep you safe from electric shock.
Unplugging the unit stops electricity flow. It also protects the air conditioner from damage during cleaning.
Locate The Power Switch
Find the power switch on your air conditioner. It is usually on the front or side panel. Turn it off to stop the unit.
Unplug The Air Conditioner
After turning off the power, carefully unplug the unit from the electrical outlet. Pull the plug, not the cord, to avoid damage.
- Turn off the power switch on the air conditioner.
- Locate the plug connected to the wall socket.
- Grip the plug firmly and pull it out.
- Do not pull the power cord itself.
- Ensure the unit is completely disconnected from electricity.
Check The Power Source
Make sure the power source is off before you start cleaning. If your unit has a circuit breaker, switch it off for extra safety.
| Power Source | Action to Take |
| Wall Outlet | Unplug the air conditioner |
| Circuit Breaker | Switch off the breaker connected to the unit |
| Power Switch on Unit | Turn off before unplugging |
Clean Or Replace Filters
Cleaning or replacing filters in your Carrier air conditioner helps it run better. Clean filters keep the air fresh and improve cooling.
Dirty filters block airflow and make the system work harder. Regular care saves energy and extends the unit’s life.
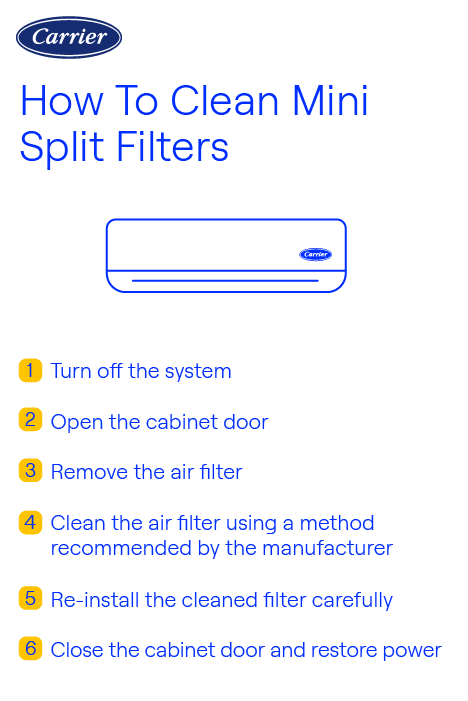
Removing The Filters
Turn off the air conditioner before removing the filters. Open the front panel gently to access the filters inside.
Slide or lift out the filters carefully. Avoid bending or damaging them during removal.
Washing And Drying Filters
Rinse the filters with lukewarm water to remove dust and dirt. Use a soft brush if needed, but do not use soap or chemicals.
Shake off excess water and let the filters air dry completely. Do not use direct sunlight or heat sources to dry them.
When To Replace Filters
Replace filters if they are torn, damaged, or very dirty. Old filters cannot clean air well and reduce efficiency.
- Replace filters every 3 to 6 months in normal use
- Change more often if you have pets or dust
- Check filters monthly for signs of wear or dirt
Clean The Evaporator And Condenser Coils
Cleaning the evaporator and condenser coils is important for your Carrier air conditioner. Dirty coils reduce cooling efficiency and increase energy use.
Regular cleaning keeps your unit running well. It also helps avoid costly repairs and extends the air conditioner’s life.
Accessing The Coils
First, turn off the power to your air conditioner. This keeps you safe during cleaning.
Find the evaporator coil inside the air handler or furnace. The condenser coil is outside in the outdoor unit.
- Remove the front panel or cover to reach the coils.
- Be gentle to avoid bending the coil fins.
- Use a flashlight to see all coil areas clearly.
Using Coil Cleaner
Choose a coil cleaner made for air conditioners. These cleaners remove dirt and grime without damage.
Spray the cleaner evenly on the coil surfaces. Let it sit for 5 to 10 minutes to loosen debris.
- Wear gloves and eye protection for safety.
- Do not use harsh chemicals or pressure washers.
- Follow the instructions on the coil cleaner label.
Rinsing And Drying
After the cleaner has worked, rinse the coils gently with water. Use a low-pressure hose or spray bottle to avoid damage.
Let the coils dry completely before putting the covers back. Dry coils prevent mold and keep your unit efficient.
- Avoid using high-pressure water jets.
- Check for any bent fins and straighten them carefully.
- Reassemble the unit only after the coils are dry.

Credit: www.kpcnews.com
Clear The Drain Line
Cleaning the drain line of your Carrier air conditioner helps keep it working well. A clear drain line stops water leaks and mold buildup.
This guide shows how to locate, flush, and prevent clogs in the drain line easily.
Locating The Drain Line
The drain line removes water from the AC unit to outside your home. Find it near the indoor air handler or evaporator coil.
Look for a PVC pipe or flexible tubing. It usually leads outside or to a drain pan below the unit.
Flushing The Line
Flushing cleans dirt and algae that block the drain line. Use a wet-dry vacuum or water hose for this task.
- Turn off the air conditioner to avoid damage.
- Detach the drain line from the unit carefully.
- Use a wet-dry vacuum to suck out debris from the line’s end.
- If no vacuum, pour water through the line to flush it.
- Reattach the drain line securely after cleaning.
Preventing Clogs
Regular care keeps the drain line clear and your AC running smoothly. Use these tips to avoid future blockages.
- Pour a cup of white vinegar down the drain line every month.
- Check and clean the drain pan for standing water.
- Inspect the drain line for cracks or damage regularly.
- Keep the area around the air handler clean and dry.
| Task | Frequency |
| Flush drain line | Every 3 months |
| Pour vinegar | Monthly |
| Check drain pan | Monthly |
| Inspect drain line | Every 6 months |
Clean The Exterior And Vents
Cleaning the exterior and vents of your Carrier air conditioner keeps it running well. Dirt and dust can block airflow and reduce cooling.
Regular cleaning also helps the unit last longer and prevents bad smells.
Cleaning The Exterior Surface
Turn off the air conditioner and unplug it before cleaning. Use a soft cloth dampened with mild soap and water. Wipe the outside surfaces gently to remove dust and stains.
Avoid spraying water directly on the unit. Dry the surface with a clean towel to stop water damage.
Cleaning The Vents
Dust and debris often collect in the vents. Use a soft brush or vacuum cleaner with a brush attachment to clean them.
- Remove the front panel if possible for better access.
- Brush away dust gently from the vent slats.
- Vacuum loose dirt inside the vents carefully.
- Use compressed air to blow out hard-to-reach dust.
- Reattach the front panel securely after cleaning.
Tips To Keep Vents Clean Longer
| Tip | How It Helps |
|---|---|
| Use air filters regularly | Stops dust from entering vents |
| Keep surrounding area clean | Reduces dirt near the unit |
| Schedule seasonal cleanings | Prevents build-up over time |
Check The Thermostat Settings
Cleaning your Carrier air conditioner starts with checking the thermostat. The thermostat controls the temperature and can affect how well the unit works.
If the thermostat is not set correctly, the air conditioner may run too long or not enough. This can reduce the cooling and waste energy.
Set The Correct Temperature
Make sure the thermostat temperature matches your comfort needs. Set it a few degrees lower than room temperature for cooling. Avoid setting it too low as this can strain the system.
Check Thermostat Mode
The thermostat should be set to “Cool” mode to clean and maintain the air conditioner properly. If it is on “Heat” or “Off,” the system will not cool the air.
Replace Or Clean The Thermostat Batteries
Thermostats with batteries need fresh power to work well. Old batteries can cause wrong temperature readings. Replace or clean batteries regularly to keep the thermostat accurate.
- Open the thermostat cover carefully.
- Remove old batteries and dispose of them properly.
- Insert new batteries matching the correct size.
- Close the cover and test the thermostat function.
Check Thermostat Placement
The thermostat should be placed away from heat sources, direct sunlight, and drafts. Poor placement can cause false temperature readings and poor air conditioner performance.
| Thermostat Issue | Effect on AC | Solution |
|---|---|---|
| Incorrect temperature setting | AC runs too long or not enough | Set to proper cooling temperature |
| Wrong mode selected | AC does not cool | Set thermostat to “Cool” mode |
| Dead batteries | Inaccurate readings | Replace batteries regularly |
| Poor placement | False temperature readings | Move thermostat away from heat or drafts |
Perform A Test Run
After cleaning your Carrier air conditioner, it is important to perform a test run. This helps ensure the unit works well and there are no issues.
A test run lets you check airflow, cooling, and any unusual noises. Follow these steps to test your air conditioner correctly.
Turn On The Air Conditioner
Switch on the Carrier air conditioner using the remote control or the unit’s power button. Set it to cooling mode for proper testing.
Check Airflow And Temperature
Make sure cool air blows strongly from the vents. Use a thermometer to measure the temperature near the vents to confirm cooling.
Listen For Unusual Sounds
Pay attention to any strange noises like rattling or grinding. These sounds might mean a problem inside the air conditioner.
Observe The Unit’s Operation Time
- Run the air conditioner for at least 15 minutes.
- Check if it cycles on and off smoothly.
- Look for any water leaks or frost buildup.
- Ensure the unit shuts off correctly when turned off.
Record Test Results
| Check Point | Status | Notes |
|---|---|---|
| Power On | ✔️ / ❌ | Did the unit start without issues? |
| Airflow Strength | ✔️ / ❌ | Was the airflow strong and cool? |
| Unusual Noises | ✔️ / ❌ | Any rattling or strange sounds? |
| Operating Time | ✔️ / ❌ | Did it run smoothly for 15 minutes? |
| Leaks or Frost | ✔️ / ❌ | Any water leaks or frost buildup? |
Regular Maintenance Tips
Cleaning your Carrier air conditioner regularly keeps it working well. It helps save energy and lasts longer.
Follow simple steps to clean and maintain the unit. This stops dirt buildup and improves air quality.
Turn Off The Power
Always switch off the air conditioner before cleaning. This prevents accidents and protects the unit.
Unplug it from the power source to be extra safe. Never clean the unit while it is running.
Clean Or Replace The Filters
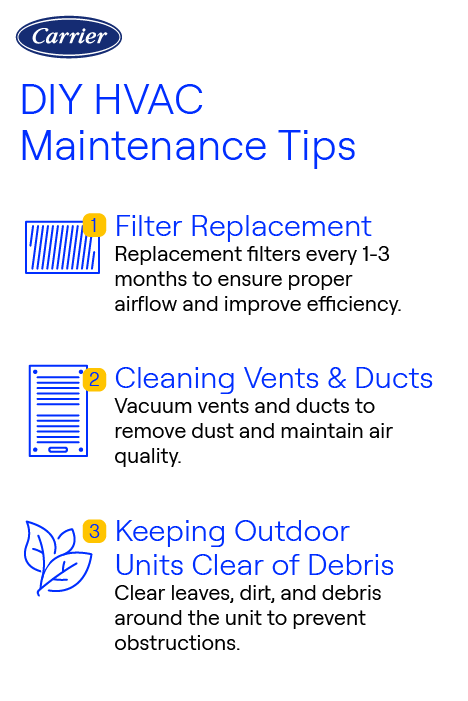
Filters catch dust and dirt from the air. Clean them every month to keep air flowing well.
Remove the filters and wash them with warm water. Let them dry fully before putting back.
- Check filters monthly
- Wash with mild soap if very dirty
- Replace filters every 3-6 months if needed
Coils help cool the air. Dust on coils reduces cooling power and raises energy use.
Use a soft brush or vacuum to remove dirt. Clean coils at least twice a year for best results.
Drain lines remove water from the unit. Blocked lines cause leaks and water damage.
Check the drain line and clean it with a mixture of bleach and water. Flush it to remove clogs.
Inspect The Outdoor Unit
Keep the outdoor unit free of leaves and debris. Clear space around it for good airflow.
Trim plants and bushes near the unit. Clean the fins gently with a soft brush to avoid damage.
Set the thermostat to a comfortable temperature. Avoid extreme settings to save energy.
Use a programmable thermostat to control cooling times. This helps maintain steady room temperature.
Frequently Asked Questions
How Often Should I Clean My Carrier Air Conditioner?
Clean your Carrier air conditioner every 3 months. Regular cleaning keeps it efficient and extends its lifespan. Dust and dirt buildup reduce cooling performance and increase energy use.
What Tools Do I Need To Clean Carrier Ac Filters?
You need a soft brush, vacuum cleaner, mild detergent, and water. These tools help remove dust and dirt without damaging the filters. Always dry filters completely before reinstalling.
Can I Clean The Ac Coils Myself Safely?
Yes, you can clean AC coils carefully using a coil cleaner spray. Turn off the unit and follow product instructions. Avoid bending the delicate fins to maintain performance.
Why Is Regular Cleaning Important For Carrier Ac Units?
Regular cleaning improves air quality, system efficiency, and prevents costly repairs. It removes dust, mold, and allergens that affect health. Clean AC units consume less energy and cool better.
Conclusion
Cleaning your Carrier air conditioner can boost its performance. It ensures cool and fresh air. Regular maintenance prevents costly repairs. A clean unit runs more efficiently. It uses less energy, saving you money. Dust and dirt can damage components. Cleaning also improves air quality in your home.
Follow the steps carefully for the best results. Routine cleaning extends your unit’s lifespan. Keep your air conditioner in top shape. Enjoy a comfortable and cool environment all year round. Remember, a little effort goes a long way. Happy cleaning!