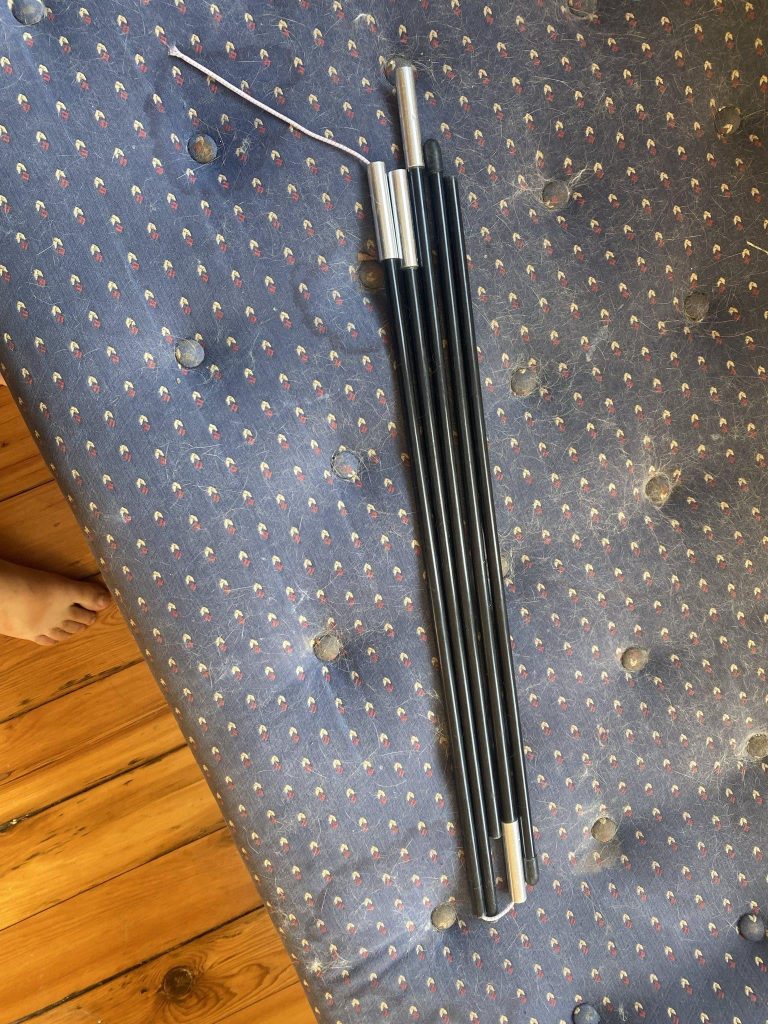
Have you ever struggled with a broken tent pole just when you needed your shelter the most? It’s frustrating, isn’t it?
But don’t worry—restringing a tent pole is easier than you think. With the right steps, you can fix your pole quickly and get back to enjoying the outdoors. This guide will walk you through the process in simple, clear steps so you can save time, avoid stress, and keep your camping plans on track.
Ready to learn how to restring your tent pole like a pro? Keep reading!

Credit: www.youtube.com
Tools And Materials Needed
Restringing a tent pole requires some basic tools and materials. Having the right items makes the process easier and faster.
Here are the key tools and materials you need before starting to restring your tent pole.
Replacement Shock Cord
The shock cord is the stretchy rope inside the tent pole. It holds the pole sections together and helps them flex.
Choose a shock cord that matches the diameter and strength of your original cord. Usually, 1.5 to 2 mm thick cord works well.
- Strong and flexible
- Resistant to weather and UV rays
- Proper length for your pole
Tent Pole Sections
Make sure your tent pole sections are clean and undamaged. You will restring the new shock cord through these parts.
If any pole section is bent or broken, replace it before restringing the cord.
Safety Pins Or Needle
Use a safety pin or a large needle to help thread the shock cord through the pole sections. This tool acts like a guide.
Attach the shock cord to the pin or needle and pull it through each pole section carefully.
Scissors Or Cutting Tool
You need scissors or a sharp cutting tool to cut the shock cord to the right length. Make sure the cut is clean.
Cutting the cord too short or too long can cause problems when assembling the tent poles.
Measuring Tape Or Ruler
A measuring tape or ruler helps you measure the correct length of the shock cord. Accurate length keeps the poles tight.
Measure the full length of your tent pole and add a little extra cord for knots.
Lighter Or Tape
Use a lighter or tape to seal the ends of the shock cord. This stops the cord from fraying after you cut it.
If you use a lighter, gently melt the ends. If you use tape, wrap it tightly around each end.
Identifying The Broken Section
Finding the broken part of a tent pole is the first step in fixing it. You need to check each section carefully to know which one needs restringing.
Look for cracks, bends, or missing pieces. These signs show where the pole is damaged and where you should focus your repair efforts.
Inspect Each Pole Section
Take apart your tent pole and lay the pieces out straight. Look closely at each section under good light. Pay attention to any unusual shapes or breaks.
Check For Loose Or Missing Ferrules
Ferrules are the connectors at the ends of pole sections. If they are loose or missing, the pole may come apart easily or not fit well.
- Look at the ends of each pole section
- See if the ferrules are cracked or worn out
- Check if any ferrules are missing completely
Test The Tension Of The Pole
Hold the pole and try to bend it gently. A broken section may feel weak or bend more than others. Listen for any cracking sounds as you test it.
Use A Table To Track Damage Signs
| Section | Cracks | Bends | Ferrule Condition | Comments |
|---|---|---|---|---|
| Section 1 | No | No | Good | Looks fine |
| Section 2 | Yes | Minor | Loose | May need restringing |
| Section 3 | No | No | Missing | Replace ferrule |
| Section 4 | No | Yes | Good | Check again |
Removing The Old Shock Cord
Removing the old shock cord is the first step to restring your tent pole. The shock cord holds the pole sections together and can wear out over time.
Careful removal helps avoid damage to the pole and makes it easier to add a new cord later.
Locate The Knot Or End Cap
Find where the shock cord starts or ends. This is usually tied in a knot or hidden under an end cap on the pole.
Gently remove the end cap if needed. Look for a knot or loop holding the cord in place.
Untie Or Cut The Knot
Try to untie the knot carefully to keep the cord intact. If the knot is too tight or old, use scissors to cut the cord.
Be careful not to cut the tent pole or damage the fabric around it.
Pull Out The Old Shock Cord
After untying or cutting, slowly pull the cord out through each pole section. Pull steadily to avoid breaking the pole.
- Start from the end where the cord is loose
- Pull the cord section by section
- Use pliers if the cord is stuck
Clean The Pole Sections
Remove any dirt, debris, or old glue inside the pole sections. Cleaning helps the new shock cord slide through easily.
Use a soft cloth or compressed air to clean the inside of the poles.

Credit: www.reddit.com
Choosing The Right Replacement Cord
When restringing a tent pole, picking the right cord is important. The cord holds the pole sections together.
Using the wrong cord can make your tent unstable or cause damage. Choose a cord that fits well and lasts long.
Check The Cord Thickness
Cord thickness affects how strong the pole will be. Too thin, and the pole might break easily.
Too thick, and it may not fit inside the pole sections properly. Measure the old cord or the inside diameter of the pole.
- Choose a cord close to the original thickness
- Thicker cords offer more strength
- Thinner cords are easier to thread but less strong
Select A Durable Material
The cord material affects how long it will last and how much it stretches. Nylon is a common choice.
Nylon cords are strong and stretch a little. Polyester cords stretch less but may be less flexible.
- Nylon: strong and stretchy
- Polyester: less stretch, good durability
- Dyneema: very strong, low stretch, but pricier
Consider The Cord Length
Use a cord longer than the pole length to allow tying knots. Add about 10-20% extra length.
Cutting the cord too short will make it hard to restring the pole and secure the ends properly.
- Measure the total pole length
- Add extra length for knots and tension
- Check pole instructions for specific recommendations
Pick The Right Stretch Level
Some cords stretch more than others. Stretch helps keep the pole tight and easy to assemble.
If the cord stretches too much, the pole may feel loose. If it stretches too little, it may break under pressure.
- Moderate stretch cords give good tension
- Low stretch cords offer stability
- High stretch cords may weaken pole tension
Cutting And Preparing The New Cord
Restringing a tent pole needs a strong cord that fits well. Cutting and preparing the new cord is key for a good repair.
Using the right length and type of cord keeps your tent stable and safe. Learn how to cut and ready the cord before restringing.
Measure The Correct Length Of Cord
Start by measuring the length of the old cord or the tent pole. The new cord should be slightly longer than the pole.
This extra length helps when knotting the ends. Too short a cord will make the pole hard to assemble.
- Measure the full length of the pole sections
- Add about 12 to 18 inches extra for knots
- Cut a few inches more if unsure
Choose The Right Cord Material
Pick a cord that is strong and stretch-resistant. Nylon or polyester cords work well for tent poles.
A cord that stretches too much can cause loose poles. Avoid thin or weak cords to keep your tent stable.
- Use nylon or polyester shock cord
- Pick cord thickness similar to the original
- Check that the cord feels strong and flexible
Cut The Cord Cleanly
Cut the cord with sharp scissors or a knife. A clean cut prevents fraying and makes knotting easier.
After cutting, seal the ends by melting them carefully with a lighter or match. This stops the cord from unraveling.
- Use sharp scissors or a knife to cut
- Melt cord ends with a lighter or match
- Be careful not to burn the cord or yourself
Threading The New Cord Through The Pole
Replacing the cord inside a tent pole is a simple task. Threading the new cord correctly helps the pole work well.
Use the right tools and follow the steps carefully. This guide explains how to thread the new cord through the pole.
Gather Your Materials
You need a new cord, scissors, and tape. The cord should be strong and fit inside the pole.
- New tent pole cord (nylon or shock cord)
- Scissors to cut the cord
- Small piece of tape
- Tweezers or a small hook (optional)
Cut The Cord To The Right Length
Measure the old cord or the pole length. Cut the new cord a little longer than the pole.
This extra length helps when tying knots and adjusting tension.
Attach Tape To The Cord End
Wrap a small piece of tape around one end of the cord. This makes it stiff and easy to push through the pole.
The tape also prevents fraying as you thread the cord.
Insert The Cord Into The Pole
Push the taped end into the first section of the pole. Use your fingers or tweezers to help guide it.
Work slowly to avoid bending or kinking the pole sections.
Pull The Cord Through Each Section
Keep pushing the cord through each connected pole section. Pull it out at the other end as you go.
If it gets stuck, gently twist or wiggle the pole to free the cord.
Tie Secure Knots At Both Ends
Tie a strong knot at each end of the cord. This keeps the cord from slipping inside the pole.
- Use a double knot for extra strength
- Trim any extra cord after the knot
- Make sure knots are tight and neat
Tying Secure Knots
Tying strong knots is important when restringing a tent pole. Secure knots keep the pole stable and safe.
Learning a few simple knots helps you fix poles quickly and avoid damage during camping.
Types Of Knots For Tent Poles
Some knots work better for tent poles than others. Choose knots that hold tight and are easy to untie.
- Figure Eight Knot
- Clove Hitch
- Double Fisherman’s Knot
- Bowline Knot
How To Tie A Figure Eight Knot
The Figure Eight Knot is strong and simple. It stops ropes from slipping through holes.
- Make a loop with the rope end.
- Pass the end over the main rope.
- Bring the end under and back through the loop.
- Tighten the knot by pulling both ends.
Clove Hitch Use And Tying
The Clove Hitch holds poles or sticks. It is quick to tie and adjust.
To tie a Clove Hitch:
- Wrap the rope around the pole once.
- Cross the rope and wrap it around again.
- Slip the end under the last wrap.
- Pull tight to secure.
Choosing The Right Knot For Your Pole
| Knot | Best Use | Ease of Tying |
| Figure Eight | Stopping rope ends | Easy |
| Clove Hitch | Attaching to poles | Easy |
| Double Fisherman’s | Joining ropes | Medium |
| Bowline | Creating loops | Medium |
Testing The Pole For Strength
After restringing a tent pole, testing its strength is essential. This ensures the pole can support your tent safely and will not break during use.
Checking the pole carefully helps avoid accidents and keeps your camping experience comfortable and secure.
Visual Inspection
Look closely at the pole sections for cracks, dents, or splinters. Any damage can weaken the pole and cause failure under pressure.
Flexibility Check
Bend each pole section gently to test its flexibility. The pole should bend without cracking or feeling too soft. Too much stiffness or softness is a bad sign.
Load Bearing Test
- Assemble the pole fully with the new string inside.
- Hold one end firmly while applying light pressure to the middle.
- Check for any unusual bending or creaking sounds.
- Ensure the pole returns to its original shape after bending.
- Repeat this test for all pole sections.
Strength Comparison Table
| Test Type | Pass Criteria | Fail Signs |
|---|---|---|
| Visual Inspection | No visible cracks or dents | Cracks, splinters, or dents present |
| Flexibility Check | Bends smoothly without cracking | Too stiff or cracks when bent |
| Load Bearing Test | Returns to shape, no creaking | Permanent bends or creaking noise |
Tips For Maintaining Tent Poles
Taking care of your tent poles helps them last longer. Good maintenance keeps your tent strong and safe.
Simple steps can prevent damage and make setting up easier. Follow these tips to keep your poles in top shape.
Clean Your Tent Poles Regularly
Dirt and sand can wear down pole joints. Wipe poles with a damp cloth after each trip.
- Remove mud and debris
- Dry poles completely before storing
- Check for cracks or splits while cleaning
Store Poles Properly
Keep poles in a dry, cool place. Avoid leaving them in direct sunlight or damp areas.
Use the original bag or a soft cover to protect them from scratches and bending.
Check Pole Sections Before Use
Inspect each pole section for damage before setting up your tent. Look for bends, cracks, or loose shock cords.
Replace broken parts to avoid pole failure during camping.
Avoid Over-bending Poles
Do not force poles to bend beyond their design. Over-bending can cause permanent damage or breaks.
- Follow the tent’s setup instructions carefully
- Use gentle pressure when assembling poles
- Handle poles with care during windy conditions
Lubricate Shock Cords Occasionally
Shock cords inside poles can dry out and lose elasticity. Use a silicone spray or dry lubricant on cords.
This keeps cords flexible and helps with smooth pole assembly.
Restring Tent Poles Carefully
When restringing, use a strong shock cord of the right length. Avoid knots inside pole sections.
- Measure cord length before cutting
- Thread cord slowly to avoid tangles
- Tie secure knots only at pole ends

Credit: www.walmart.com
Frequently Asked Questions
How Do You Restring A Broken Tent Pole?
To restring a broken tent pole, first remove the old elastic cord. Then, thread a new shock cord through each pole section. Use a safety pin or string to guide the cord. Tie secure knots at both ends to hold the tension.
What Tools Are Needed To Restring Tent Poles?
You need a replacement shock cord, a safety pin or thin wire, and scissors. A ruler or tape measure helps for correct cord length. No complex tools are necessary, making restringing a simple DIY task.
How Long Should The Shock Cord Be For Tent Poles?
The shock cord should be about 10-15% shorter than the total pole length. This ensures proper tension to keep poles together. Too long or short cord affects pole stability and tent structure.
Can You Restring Tent Poles Without Removing Them?
Yes, but it is easier to restring poles once fully disassembled. Removing poles prevents damage and allows smooth threading of the new cord. Attempting to restring without removal may cause tangling or damage.
Conclusion
Restringing a tent pole is a simple task. With practice, it becomes easier. Always keep your tools handy. Check the cord’s tension for a snug fit. Ensure no kinks in the cord. This helps prevent future breaks. A well-strung pole supports your tent better.
Enjoy more camping trips with confidence. Remember, patience is key. Happy camping!