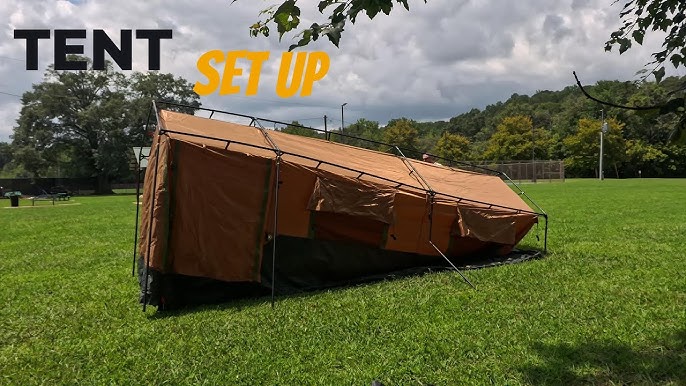
Setting up your Ozark Trail tent doesn’t have to be confusing or time-consuming. Whether you’re a first-timer or just need a quick refresher, this guide will walk you through every step clearly and simply.
You’ll learn how to get your tent ready fast, so you can spend more time enjoying the outdoors and less time struggling with poles and stakes. Keep reading, and soon you’ll feel confident setting up your tent anywhere, anytime.
Credit: www.walmart.com
Choosing The Right Spot
Choosing the right spot for your Ozark Trail tent helps ensure a safe and comfortable camping experience.
Consider the ground, surroundings, and wind before setting up your tent.
Flat And Clear Ground
Pick a flat area to keep your tent stable and comfortable. Avoid spots with rocks, roots, or uneven surfaces.
- Look for a level patch of earth or grass.
- Clear away small stones or sticks.
- Make sure the ground is firm, not soft or muddy.
Avoiding Hazards
Stay away from hazards that can harm you or damage your tent. This keeps you safe during your trip.
| Hazard | Reason to Avoid |
| Dead or falling branches | Can fall and cause injury |
| Low spots | Can collect water when it rains |
| Animal paths | Disturb wildlife and risk encounters |
| Steep slopes | Risk of sliding or rolling down |
Considering Wind Direction
Check the wind direction to protect your tent from strong gusts. Position your tent door away from the wind.
- Face the tent door opposite to the wind.
- Use natural windbreaks like trees or bushes.
- Secure tent stakes firmly in windy areas.
Credit: www.walmart.ca
Unpacking Your Tent
Setting up your Ozark Trail tent starts with careful unpacking. This helps avoid missing parts and damage.
Take your time to unpack everything in a clean, flat space. This makes setup easier and safer.
Checking Tent Components
After unpacking, check all parts of the tent carefully. Make sure nothing is missing or broken.
Typical tent parts include the tent body, rainfly, poles, stakes, and carrying bag. Inspect each one.
- Look for tears or holes in the fabric
- Check poles for cracks or bends
- Count stakes to match the number needed
- Ensure zippers open and close smoothly
- Verify that the rainfly is the right size
Organizing Gear
Organize your tent gear before setting up. Group similar items together to stay efficient.
Place poles in one area, stakes in another, and keep the tent fabric clean and ready. This helps prevent loss.
- Lay out poles by size or type
- Keep stakes in a small container or bag
- Fold the tent body neatly to avoid wrinkles
- Set the rainfly aside for quick access
Laying Out The Tent
Setting up your Ozark Trail tent starts with laying it out properly. This step helps you see where each part will go.
Taking time here makes the rest of the setup easier and faster.
Positioning The Tent Body
Find a flat, clear area for your tent. Remove sticks, rocks, and sharp objects. Lay the tent body flat on the ground with the bottom side down.
- Face the tent door toward your desired direction.
- Stretch the tent body to remove wrinkles.
- Align the corners with your planned staking spots.
- Check that the tent is not on a slope.
Aligning Doors And Windows
Make sure the tent doors and windows open away from strong winds or direct sunlight. This helps with comfort and ventilation.
| Feature | Tip for Positioning |
| Doors | Face away from wind for easy entry and exit |
| Windows | Place where they get good airflow and light |
| Rain Flaps | Position so rain runs off without pooling |
Assembling Tent Poles
Setting up your Ozark Trail tent starts with the poles. The poles give your tent its shape and support. It is important to assemble them correctly to avoid damage.
This guide will help you connect the pole sections and insert them into the tent sleeves. Follow these steps carefully for a smooth setup.
Connecting Pole Sections
Ozark Trail tent poles come in sections that fit together. Each section has a shock cord inside to keep them connected. Lay out all the pole pieces on a flat surface.
Hold two sections close and slide the ends together. The shock cord will pull the sections tightly. Make sure each joint is secure before moving to the next section.
- Lay poles out straight on the ground
- Align the ends of two sections
- Push sections together until snug
- Repeat until all pole sections are connected
Inserting Poles Into Tent Sleeves
Your Ozark Trail tent has sleeves or clips to hold the poles. These sleeves run along the tent fabric. Insert the connected poles carefully to avoid bending or breaking them.
Start by sliding one end of the pole into the sleeve opening. Gently push the pole through the sleeve until it reaches the other end. Do this for each pole until all are in place.
- Find the pole sleeves on the tent
- Insert one end of the pole into a sleeve
- Push the pole through the entire sleeve length
- Repeat for all poles as shown in your tent instructions
Raising The Tent
Raising your Ozark Trail tent is an important part of setting up camp. It makes your tent stand strong and ready for use.
Follow simple steps to secure the tent poles and build the frame. This will help your tent stay stable.
Securing Poles In Place
Start by laying out the tent poles next to the tent. Check each pole to make sure it is fully connected.
Insert the ends of the poles into the correct grommets or pole sleeves on the tent fabric. This holds the poles firmly.
- Align pole ends with tent grommets or sleeves
- Push poles fully into place
- Check for any bends or gaps in poles
Erecting The Tent Frame
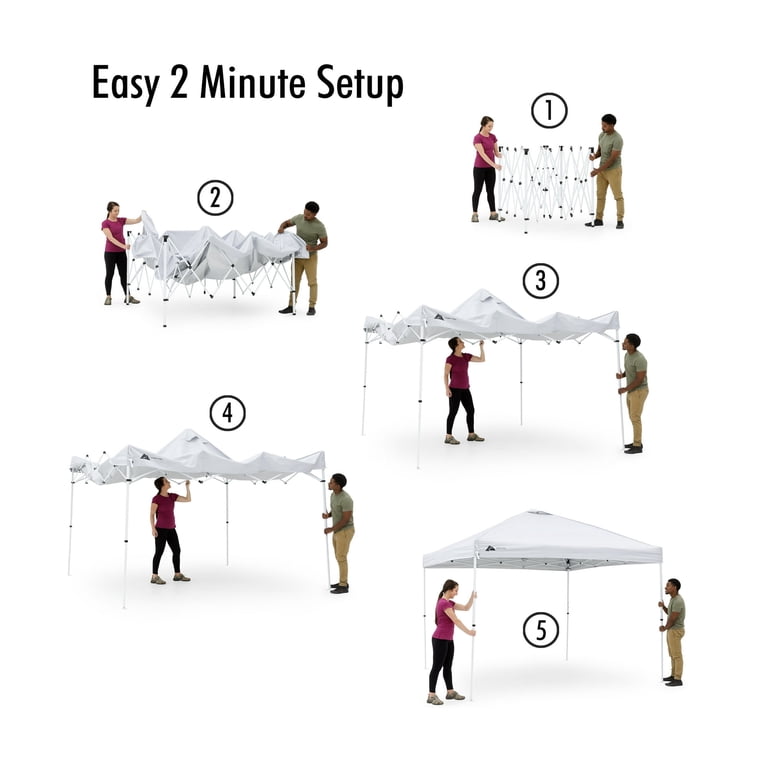
Once poles are secured, lift the tent by raising the poles upright. Use a gentle but firm motion to avoid damage.
Connect any clips or hooks on the tent body to the poles. This keeps the tent fabric tight and stable.
- Lift poles carefully to form the tent shape
- Attach tent clips or hooks to poles
- Check that the tent stands evenly on the ground
Staking The Tent
Staking your Ozark Trail tent keeps it stable on windy days. Proper staking stops the tent from moving or collapsing.
Follow these tips to secure your tent well and enjoy a safe camping experience.
Placing Stakes At Angles
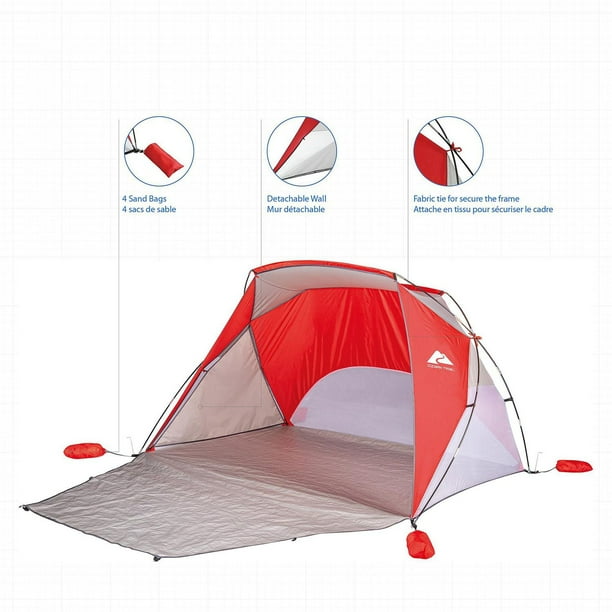
Insert tent stakes into the ground at a 45-degree angle away from the tent. This angle gives better hold and keeps stakes from pulling out easily.
- Push stakes deep into firm soil for strong grip.
- Point the stake tip away from the tent wall.
- Use a hammer or rock to drive stakes if ground is hard.
- Check stakes after strong winds and adjust if needed.
Securing Tent Corners
Firmly staking the tent corners keeps the structure tight and stable. Loose corners can cause the tent to flap or sag.
| Corner | Action |
| Front Left | Pull fabric tight and stake firmly |
| Front Right | Stretch and secure with a strong stake |
| Back Left | Anchor tightly to keep shape |
| Back Right | Secure firmly for overall stability |
Attaching The Rainfly
Attaching the rainfly is an important step to keep your Ozark Trail tent dry. The rainfly protects you from rain and wind while camping.
This guide will help you position and secure the rainfly correctly for the best shelter.
Positioning The Rainfly
Start by unfolding the rainfly and laying it over the tent. Make sure the rainfly matches the shape of the tent roof. The door of the rainfly should line up with the tent door.
- Place the rainfly evenly over the tent body.
- Align the rainfly door with the tent door.
- Check that the edges cover the tent’s mesh walls.
- Adjust the rainfly so it hangs slightly over the tent edges.
Securing Rainfly Clips And Straps
Use the clips and straps on the rainfly to attach it firmly to the tent frame. This will keep the rainfly stable in wind and rain.
| Clip or Strap | How to Secure | Purpose |
|---|---|---|
| Corner Clips | Attach to tent poles at each corner | Keep rainfly edges tight |
| Side Straps | Buckle around tent frame or stake loops | Prevent rainfly from flapping |
| Guy Line Loops | Use guy lines to stake out rainfly | Add extra stability in wind |
Adjusting For Stability
Setting up your Ozark Trail tent correctly helps keep it stable in wind and rain. Adjusting the tent parts makes it strong and safe for camping.
Two key steps to improve stability are tightening the guy lines and checking the tent tension. These keep your tent firm on the ground.
Tightening Guy Lines
Guy lines hold the tent steady by pulling it outward from the stakes. Tight lines stop the tent from moving or sagging.
- Attach guy lines to the tent’s loops or rings.
- Pull each line tight, but not too tight to avoid breaking.
- Secure the lines to ground stakes at a 45-degree angle.
- Adjust the length to keep the tent walls straight.
- Check all lines after strong wind or rain.
Checking Tent Tension
Proper tension keeps the tent fabric smooth and prevents water pooling. Loose fabric can flap and wear out fast.
| Area | What to Check | How to Adjust |
| Rainfly | Firm and tight over tent | Tighten straps or buckles |
| Tent Walls | Flat without sagging | Pull guy lines or adjust poles |
| Floor | Stretched and wrinkle-free | Stretch corners and secure stakes |
Packing Up Tips
Packing up your Ozark Trail tent properly keeps it safe and ready for next use. Taking time to clean and fold it well helps the tent last longer.
Follow simple steps for cleaning and folding. This makes packing easier and protects your gear.
Cleaning The Tent
Before packing, remove dirt, leaves, and bugs from the tent. Use a soft brush or cloth to clean it gently.
Check for wet spots and let the tent dry. Packing it wet can cause mold and bad smells.
- Brush off dirt and debris
- Spot clean stains with mild soap and water
- Dry the tent completely before packing
Proper Folding Techniques
Fold your Ozark Trail tent carefully to save space and avoid damage. Start by laying the tent flat and straightening all parts.
Fold the tent in long, even sections. Keep poles and stakes separate to avoid bending or breaking.
- Lay the tent flat and smooth out wrinkles
- Fold the tent in thirds or quarters lengthwise
- Fold the tent again to fit the storage bag
- Keep poles and stakes in their own bag

Credit: www.greensafaris.com
Frequently Asked Questions
How Do I Start Setting Up An Ozark Trail Tent?
Begin by choosing a flat, clear spot. Unpack the tent and lay out the footprint or tarp. Assemble the poles and insert them into the tent’s pole sleeves or clips. Secure the tent body to the poles and stake the corners firmly.
What Tools Are Needed To Set Up Ozark Trail Tents?
No special tools are needed. All necessary parts come with the tent. Poles, stakes, and rainfly are included. A mallet can help drive stakes, but using hands or feet is usually enough for soft ground.
How Do I Secure My Ozark Trail Tent In Windy Conditions?
Use all provided stakes and guy lines. Tighten the lines to keep the tent taut. Position the tent so the smallest side faces the wind. Adding extra guylines and heavier stakes improves stability in strong winds.
Can One Person Set Up An Ozark Trail Tent Alone?
Yes, most Ozark Trail tents are designed for easy solo setup. Follow step-by-step instructions and practice beforehand. Setting up on soft ground and organizing parts helps speed the process.
Conclusion
Setting up an Ozark Trail tent is easy with the right steps. Follow the instructions carefully and you’ll camp comfortably. Double-check all parts before heading out. Practice setting up the tent at home. This saves time at the campsite. Remember to secure the tent against wind and rain.
Enjoy nature, knowing your shelter is safe. Always pack extra stakes and a mallet. These tips ensure a smooth camping experience. Happy camping with your Ozark Trail tent!