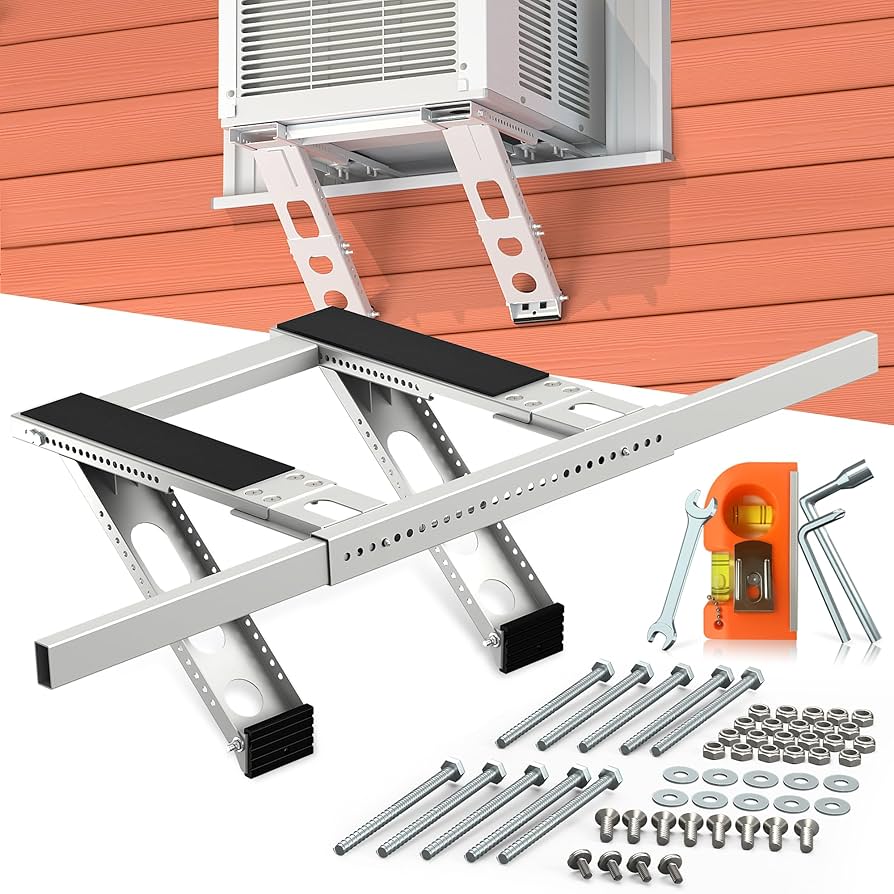
Are you ready to keep your home cool and comfortable this summer? Installing an air conditioner window bracket might seem tricky, but it doesn’t have to be.
With the right steps, you can securely set up your AC unit and enjoy a refreshing breeze without hassle. In this guide, you’ll discover simple, clear instructions that make the whole process easy to follow. By the end, you’ll feel confident and proud of your work—no expensive help needed.
Keep reading to find out exactly how to install your air conditioner window bracket quickly and safely.
Choosing The Right Bracket
Installing an air conditioner window bracket needs the right choice. The bracket must fit your window and hold the unit safely. Picking the right bracket makes installation easier and keeps the air conditioner steady.
Look at your window type, size, and material before buying a bracket. This helps you find a bracket that works well with your window and supports your air conditioner properly.
Types Of Window Brackets
There are different brackets for air conditioners. Each type suits certain windows and weight limits. Choose a bracket that matches your window style and air conditioner size.
- L-shaped brackets:Fit most windows, provide strong support.
- T-shaped brackets:Good for heavy units, balance weight well.
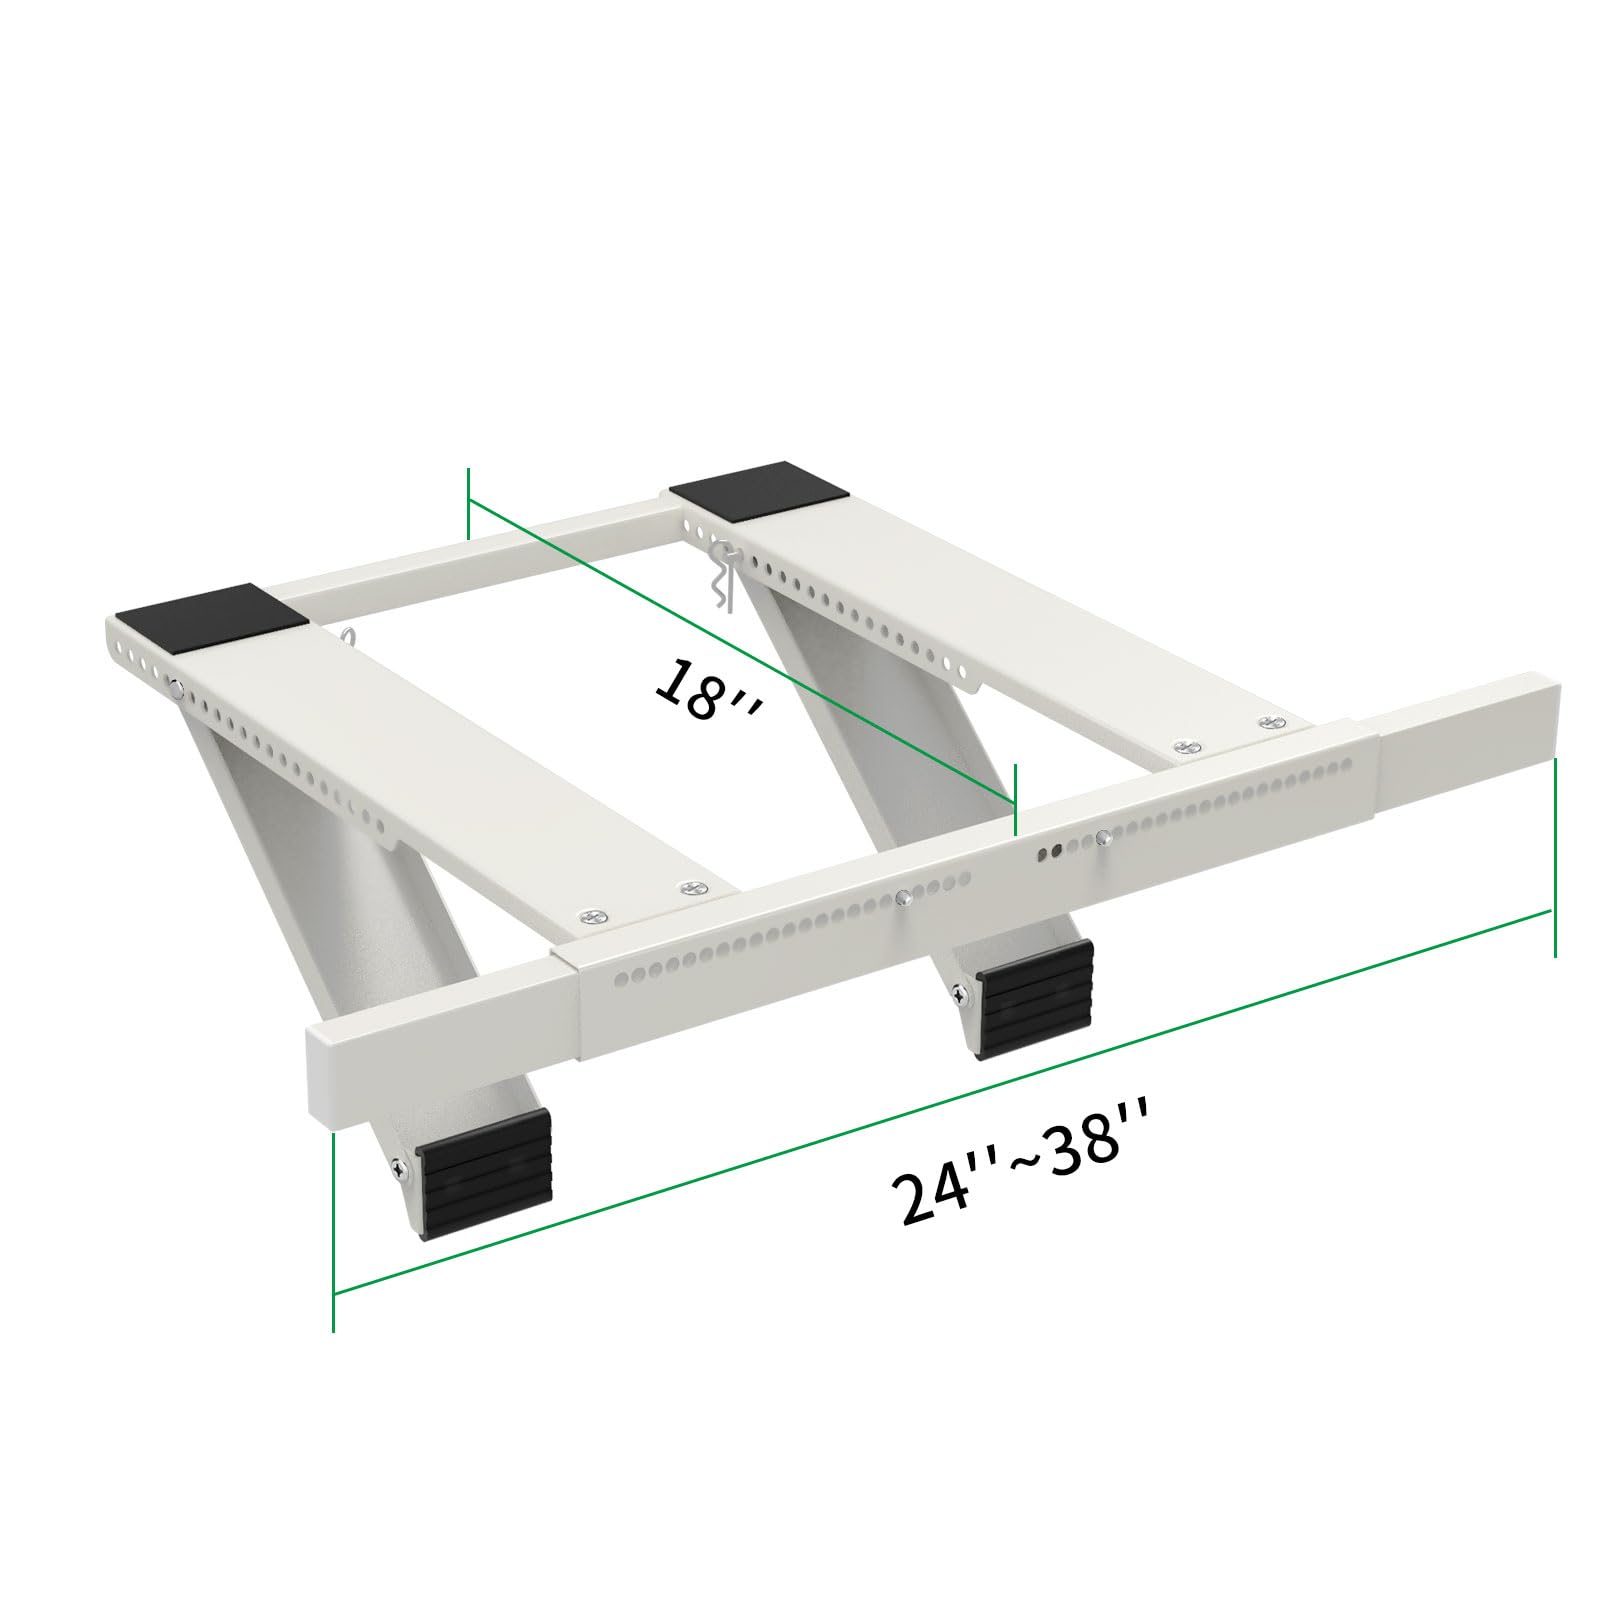
- Adjustable brackets:Change size to fit various windows.
- Fixed brackets:Made for specific window sizes, very stable.
Measuring Your Window
Measure your window before picking a bracket. Get the width and height of the window frame. Check the depth if the bracket will sit inside the window.
Measure twice to avoid mistakes. The bracket must fit tightly and support the air conditioner without gaps or wobbling.
- Measure window width from inside edge to edge.
- Measure window height from sill to top frame.
- Check window depth to fit bracket thickness.
- Note any obstructions or window features.
Material Considerations
Brackets come in different materials. Choose one that lasts and holds the air conditioner securely. The material also affects how much weight the bracket can carry.
- Steel brackets:Strong and durable, resist bending.
- Aluminum brackets:Lightweight and rust-resistant.
- Plastic brackets:Less strong, good for small units.
- Galvanized brackets:Coated to prevent rust and corrosion.
Tools And Materials Needed
Installing an air conditioner window bracket requires the right tools and materials. Using proper gear makes the job safer and easier.
This guide covers the essential tools, safety gear, and additional supplies you will need to install the bracket correctly.
Essential Tools
You need a few basic tools to install the window bracket. These tools help you measure, drill, and secure the bracket firmly.
- Measuring tape to get exact dimensions
- Power drill with drill bits for holes
- Screwdriver to tighten screws
- Level to ensure the bracket is straight
- Hammer for any light adjustments
Safety Gear
Safety is important during installation. Wear protective gear to avoid injuries from tools and debris.
- Safety glasses to protect your eyes
- Work gloves to protect your hands
- Dust mask to avoid breathing dust
- Closed-toe shoes for foot protection
Additional Supplies
Besides tools and safety gear, some extra supplies help finish the job smoothly. These materials secure the bracket and protect your window.
- Window bracket kit with screws and anchors
- Weather stripping to seal gaps
- Silicone sealant to prevent water leaks
- Wood shims to level the bracket if needed
Preparing The Window Area
Before installing the air conditioner window bracket, prepare the window area carefully. This will ensure the bracket fits well and stays secure.
Preparing the space helps avoid damage and keeps the installation safe. Focus on clearing, cleaning, and checking the window frame.
Clearing The Space
Remove all objects around the window to have enough room for the installation. This makes the process easier and safer.
- Take down curtains or blinds near the window.
- Move furniture away from the window area.
- Clear any plants or decorations on the window sill.
- Ensure the window can open fully without obstacles.
Cleaning The Window Frame
Clean the window frame to remove dust, dirt, and old paint. A clean surface helps the bracket stick better and prevents damage.
- Use a brush or vacuum to remove loose dirt.
- Wipe the frame with a damp cloth and mild detergent.
- Dry the frame completely before installation.
- Remove any peeling paint or rust with sandpaper.
Checking For Damage
Inspect the window frame for cracks, rot, or weak spots. Damaged areas can cause the bracket to fail.
| Damage Type | Signs to Look For | Action Needed |
| Cracks | Visible lines or splits in wood or metal | Fill cracks with sealant or replace frame parts |
| Rot | Soft, crumbly wood and discoloration | Replace rotten sections before installing |
| Loose Joints | Wobbly or shifting frame parts | Tighten screws or reinforce with brackets |
Installing The Bracket
Installing the air conditioner window bracket is an important part of the setup. The bracket holds the unit safely in place. Follow the steps carefully to ensure a secure fit.
This guide covers marking drill points, drilling holes, and securing the bracket.
Marking Drill Points
Begin by placing the bracket on the window frame. Align it to the desired position where the air conditioner will sit. Use a pencil to mark the spots where you will drill holes.
- Hold the bracket firmly against the window frame.
- Check that the bracket is level before marking.
- Mark all the holes on the bracket using a pencil.
- Double-check the marks for accuracy.
Drilling Holes
Next, drill holes at the marked points. Use a drill bit that matches the size of the screws provided. Drill slowly to avoid damaging the window frame.
| Tool | Use |
|---|---|
| Drill | Create holes in window frame |
| Drill bit | Match size to screws |
| Safety glasses | Protect eyes while drilling |
Securing The Bracket
After drilling, attach the bracket with screws. Tighten the screws to hold the bracket firmly. Check that the bracket does not move.
- Place the bracket over the drilled holes.
- Insert screws through the bracket holes.
- Use a screwdriver to tighten the screws.
- Ensure the bracket is stable and secure.
Mounting The Air Conditioner
Mounting your air conditioner window bracket correctly ensures the unit works well and stays safe. This guide covers how to position the unit, secure it to the bracket, and seal gaps.
Follow these simple steps to make sure your air conditioner fits tightly and operates efficiently.
Positioning The Unit
Place the air conditioner so the back faces outside. The unit should rest firmly on the bracket. Make sure it is level to prevent water leaks and improve cooling.
- Lift the unit carefully and set it on the bracket.
- Align the unit so it fits snugly inside the window frame.
- Check that the unit is level from side to side and front to back.
- Ensure the weight is evenly supported by the bracket.
Securing The Ac To The Bracket
Use screws or bolts to attach the air conditioner firmly to the bracket. This stops the unit from moving or falling out of place during use.
| Tool | Purpose | Tip |
| Screwdriver | Tighten screws on bracket and unit | Use the correct size to avoid stripping screws |
| Drill | Make holes if needed for bracket mounting | Drill slowly to prevent damage to window frame |
| Level | Check unit alignment | Adjust bracket if the unit is not level |
Sealing Gaps
Seal all gaps around the air conditioner to keep air and insects out. This improves energy efficiency and keeps your room comfortable.
- Weatherstripping foam
- Silicone caulk
- Foam insulation strips
Apply weatherstripping around the sides where the unit meets the window frame. Use silicone caulk for small cracks and foam strips to fill larger gaps. Check that the seal is tight before finishing.

Credit: www.abt.com
Testing And Final Adjustments
After installing the air conditioner window bracket, it is important to test its stability and make final adjustments. This ensures your AC works safely and efficiently.
This part helps you avoid problems like vibrations, poor cooling, or safety risks. Follow these steps carefully for best results.
Checking Stability
Check if the window bracket is firmly fixed to the window frame. Make sure it does not wobble or move when you push it gently.
Look under the bracket and around the screws for any gaps or loose parts. Tighten screws if needed to secure the bracket better.
- Push the bracket lightly from different sides
- Look for any movement or noise
- Tighten all screws and bolts
- Ensure the bracket sits flat against the window
Powering On The Ac
Plug in your air conditioner and switch it on. Listen for any strange sounds like rattling or buzzing.
Check if the AC starts cooling the room properly. If it does not turn on, check the power source and connections again.
- Plug in the AC unit
- Turn on the power switch
- Listen for unusual noises
- Feel for cool air after a few minutes
Adjusting For Efficiency
Adjust the angle of the AC unit slightly to improve airflow. Make sure the unit is level so it drains water properly.
Check the window seal around the bracket. Add weather stripping if you see gaps to keep cool air inside and hot air out.
- Tilt the unit slightly downward outside
- Use a level tool to check balance
- Seal gaps with foam or weather stripping
- Test cooling after adjustments
Maintenance Tips
Keeping your air conditioner window bracket in good shape helps it last longer. Proper care prevents damage and keeps the unit safe.
Follow simple maintenance tips to ensure your bracket stays strong and works well every season.
Regular Cleaning
Clean the window bracket often to remove dirt and dust. Dirt can cause rust and weaken the bracket over time.
Use a damp cloth and mild soap to wipe the bracket. Avoid harsh chemicals that can damage the metal.
- Wipe down the bracket every 2 weeks
- Dry the bracket completely after cleaning
- Check for any stuck debris in the holes or joints
Inspecting The Bracket
Look over the bracket regularly for signs of wear or damage. Small cracks or rust spots can grow bigger if ignored.
Tighten any loose screws and bolts to keep the bracket stable. Replace parts that look weak or broken.
- Check screws and bolts monthly
- Look for rust or corrosion
- Replace bent or cracked parts immediately
Seasonal Removal
Remove the bracket during off-seasons if you do not use the air conditioner. This helps protect it from weather damage.
Store the bracket in a dry place until you need it again. Clean it before storing to prevent rust.
- Detach the bracket carefully to avoid bending
- Clean and dry before storage
- Store in a cool, dry area
Credit: www.amazon.com

Credit: thelenmechanical.com
Frequently Asked Questions
How Do I Install An Air Conditioner Window Bracket?
First, measure your window and bracket. Attach the bracket securely to the window frame. Follow the manufacturer’s instructions carefully for stability and safety.
What Tools Are Needed To Install Window Ac Brackets?
You will need a drill, screwdriver, level, measuring tape, and screws. These tools help ensure a secure and accurate installation.
Can I Install A Window Bracket Without Professional Help?
Yes, you can install it yourself with proper tools and instructions. Follow safety guidelines and double-check measurements for best results.
How To Ensure The Window Bracket Supports The Ac Weight?
Check the bracket’s weight rating matches your AC unit. Use sturdy screws and install into solid window frame parts for maximum support.
Conclusion
Installing an air conditioner window bracket is simple with the right steps. Follow the guide carefully. Safety comes first. Ensure the bracket is secure before placing the unit. Double-check all screws and fittings. This prevents accidents and ensures stability. A properly installed bracket keeps your air conditioner steady.
Enjoy a cool, comfortable room with peace of mind. Regular maintenance extends the bracket’s lifespan. Check periodically for any signs of wear or damage. With proper installation, you ensure a safe and efficient cooling solution. Stay cool and safe!