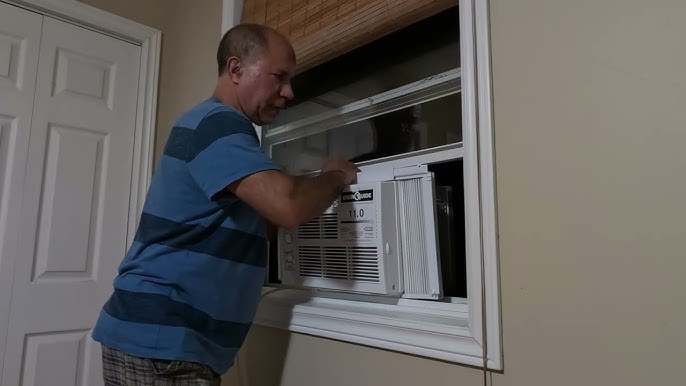
Are you tired of feeling the heat inside your home? Installing a window air conditioner in your wall can be a game-changer for your comfort.
But you might wonder, is it something you can do yourself? The good news is—you absolutely can. With the right steps, tools, and a little patience, you’ll have cool, refreshing air flowing in no time. Keep reading, and I’ll guide you through the simple process to make your space chill and comfortable without breaking the bank.
Your perfect cool zone is just a few easy steps away!

Credit: archexteriors.com
Tools And Materials Needed
Installing a window air conditioner in a wall needs the right tools and materials. This guide helps you gather everything before starting.
Having all items ready makes the process smoother and safer. Check the list carefully to avoid delays.
Basic Tools Required
Use these tools to measure, cut, and secure the air conditioner in the wall.
- Measuring tape
- Electric drill with bits
- Level
- Screwdriver set
- Stud finder
- Utility knife
- Hammer
- Caulking gun
Materials Needed For Installation
These materials help hold the air conditioner in place and seal gaps.
| Material | Purpose |
| Wall sleeve or mounting bracket | Supports the air conditioner unit |
| Wooden or metal frame | Secures the unit inside the wall |
| Insulation foam | Fills gaps to prevent air leaks |
| Weatherproof caulk | Seals around the unit to keep moisture out |
| Sheet metal screws | Fasten the unit and frame securely |
| Protective gloves | Ensure hand safety during work |
Safety Equipment
Protect yourself by using proper safety gear during installation.
- Safety goggles
- Dust mask
- Work gloves
- Ear protection (if using loud tools)
Credit: www.angi.com
Choosing The Right Wall Location
Installing a window air conditioner in a wall needs careful planning. Choosing the right spot helps the unit work well and last longer.
This guide covers key points to check before installation. Focus on wall thickness, electrical needs, and sunlight exposure.
Measuring Wall Thickness
Measure your wall thickness before installation. The unit needs enough space to fit securely and work properly.
| Wall Type | Recommended Thickness |
| Brick or Concrete | 8 to 12 inches |
| Wood Frame | 6 to 10 inches |
| Drywall Only | Not suitable |
Checking Electrical Requirements
Check your electrical system before installing the air conditioner. The unit needs the right power and outlet to run safely.
- Confirm voltage matches the air conditioner’s needs.
- Use a dedicated circuit for the unit.
- Ensure the outlet is near the installation spot.
- Check if a circuit breaker or fuse is in place.
Considering Sunlight Exposure
Avoid walls that get direct sunlight all day. Too much sun makes the air conditioner work harder and wastes energy.
Choose a shaded wall or one with minimal afternoon sun. This helps keep your room cooler and lowers electricity bills.
Preparing The Wall Opening
Installing a window air conditioner in the wall needs careful preparation. The wall opening must fit the unit properly. This guide helps you prepare the wall opening safely and correctly.
Follow these steps to mark, cut, and reinforce the wall opening. Proper work will keep your air conditioner secure and efficient.
Marking The Cut Area
Measure the air conditioner’s dimensions before marking. Use a pencil and a level to draw the cut lines. Mark the outline clearly on the wall surface.
- Measure the unit width, height, and depth
- Mark the top and bottom edges on the wall
- Use a level to ensure straight lines
- Double-check measurements before cutting
Cutting The Wall Safely
Wear safety goggles and gloves before cutting. Use the right tools like a saw or utility knife. Cut slowly along the marked lines to avoid damage.
- Put on safety gear: goggles, gloves, and mask
- Score the wall along the marked lines with a utility knife
- Cut through drywall or paneling carefully
- Remove any debris and clean the edges
Reinforcing The Opening
Reinforce the opening to hold the air conditioner’s weight. Use wooden frames or metal brackets inside the wall. Secure the frame tightly around the cut area.
| Material | Purpose | Installation Tips |
|---|---|---|
| Wooden studs | Provide strong support | Use 2×4 lumber and attach with screws |
| Metal brackets | Prevent frame movement | Install at corners and secure firmly |
| Foam insulation | Seal gaps and reduce vibration | Apply around the frame edges |
Installing The Support Bracket
Installing the support bracket is a key step to secure your window air conditioner in the wall. The bracket holds the unit safely in place and supports its weight.
This guide covers how to position the bracket and secure it to the wall for a strong installation.
Positioning The Bracket
Place the support bracket just below the window opening. Make sure it is level and centered. The bracket must extend far enough out to hold the air conditioner firmly.
- Measure the width of the air conditioner unit.
- Mark the wall where the bracket will sit.
- Use a level tool to ensure the bracket will be straight.
- Check that the bracket edges align with the window frame.
Securing The Bracket To Wall
Attach the bracket to the wall using strong screws and anchors. The bracket must hold the air conditioner weight without bending or moving.
| Material | Recommended Fasteners | Notes |
| Wood Frame | Wood screws (3-inch) | Pre-drill holes to avoid splitting |
| Concrete/Brick | Masonry anchors with screws | Use a hammer drill for holes |
| Drywall with Studs | Screws into studs | Locate studs with a stud finder |
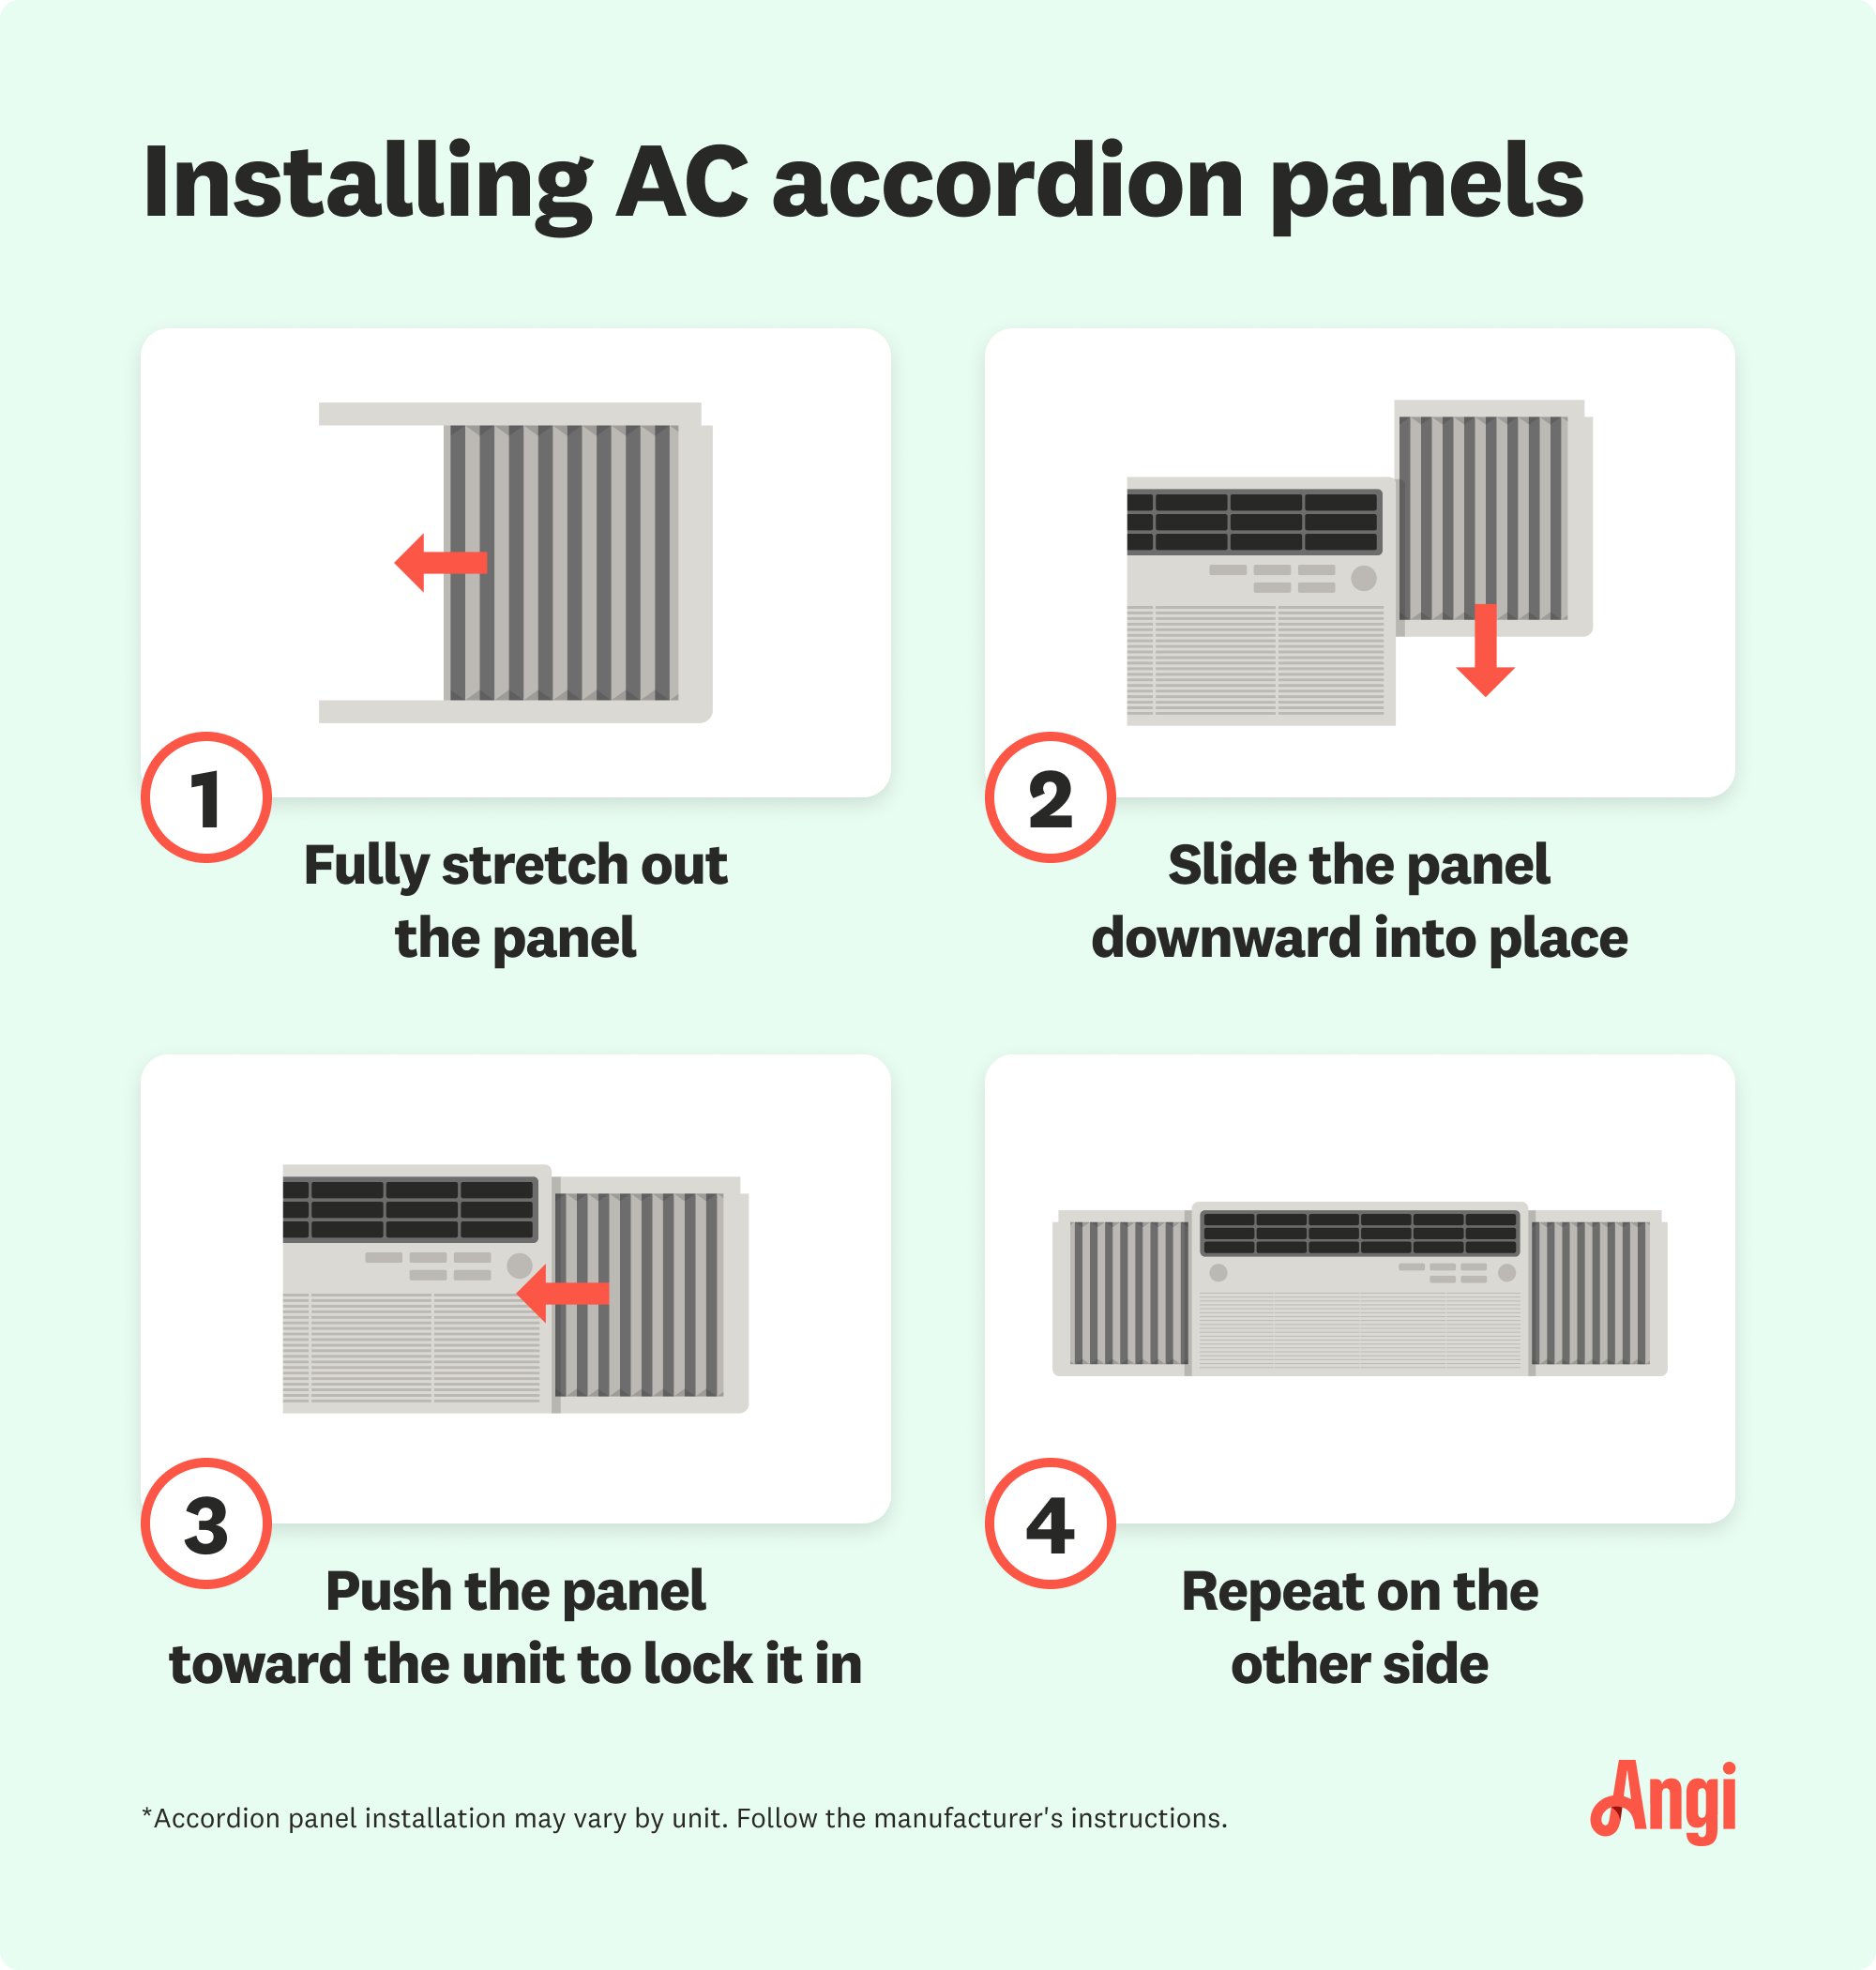
Fitting The Air Conditioner Unit
Installing a window air conditioner in a wall needs careful fitting. A good fit keeps the unit secure and efficient.
This guide explains how to place the unit and seal gaps for proper installation.
Placing The Unit Into The Wall Opening
Start by lifting the air conditioner carefully. Align it with the wall opening made for the unit.
Push the unit slowly into the opening. Make sure it fits snugly without forcing it.
- Check that the unit sits level and straight
- Ensure the back part extends outside the wall
- Support the unit to prevent it from falling
- Use screws or brackets to secure the unit if needed
Sealing Gaps And Insulation
After fitting the unit, seal the gaps around it. This stops air leaks and keeps the room cool.
Use foam insulation or weatherstripping to fill spaces. Check that the seal is tight and complete.
- Apply foam sealant around the edges
- Use weatherstripping for smaller gaps
- Cover with trim or molding to finish
- Inspect the seal to avoid drafts
Connecting Electrical Components
Installing a window air conditioner in a wall needs careful electrical connection. This ensures the unit runs safely and efficiently.
Follow the correct steps to wire the unit and test the electrical connection before use.
Wiring The Unit Safely
Turn off the main power before starting any wiring work. Use a voltage tester to confirm no power flows to the wires.
- Use wires that match the air conditioner’s specifications.
- Connect the ground wire to the unit’s grounding screw.
- Secure all wire connections with wire nuts or terminal blocks.
- Follow the wiring diagram found in the air conditioner’s manual.
- Keep wires away from sharp edges to avoid damage.
Testing The Electrical Connection
After wiring, test the electrical connection to prevent hazards and ensure proper function.
| Test | Purpose | How to Perform |
| Voltage Test | Check correct voltage supply | Use a multimeter at the plug or terminal |
| Ground Continuity | Verify ground wire connection | Use a continuity tester between ground and unit frame |
| Power On | Confirm unit powers up safely | Turn on the circuit breaker and switch on the unit |
Final Adjustments And Maintenance Tips
Installing a window air conditioner in the wall is only part of the job. You must make final adjustments to ensure it works well. Regular maintenance keeps the unit running longer and cools better.
Proper care helps you avoid costly repairs. Follow these simple tips to keep your air conditioner in top shape.
Leveling The Unit
Check if the air conditioner is level after installation. A slight tilt toward the outside helps water drain properly. Use a carpenter’s level to test the unit’s position.
If the unit is not level, adjust the brackets or shims until it is. This prevents water leaks and damage to the wall and unit.
- Place a level on top of the unit
- Look for a slight tilt outward, about 1/4 inch
- Add shims under the unit if needed
- Tighten screws to secure the position
Regular Cleaning And Filters Replacement
Clean the air filter every month during the cooling season. A dirty filter blocks airflow and reduces cooling power. Remove the filter and wash it with mild soap and water.
Replace the filter if it is torn or very dirty. Keeping the filter clean helps improve air quality and lowers energy use.
- Turn off and unplug the unit before cleaning
- Remove the front panel to access the filter
- Wash the filter gently and let it dry completely
- Replace the filter every 3-6 months or as needed
- Wipe the exterior with a damp cloth regularly

Credit: thelenmechanical.com
Frequently Asked Questions
How Do I Prepare The Wall For Window Ac Installation?
Measure the wall thickness and cut a precise opening. Ensure the wall can support the unit’s weight. Clear debris and level the space before mounting.
What Tools Are Needed To Install A Window Ac In A Wall?
You’ll need a drill, screwdriver, measuring tape, level, saw, and mounting brackets. Safety gear like gloves and goggles is essential.
How Do I Seal Gaps After Installing The Ac Unit?
Use weatherproof caulk or foam sealant around the edges. This prevents air leaks and improves energy efficiency.
Can I Install A Window Ac Without Professional Help?
Yes, with proper tools and instructions, most can install it. However, ensure electrical connections follow safety codes.
Conclusion
Installing a window air conditioner in a wall isn’t hard. Just follow clear steps. Measure carefully. Choose a solid spot. Read the manual. Use the right tools. Secure it well. Check for gaps to seal. This ensures cool air stays inside.
Stay safe while working. A properly installed unit cools your room better. Saves energy, too. Enjoy a comfortable space during hot days. You’re now ready to enjoy a cooler, more pleasant home. With these steps, you can confidently install your AC.
Cool air is just a few steps away.