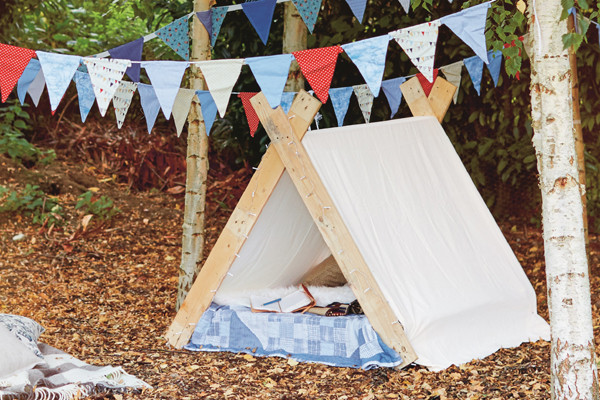
Have you ever wanted to create your own cozy shelter without buying an expensive tent? Making a homemade tent can be easier than you think.
Imagine having a personalized space that fits your needs perfectly—whether you’re camping, playing in the backyard, or just needing a quiet spot. In this guide, you’ll discover simple steps and tips to build your own tent using materials you likely already have.
Keep reading, and you’ll soon have a fun, practical shelter made just by you. Ready to start? Let’s dive in!
Materials Needed
Making a homemade tent requires some basic materials. These materials help you build a strong and safe shelter.
Choosing the right materials is important to make your tent last and protect you from weather.
Choosing The Right Fabric
Pick fabric that is strong and water-resistant. It should keep rain and wind out.
Common choices include canvas, nylon, and polyester. Each has different benefits.
- Canvas:Very durable and breathable but heavy.
- Nylon:Lightweight and dries fast, good for hiking.
- Polyester:Resists stretching and sun damage well.
Essential Tools
You need tools to cut, sew, and assemble your tent fabric. These tools make the job easier.
- Scissors or fabric cutter for precise cuts
- Needle and strong thread for sewing fabric pieces
- Measuring tape to get exact fabric sizes
- Marker or chalk to mark cutting lines
- Hammer and stakes to secure the tent to the ground
Optional Accessories
Accessories can add comfort and make your tent easier to use. They are not always needed.
- Rope or cord for extra support and securing the tent
- Zippers or Velcro strips to close tent openings
- Waterproof spray to improve fabric water resistance
- Ground tarp to protect the tent floor
Selecting A Design
Choosing the right design is important when making a homemade tent. The design affects how easy it is to build and how well it protects you.
Think about where you will use the tent and how many people will need to fit inside. This will help you decide which style works best.
Simple A-frame Tent
The A-frame tent is one of the easiest designs to make. It uses two poles or sticks to create a triangle shape, with a tarp or fabric stretched over it.
- Use two sturdy poles or branches
- Place them upright in the ground close together
- Stretch a tarp or canvas over the poles
- Secure the edges with stakes or rocks
- This design is stable and sheds rain well
Tarp Shelter
A tarp shelter is very flexible and quick to set up. You can adjust the shape depending on the weather and space.
| Type | Setup Style | Pros | Cons |
|---|---|---|---|
| Lean-To | One side tied to a tree, other side staked to ground | Easy to build, good wind protection | Limited floor space |
| A-Frame Tarp | Tarp over two poles forming a ridge line | Good rain runoff, simple | Needs poles or trees |
| Flat Tarp | Tarp stretched flat and low to ground | Quick setup, good for sun shade | Poor rain protection |
Pop-up Style
Pop-up tents fold out and stand by themselves. You can make a simple frame with flexible rods and cover it with fabric.
Here are key points to consider for a pop-up style:
- Use flexible rods like fiberglass or thin wood
- Connect rods at the top to form a dome shape
- Cover the frame with lightweight fabric or tarp
- Add ground stakes to keep it stable
Preparing The Fabric
Preparing the fabric is a key step in making a homemade tent. It ensures the tent will be sturdy and comfortable. Proper fabric work helps the tent last through different weather.
This section covers measuring and cutting the fabric, reinforcing the edges, and adding ventilation. Each part is important for a strong and usable tent.
Measuring And Cutting
Measure the fabric carefully before cutting. Accurate measurements save material and prevent mistakes. Use a tape measure and mark the fabric clearly.
- Measure the length and width needed for each tent panel.
- Mark straight lines with chalk or a fabric marker.
- Double-check all measurements before cutting.
- Cut slowly with sharp fabric scissors to get clean edges.
Reinforcing Edges
Edges of the tent fabric face the most stress. Reinforce them to avoid tearing. Use strong stitching and extra fabric strips on the edges.
| Edge Reinforcement Method | Description |
| Double Folding | Fold edge twice and sew for strength |
| Bias Tape | Attach tape along edges to protect fabric |
| Grommets | Install metal rings for tie points |
| Extra Stitching | Use heavy-duty thread to sew edges |
Adding Ventilation
Good airflow helps reduce heat and moisture inside the tent. Add vents to the fabric to keep air moving. Place vents in spots that avoid rain entry.
Here are common vent types:
- Mesh windows with flaps
- Small fabric openings with covers
- Zip vents on sides or top
Cut fabric carefully for vents and sew mesh or covers securely.

Credit: www.creativegreenliving.com
Assembling The Tent
Assembling your homemade tent takes careful work. You need to join parts so it stays strong.
Start by sewing the fabric, then add door flaps. Finish by installing poles or supports.
Sewing And Fastening
Sew the tent fabric pieces together using strong thread. Use double stitches for extra strength.
Fasten corners and edges with reinforced stitches or fabric glue. This keeps the tent tight.
- Use a sewing machine or needle for hand sewing
- Make seams at least one inch wide
- Reinforce stress points with extra stitches
- Apply fabric glue on seams for water resistance
Creating Door Flaps
Cut door flaps from the same fabric. Make sure they are large enough to enter and exit easily.
Sew the flaps onto the tent body. Leave space to roll or fold the flap open.
- Add velcro strips or buttons to hold the flap open
- Use double fabric for door flaps to block wind
- Hem the edges to prevent fabric fraying
Installing Poles Or Supports
Use strong poles or sticks as supports. Place them at the corners and middle of the tent.
Insert poles into fabric sleeves or tie them with ropes. This helps the tent keep its shape.
- Choose poles that fit the tent size
- Secure poles tightly to avoid slipping
- Check stability before using the tent
Setting Up The Tent
Setting up a homemade tent takes some care to ensure it is safe and comfortable. You need to plan where to place it and how to keep it steady.
This guide shows how to choose a good spot, secure the tent with stakes and ropes, and adjust it for the best stability.
Choosing The Right Location
Pick a flat and dry area to set up your tent. Avoid places near water or where wind can blow strongly.
Clear the ground of rocks, sticks, and anything sharp. This helps protect the tent floor and makes sleeping easier.
- Find flat ground to keep the tent stable
- Stay away from low spots that can collect water
- Look for natural windbreaks like trees or hills
- Remove sharp objects from the area
Securing With Stakes And Ropes
Use stakes to hold the tent corners firmly in the ground. Drive them in at an angle for better grip.
Tie ropes from the tent to the stakes. Pull the ropes tight to keep the tent stretched and stable.
- Place stakes about 6-12 inches from the tent edge
- Push stakes deep into the soil at a 45-degree angle
- Tie strong knots to avoid slipping
- Check that ropes are tight but not too tight to damage fabric
Adjusting For Stability
After staking, check the tent’s shape and tension. Adjust ropes to remove sagging and keep the tent firm.
Use extra ropes and stakes if needed. This helps the tent resist wind and stay in place during rain.
- Tighten ropes evenly on all sides
- Add extra stakes if the ground is soft
- Re-check knots after windy weather
- Make small adjustments for a smooth tent surface

Credit: parade.com
Maintaining Your Tent
Taking care of your homemade tent helps it last longer. Simple steps keep it clean and strong. Good maintenance keeps you safe and comfortable outdoors.
Regular checks and care stop small problems from getting worse. Follow these tips to keep your tent in great shape.
Cleaning Tips
Cleaning your tent after each use removes dirt and prevents damage. Use gentle methods to protect the fabric and seams.
Always dry your tent completely before storing it. Wet fabric can cause mold and bad smells.
- Shake out dirt and leaves outside
- Use a soft brush or cloth to clean
- Wash with mild soap and water only
- Rinse well to remove all soap
- Air dry in shade, not direct sunlight
Repairing Tears And Holes
Fix small tears quickly to avoid bigger damage. Use patch kits made for tent fabric or strong waterproof tape.
Check seams and zippers often. Tighten loose threads and replace broken parts to keep your tent safe and dry.
- Clean area around the tear before repair
- Cut patch slightly larger than tear
- Apply glue or tape smoothly without bubbles
- Let repair dry fully before use
- Test repaired area gently to ensure hold
Storage Advice
Store your tent in a cool, dry place to prevent mold and damage. Avoid tight packing to keep fabric fibers healthy.
Use a large breathable bag instead of small stuff sacks. This helps air flow and keeps your tent fresh until next use.
- Clean and dry tent completely before storing
- Fold loosely to avoid creases and stress points
- Keep away from direct sunlight and moisture
- Check tent every few months for any issues
- Repair any damage before next trip

Credit: www.creativegreenliving.com
Frequently Asked Questions
How Do You Choose Materials For A Homemade Tent?
Choose lightweight, durable, and waterproof materials like nylon or canvas. Use poles or sturdy sticks for the frame. Select materials that provide good weather resistance and ventilation for comfort.
What Tools Are Needed To Make A Homemade Tent?
Basic tools include scissors, a measuring tape, a sewing kit, and strong ropes. You may also need a hammer and stakes to secure the tent to the ground.
How Do You Ensure A Tent Is Waterproof?
Use waterproof fabric or apply a waterproof spray on the tent material. Seal seams with waterproof tape or seam sealer to prevent water leakage during rain.
How Can I Make My Homemade Tent Stable?
Secure the tent with stakes firmly in the ground. Use guy lines attached to the tent corners and poles for extra support and wind resistance.
Conclusion
Crafting a homemade tent is simple and rewarding. You just need some basic materials and a bit of creativity. Follow the steps to build your cozy shelter. A homemade tent offers fun, adventure, and a sense of achievement. It’s perfect for backyard camping or a day at the park.
Enjoy the experience of building and using your tent. Remember, the key is to keep it simple. Practice makes perfect, so don’t worry about making mistakes. Have fun with your creation and enjoy the outdoors!