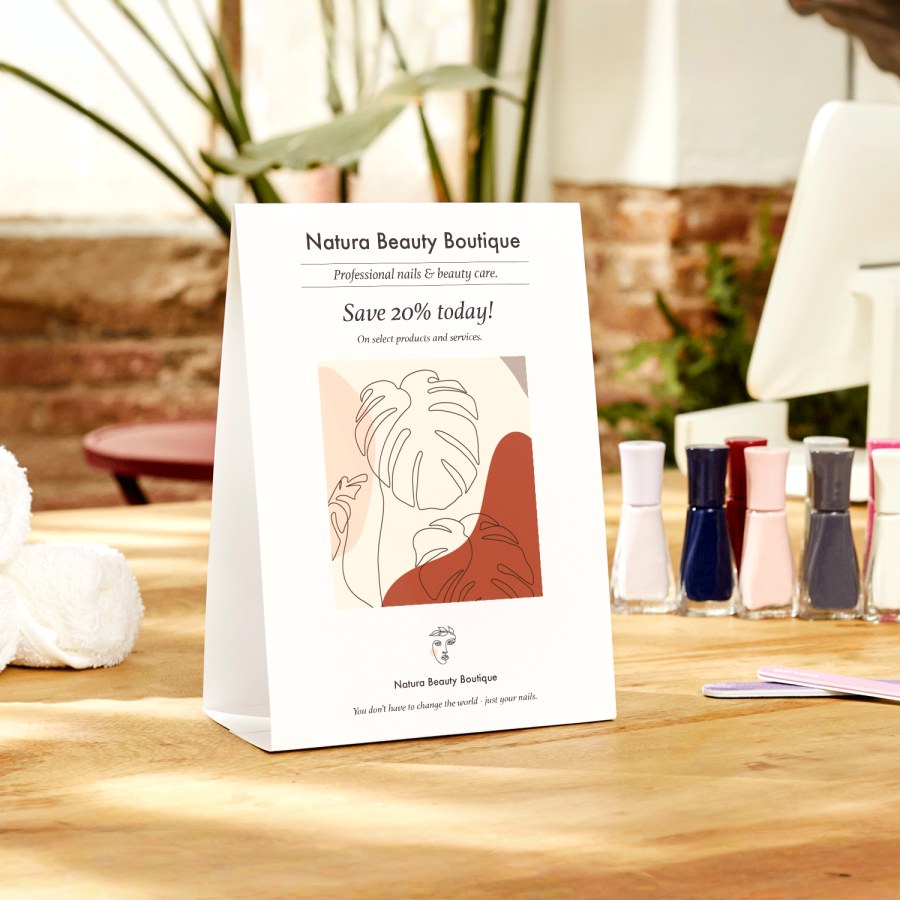
Are you looking to create eye-catching tent cards that grab attention and make your message stand out? Whether it’s for a special event, a business promotion, or a personal gathering, knowing how to print tent cards the right way can save you time and money.
In this guide, you’ll discover simple steps and insider tips that will help you design and print tent cards that look professional and impress everyone. Ready to make your ideas come to life? Let’s dive in and unlock the secrets to perfect tent cards you’ll be proud to display.

Credit: essexbanners.com
Choosing The Right Paper
Picking the right paper is key for printing tent cards. The paper affects how the card looks and feels.
Good paper choice helps your tent card stand strong and catch attention easily.
Paper Types For Tent Cards
Tent cards use different paper types. Cardstock is a popular choice for its thickness and durability.
- Matte paper has a smooth, non-shiny surface.
- Glossy paper shines and makes colors look bright.
- Recycled paper is eco-friendly and has a natural look.
- Textured paper adds a unique feel to your card.
Weight And Finish Options
Paper weight shows how thick the paper is. Heavier paper feels stronger and lasts longer.
| Weight | Description | Use |
| 80-100 lb | Lightweight, flexible | Temporary tent cards |
| 110-130 lb | Medium weight, sturdy | Standard tent cards |
| 150-200 lb | Heavyweight, very durable | Long-lasting tent cards |
Finish options change the look and feel of the card surface. Choose based on style and use.
- Matte finish reduces glare and looks elegant.
- Glossy finish makes colors pop with shine.
- Satin finish gives a soft sheen, between matte and glossy.
- UV coating adds protection and extra gloss.

Credit: www.typecalendar.com
Designing Your Tent Card
Designing a tent card needs clear planning. It helps to create an attractive and easy-to-read card.
Good design makes your message stand out. Focus on size, text, images, and templates for best results.
Selecting Dimensions And Layout
Choose the right size for your tent card. Common sizes include 4×6 inches and 5×7 inches.
Think about the layout. Decide if you want a simple fold or a more complex shape.
- Pick a size that fits your space
- Use a fold that makes the card stable
- Keep enough space for text and images
Incorporating Text And Images
Use clear and short text. Make sure it is easy to read from a distance.
Choose images that support your message. Use high-quality pictures for a sharp look.
- Use large fonts for important information
- Limit text to key points only
- Place images where they do not block text
Using Templates For Accuracy
Templates help keep your design neat and correct. They show where to place text and images.
Use templates from your printer or design software. This reduces mistakes and saves time.
- Download a template that matches your card size
- Follow the guide lines for safe areas
- Check your design on the template before printing
Setting Up Your Printer
Printing tent cards needs a good printer setup. Proper setup helps your cards look neat and clear.
This guide covers printer compatibility, print settings, and paper loading. Follow these tips for best results.
Printer Compatibility
Not all printers work well with tent cards. Check if your printer supports thick or specialty paper.
- Look for printers with a manual feed slot.
- Inkjet printers usually handle thick paper better.
- Laser printers may need special toner for heavy stock.
- Check the maximum paper thickness your printer can handle.
Adjusting Print Settings
Setting the printer correctly prevents smudges and misprints. Adjust settings before printing.
| Setting | Recommended Option |
| Paper Type | Cardstock or Heavy Paper |
| Print Quality | High or Best |
| Color Mode | Color or Grayscale |
| Duplex Printing | Off (unless your tent card design needs double-sided print) |
Loading Paper Correctly
Loading paper the right way avoids jams and crooked prints. Follow your printer’s paper guide.
- Use the manual feed tray if available.
- Place tent card paper face down or up as your printer requires.
- Align the paper edges with guides to keep it straight.
- Load one sheet at a time if your printer struggles with thick paper.
Printing The Tent Cards
Printing tent cards needs care to make sure they look good and stand well. Use good paper and the right printer settings to get clear text and images.
Check your design size and layout before printing. This helps avoid wasting paper and ink.
Test Prints And Adjustments
Start with test prints to see how your tent card looks. Print one copy to check colors, alignment, and size.
If the print is not right, adjust the printer settings or your design file. Small changes can make a big difference in quality.
- Check margins to avoid cutting off text
- Adjust color settings for accurate colors
- Make sure text is clear and easy to read
Printing Multiple Copies
Once the test print looks good, print all the copies you need. Use the printer’s batch or multiple copy settings to save time.
Keep the paper aligned and loaded correctly to avoid jams. Check ink or toner levels before printing many cards.
- Set the correct number of copies in the printer menu
- Use high-quality paper for better durability
- Print in batches if your printer can overheat
Avoiding Common Printing Issues
Some problems can happen when printing tent cards. Watch out for paper jams, smudges, and faded colors.
Clean your printer and use the right paper type to prevent these issues. Double-check settings before each print job.
- Use the printer’s recommended paper type and size
- Keep printer heads clean to avoid smudges
- Check ink levels and replace cartridges if low
- Align paper properly to prevent jams
Cutting And Folding Tips
Printing tent cards needs careful cutting and folding. Good techniques give a neat finish. These tips will help you create perfect tent cards.
Follow the right steps to cut straight lines and fold clean edges. This makes your cards look professional and strong.
Tools For Precise Cutting
Use the right tools to get clean cuts. Sharp blades and rulers help avoid jagged edges. A steady hand improves accuracy.
- Use a metal ruler as a guide for cutting
- Choose a craft knife or rotary cutter for best results
- Replace dull blades to prevent tearing
- Cut on a self-healing mat to protect surfaces
- Measure twice before cutting to avoid mistakes
Creating Clean Folds
Folding tent cards requires smooth and sharp creases. This helps the card stand well and look tidy. Use tools to guide the fold line.
| Tool | Use |
|---|---|
| Bone folder | Presses and sharpens folds without tearing |
| Scoring board | Creates a groove to fold easily and accurately |
| Ruler | Helps fold straight lines |
Ensuring Stability
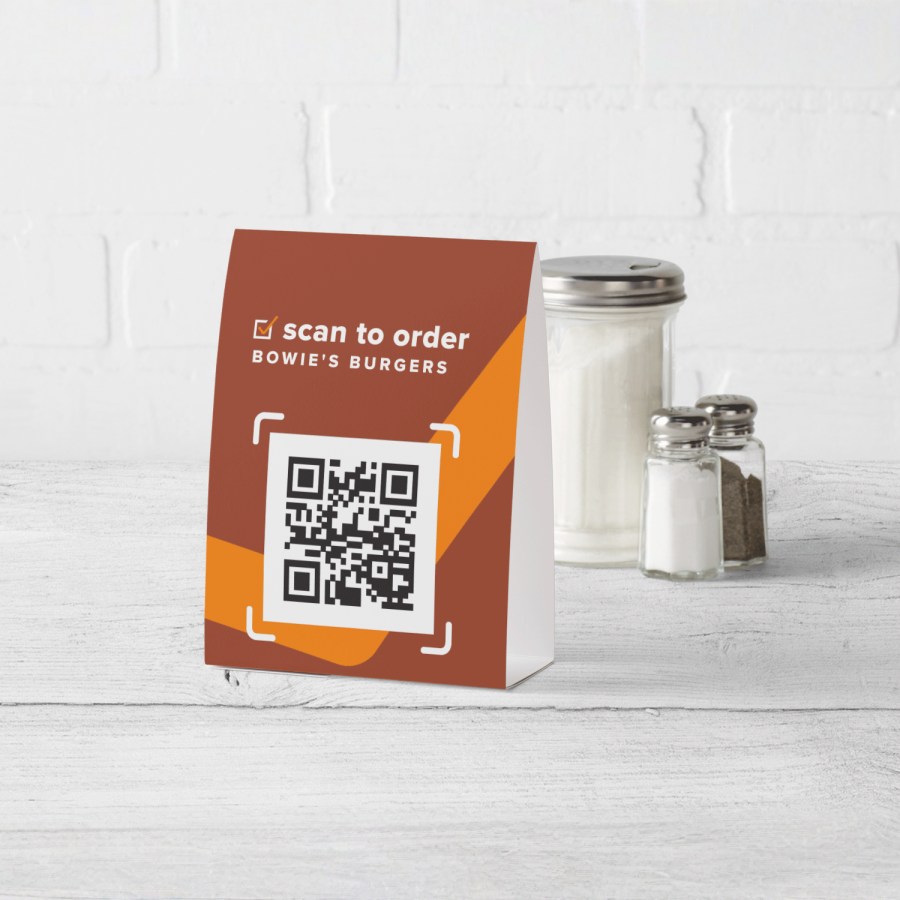
Make sure your tent card stands firmly. Fold the card evenly and check the angles. Proper folds help keep the card stable on flat surfaces.
- Fold the card in half along the scored line
- Press the fold firmly with a bone folder
- Check that both sides align evenly
- Adjust folds slightly if the card leans or tips
- Use heavier paper for better stability
Credit: www.vistaprint.ca
Finishing Touches
Printing tent cards is only part of the process. The finishing touches make them look professional and last longer.
This guide covers coatings, decoration, and storage to keep your tent cards in top shape.
Adding Coatings For Durability
Coatings protect your tent cards from damage and wear. They add strength and water resistance.
- Lamination: Adds a plastic layer for water and scratch protection.
- UV Coating: Protects colors from fading in sunlight.
- Matte Coating: Reduces glare and fingerprints.
- Glossy Coating: Enhances color vibrancy and shine.
Decorative Enhancements
Decorations make your tent cards stand out and catch attention. Simple additions can create a big impact.
| Enhancement | Description | Effect |
| Foil Stamping | Metallic foil applied to text or logos | Shiny and elegant look |
| Embossing | Raised design on the card surface | Creates texture and depth |
| Spot UV | Glossy coating on specific areas | Highlights key design parts |
| Die-Cutting | Custom-shaped cuts for unique edges | Adds creative shapes |
Storage And Handling
Proper storage keeps tent cards clean and undamaged before use. Handle them gently to avoid creases.
- Keep cards flat in a dry, cool place.
- Use protective sleeves or boxes to prevent dust.
- Avoid stacking heavy items on top.
- Handle by the edges to prevent fingerprints.
Frequently Asked Questions
What Materials Are Best For Printing Tent Cards?
Cardstock or thick paper works best for tent cards. It provides durability and a professional look. Choose matte or glossy finish based on your design preference and printing method.
How Do I Design Tent Cards For Printing?
Use a template with correct dimensions and bleed area. Keep text readable with clear fonts and contrasting colors. Include essential information and align elements symmetrically for a balanced design.
Which Printer Settings Suit Tent Card Printing?
Select the highest print quality and appropriate paper type in settings. Use color calibration for accurate colors. Choose double-sided printing if your tent card requires content on both sides.
Can I Print Tent Cards At Home?
Yes, if you have a good quality printer and cardstock. Use proper settings and test print first. For large quantities, professional printing services are recommended for better quality.
Conclusion
Creating tent cards is simple with the right steps. First, choose a clear design. Second, use quality paper for better durability. Third, print using your home printer or a professional service. Finally, fold and set up your cards. These steps ensure your tent cards look professional and appealing.
They help in making your event organized and stylish. Remember, practice makes perfect. Try different designs to find what works best. With these tips, you can confidently create tent cards for any occasion. Enjoy the process and the results!