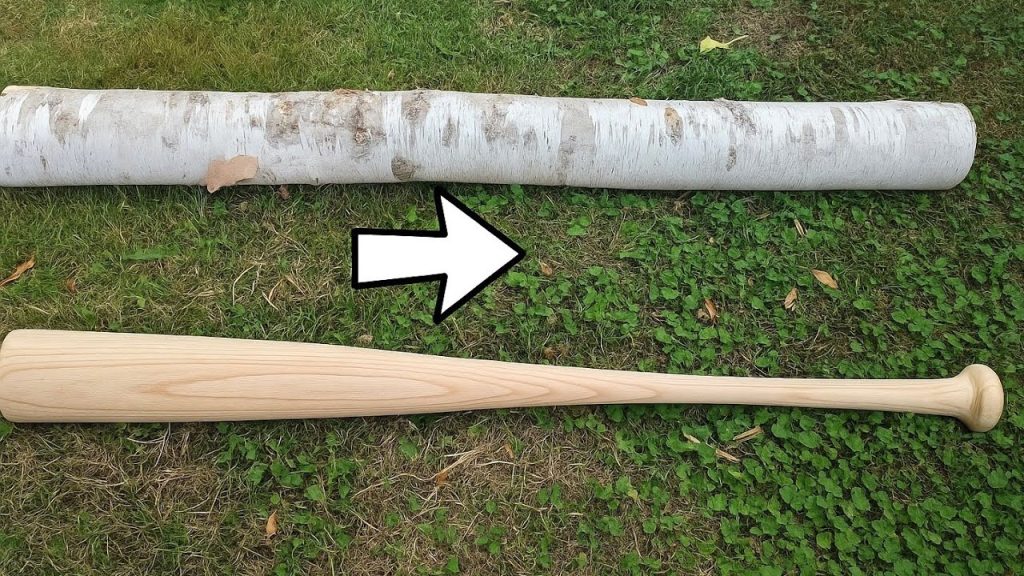
If you’ve ever wondered how to make wood baseball bats with your own hands, you’re in the right place. Imagine holding a bat crafted by you—perfectly balanced, smooth, and ready to hit the ball out of the park.
Making your own bat isn’t just a fun project; it’s a way to connect deeply with the game you love. You’ll discover simple steps and expert tips that will guide you through the process. Whether you’re a beginner or looking to improve your skills, this guide will help you create a bat you can be proud of.
Ready to start? Let’s dive in!
Choosing The Right Wood
Making a wood baseball bat starts with picking the right wood. The wood affects the bat’s strength, weight, and performance.
We will look at types of wood, what makes wood good quality, and where to get the materials.
Types Of Wood
Different woods work well for baseball bats. Some woods are heavier, while others are lighter or stronger.
- Maple: Hard and dense, gives good power and durability.
- Hickory: Very strong and shock resistant but heavier.
- Birch: Flexible and tough, with a good balance of weight.
- Ash: Lightweight and flexible, popular for its feel.
Wood Quality Factors
Good wood has certain qualities that make it better for bats. Look at grain, moisture, and hardness.
| Quality Factor | Description |
|---|---|
| Straight Grain | Lines in the wood should run straight for strength. |
| Low Moisture | Dry wood reduces warping and cracking. |
| Hardness | Hard wood lasts longer and resists dents. |
| Free of Defects | No knots or cracks that weaken the bat. |
Sourcing Materials
Finding the right wood means checking places that sell quality lumber. You want wood cut for sports use.
- Local lumberyards often have hardwood suitable for bats.
- Specialty sports wood suppliers provide certified bat wood.
- Reclaimed wood can be used but check for damage first.
- Online stores offer a wide range of wood types and sizes.
Preparing The Wood Blank
Making a wooden baseball bat starts with preparing the wood blank. The blank is the raw piece of wood that you shape into a bat. Proper preparation ensures the bat is strong and balanced.
This guide covers cutting the blank to size, seasoning and drying it, and marking the bat shape before turning.
Cutting To Size
Start by selecting a straight-grained wood blank. Cut it to the right length and diameter. This will make shaping easier later.
- Measure the length needed for your bat
- Cut the blank slightly longer than the final bat
- Check the diameter matches your bat design
- Remove any knots or defects if possible
Seasoning And Drying
Seasoning removes moisture from the wood. Dry wood is stronger and less likely to crack. It takes time but is very important.
| Method | Description | Time Needed |
| Air Drying | Stack wood in a dry place with good air flow | 6-12 months |
| Kiln Drying | Use a controlled heat chamber to dry wood quickly | 2-4 weeks |
| Microwave Drying | Use microwave pulses for small blanks | Several minutes |
Marking The Bat Shape
Marking the shape guides your turning. Use a pencil and ruler to draw outlines clearly on the blank.
Here are key marks to add:
- Handle length and diameter
- Barrel length and diameter
- Taper lines connecting handle to barrel
- End cap or knob shape
Shaping The Bat
Shaping a wooden baseball bat is an important step. It gives the bat its final look and feel.
This process requires skill and the right tools to make the bat smooth and balanced.
Using A Lathe
A lathe spins the wood block while you shape it. This helps you make a round and even bat.
You hold sharp tools against the spinning wood to remove extra wood and form the bat’s shape.
Creating The Barrel
The barrel is the thick part of the bat. It needs to be smooth and wider than the handle.
Use the lathe to carefully shape the barrel. Check the size to match the needed diameter.
- Start shaping from the thick end
- Keep the surface even and round
- Measure often to avoid making it too thin
Forming The Handle And Knob
The handle must be thinner than the barrel. It should feel comfortable to hold.
The knob is the small flare at the end of the handle. It stops the bat from slipping in the hands.
- Shape the handle with smooth curves
- Make the knob slightly wider than the handle
- Use sanding tools to finish the surface

Credit: www.ebay.ca
Sanding And Smoothing
Sanding and smoothing wood baseball bats makes them safe and comfortable to use. It removes rough spots and shapes the bat evenly. Proper sanding also prepares the wood for finishing.
This part of bat making takes patience and the right tools. Using the correct sandpaper and techniques will give the bat a smooth, professional look.
Choosing Sandpaper Grits
Select sandpaper grit based on how rough the bat surface is. Start with coarse grit to remove big bumps. Then use finer grits to smooth the wood.
- 60-80 grit: Remove large rough spots and shape the bat.
- 120-150 grit: Smooth the surface after coarse sanding.
- 220-320 grit: Prepare the bat for finishing and polishing.
Sanding Techniques
Sanding by hand or with a sanding block helps control pressure and shape. Always sand with the wood grain to avoid scratches. Use gentle, even strokes and check your progress often.
- Use coarse grit sandpaper to shape the bat and remove marks.
- Switch to medium grit to smooth rough areas.
- Finish with fine grit for a soft, smooth surface.
- Wipe the bat clean between sanding steps to see the surface clearly.
Final Surface Preparation
After sanding, the bat needs a final check. Look for rough spots or uneven areas. Use a soft cloth to remove dust before applying any finish.
| Task | Purpose |
| Inspect surface | Find rough or uneven spots |
| Light sanding with fine grit | Fix minor imperfections |
| Clean with cloth | Remove dust and debris |
| Prepare for finish | Ensure smooth, clean surface |
Branding And Finishing
Branding and finishing add style and protection to wood baseball bats. These steps make bats look professional and last longer.
Proper branding and finishing improve the bat’s appearance and keep the wood safe from damage and moisture.
Adding Logos Or Engravings
Logos or engravings give your bat a unique look. You can burn, carve, or print designs on the wood surface.
Branding tools like wood burners or laser engravers create clear marks. Make sure to work carefully to avoid mistakes.
- Choose a simple design for easy branding
- Test the tool on scrap wood first
- Keep the bat steady during engraving
- Clean the surface before branding
Applying Sealants Or Varnish
Sealants or varnish protect the wood from moisture and dirt. They also give the bat a smooth, shiny finish.
Use a brush or cloth to apply the sealant evenly. Apply thin coats and let each coat dry before adding the next.
- Sand the bat lightly before applying sealant
- Choose clear sealant to show natural wood grain
- Apply 2 to 3 coats for best protection
- Wear gloves to avoid skin contact
Drying And Curing
Drying and curing let the finish harden and protect the wood fully. This process can take several hours or days.
Keep the bat in a dust-free, dry place during drying. Avoid touching the surface until it feels hard and dry.
- Place the bat on a rack to dry evenly
- Avoid direct sunlight to prevent cracks
- Check the finish after 24 hours
- Apply extra coats if needed and dry again
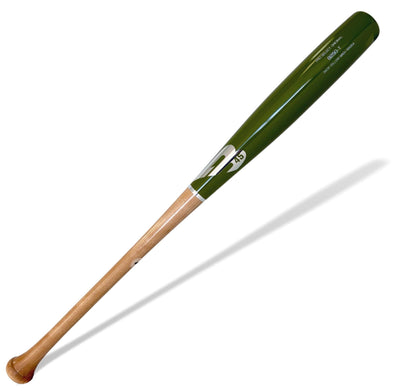
Credit: www.b45baseball.com
Quality Checks And Testing
Making wood baseball bats requires careful quality checks. Testing ensures each bat performs well and lasts long. This guide covers important checks for weight, balance, durability, and final touches.
These tests help find any problems early. They also improve the player’s experience by delivering a reliable bat.
Weight And Balance
Each bat must have the right weight and balance for good control. We measure weight and check how the bat feels in hand. Balance affects swing speed and accuracy.
- Use a scale to weigh the bat precisely.
- Check balance by holding the bat at different points.
- Adjust wood thickness if weight is off.
- Ensure even weight distribution along the bat.
Durability Testing
Durability tests check if the bat can handle repeated hits without breaking. We use machines to simulate game swings. The wood quality and finish affect durability.
| Test Type | Purpose | Result Needed |
| Impact Test | Check resistance to ball hits | No cracks or splits |
| Flex Test | Measure wood bending limit | Returns to original shape |
| Finish Test | Test coating strength | No peeling or wear |
Final Adjustments
After tests, we make small changes to improve feel and safety. Final sanding smooths the bat. We also check for sharp edges and cracks. The handle grip is adjusted for comfort.
- Sand and polish the bat surface.
- Inspect for any cracks or defects.
- Apply grip tape or finish handle.
- Verify weight and balance again.
- Package bats carefully for delivery.
Maintenance Tips For Wooden Bats
Wooden baseball bats need care to last longer and perform well. Regular maintenance keeps the wood strong and safe to use.
Simple habits like storing bats properly and cleaning them help avoid damage. Fixing small problems early stops bigger issues.
Proper Storage
Keep wooden bats in a dry place with stable temperature. Avoid leaving them in damp areas or direct sunlight.
Store bats upright or hanging to prevent warping. Do not lean them against walls or lay them flat for long times.
- Use a bat rack or holder
- Avoid extreme heat or cold
- Keep away from moisture and rain
- Store indoors when not in use
Cleaning Methods
Clean bats after each use to remove dirt and sweat. Use a soft cloth and mild soap with water.
Do not soak the bat or use harsh chemicals. Dry the bat completely with a towel after cleaning.
- Wipe bat with a damp cloth
- Use mild soap if needed
- Dry fully before storing
- Polish with linseed oil occasionally
Repairing Minor Damage
Check bats for small cracks or dents regularly. Fix minor damage quickly to stop it from getting worse.
Sand small dents lightly with fine sandpaper. Use wood glue for small cracks and clamp until dry.
- Inspect bats before and after use
- Sand dents smoothly
- Apply wood glue for cracks
- Let glue dry fully before use

Credit: www.reddit.com
Frequently Asked Questions
What Materials Are Needed To Make A Wood Baseball Bat?
To make a wood baseball bat, you need quality hardwood like ash or maple. Also, gather tools such as a lathe, sandpaper, wood finish, and measuring tape for precise shaping and finishing.
How Long Does It Take To Craft A Wood Baseball Bat?
Crafting a wood baseball bat typically takes several hours to a day. The process includes shaping, sanding, and finishing, depending on skill level and tools used.
What Type Of Wood Is Best For Baseball Bats?
Maple, ash, and birch are the best woods for baseball bats. They offer strength, durability, and a good balance of weight for performance.
Can Beginners Make Their Own Wood Baseball Bats?
Yes, beginners can make wood baseball bats with basic woodworking skills. Starting with simple designs and proper tools helps ensure success and safety.
Conclusion
Making wood baseball bats takes patience and care. Start with good wood and follow each step closely. Sand and shape the bat for smoothness and balance. Test the bat to check its feel and strength. Crafting your own bat can bring pride and fun.
Keep practicing to improve your skills. Enjoy the process and the final product. This guide helps you create bats at home easily. Give it a try and see your work come alive.