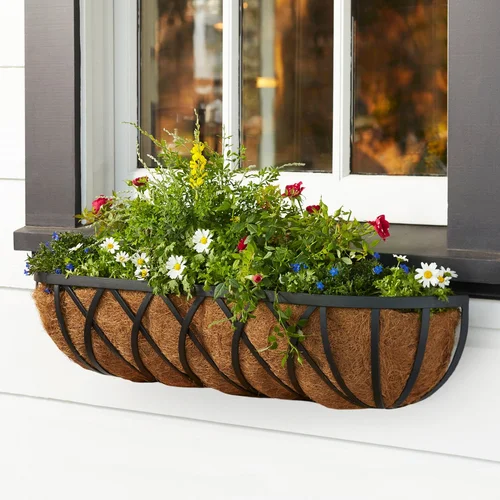
Are you ready to add a splash of color and charm to your windows? Installing window box planters is an easy way to bring life and beauty right to your home’s exterior.
Whether you want fresh herbs, bright flowers, or lush greenery, these planters can transform your space instantly. In this guide, you’ll discover simple steps to install window box planters yourself, even if you’ve never done it before. Keep reading, and you’ll learn how to boost your home’s curb appeal and create a cozy, inviting atmosphere with just a few tools and a little effort.
Your windows are about to become the highlight of your house!

Credit: www.containedcreations.com
Choosing The Right Window Box
Picking the right window box is key to a beautiful garden look. The box should fit the space well and suit your plants.
Think about the materials, size, and style before buying. These choices help your window box last longer and look great.
Materials And Sizes
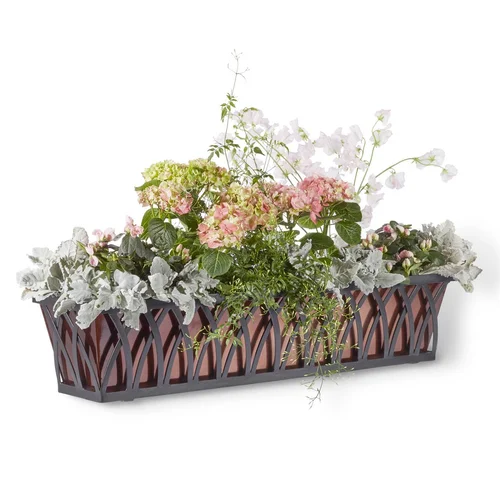
Window boxes come in many materials like wood, plastic, metal, and resin. Each has benefits and care needs.
Sizes vary from small to large. Choose a size that fits your window and the plants you want to grow.
- Wood: classic look but needs sealing to prevent rot
- Plastic: lightweight and low maintenance
- Metal: durable but can heat up in the sun
- Resin: weather-resistant and looks like wood
- Small boxes fit herbs and small flowers
- Larger boxes hold more soil for bigger plants
Matching Your Home’s Style
Pick a window box that matches your home’s look. It should blend well with paint and window frames.
Traditional homes often suit wooden boxes. Modern homes may look better with metal or resin boxes.
- Wood boxes for classic or rustic homes
- Metal boxes for industrial or modern styles
- Plastic or resin for casual or simple designs
Considering Plant Types
Think about the plants you want in your window box. Some plants need more space or different soil depth.
Choose a box size and material that helps your plants grow well and stay healthy.
- Herbs need small boxes with good drainage
- Flowers may need medium to large boxes for roots
- Succulents prefer shallow boxes with quick drainage
- Heavy plants need strong boxes that hold weight
Credit: www.containedcreations.com
Gathering Necessary Tools
Installing window box planters is easier when you have the right tools. Preparing everything before you start saves time and effort.
This guide will help you gather the basic tools, safety equipment, and extra supplies you need for the job.
Basic Tools List
You will need some common tools to install your window box planters. These tools help with measuring, drilling, and securing the planter.
- Measuring tape
- Power drill with drill bits
- Screwdriver (manual or electric)
- Level
- Hammer
- Pencil for marking
Safety Equipment
Safety is important during installation. Protect yourself with the right gear to avoid injuries.
| Equipment | Purpose |
| Safety goggles | Protect eyes from dust and debris |
| Work gloves | Protect hands from splinters and sharp tools |
| Dust mask | Prevent inhaling dust particles |
| Closed-toe shoes | Protect feet from falling objects |
Additional Supplies
Besides tools and safety gear, gather extra supplies to complete your installation smoothly.
- Mounting brackets or hooks
- Exterior screws or bolts
- Sealant or weatherproof paint
- Soil and plants for the planter
- Plastic liner or drainage material
Preparing The Window Area
Installing window box planters starts with preparing the window area properly. This step ensures your planters stay secure and look great.
Clean and measure carefully before you mark where to mount the boxes. This makes the installation smooth and safe.
Cleaning The Surface
Remove dirt, dust, and old paint from the window ledge or wall. A clean surface helps the mounting hardware stick better.
- Use a brush or cloth to wipe away loose debris
- Wash the area with mild soap and water
- Let the surface dry completely before proceeding
- Check for cracks or damage and fix if needed
Measuring For Placement
Measure the window width and height to find the best spot for the planter box. Accurate measurements prevent mistakes.
| Measurement | Recommended Action |
| Window Width | Choose a planter box slightly smaller than the width |
| Window Ledge Depth | Ensure planter fits without overhang |
| Height from Ground | Confirm safe and reachable for watering |
Marking Mounting Points
Mark where screws or brackets will go. Clear marks help you drill in the right spots.
- Hold the planter in place under the window
- Use a pencil to mark bracket hole locations
- Double-check the marks with a level tool
- Adjust marks if the planter is not balanced
- Prepare for drilling by selecting the right drill bit
Installing The Mounting Brackets
Mounting brackets hold your window box planters securely. Installing them properly keeps your plants safe. This guide helps you fit the brackets with care.
Use the right tools and follow each step carefully. Strong brackets prevent accidents and protect your window ledge.
Finding Studs Or Secure Anchors
Studs are wooden beams inside walls that give strong support. You can use a stud finder tool to find them. If you cannot find studs, use wall anchors made for heavy loads.
Secure anchors keep brackets in place on drywall or masonry. Choose anchors that match your wall type to hold the weight safely.
- Use a stud finder to locate studs behind the wall.
- Mark stud positions with a pencil.
- For drywall without studs, pick strong wall anchors.
- For brick or concrete, use masonry anchors or screws.
Using Proper Fasteners
Fasteners are screws or bolts that hold the brackets. Use the correct size and type for your wall and bracket. This keeps the window box steady and safe.
Check the bracket instructions to know what fasteners to use. Pick rust-resistant screws if your planter will be outside.
- Match fasteners to the wall material (wood, drywall, brick).
- Use screws long enough to reach studs or anchors.
- Pick stainless steel or coated screws for outdoor use.
- Do not overtighten screws to avoid wall damage.
Leveling The Brackets
Level brackets make your window box planter look neat and stay stable. Use a spirit level tool to check horizontal alignment. Adjust brackets before tightening screws fully.
Measure the distance between brackets to fit your planter exactly. Double-check the level after installation for the best results.
- Place the spirit level on each bracket.
- Adjust brackets up or down to get a flat line.
- Keep equal space between brackets for balance.
- Tighten screws only after confirming the level.
Attaching The Window Box
Attaching a window box planter correctly is key to its safety and durability. You must secure the box well to hold plants and soil weight.
This guide covers how to attach your window box safely and keep it balanced for a neat look.
Securing The Box To Brackets
Start by placing the window box on the mounting brackets. Align the box so it sits evenly on both brackets.
- Use screws that fit the box material and brackets.
- Drill pilot holes to avoid splitting the wood.
- Screw the box into the brackets tightly but carefully.
- Check that all screws are secure and flush with the wood.
Checking Stability
After securing, test the window box to make sure it holds firmly. Give it a gentle push and pull to check for movement.
| Check Point | What to Look For |
| Bracket Screws | Firmly in place, no wiggle |
| Box Position | Centered and level on brackets |
| Movement | No rocking or shifting |
Adjusting For Balance
If the window box tilts or feels uneven, adjust the brackets or add shims to balance it. Proper balance helps prevent soil spill and stress on mounts.
Follow these tips to balance your window box:
- Place thin wooden or plastic shims under the box where needed.
- Tighten or loosen screws slightly to level the box.
- Recheck stability after each adjustment.
Planting And Maintenance Tips
Window box planters brighten up any window with colorful plants. Proper planting and care keep them healthy and growing well.
Follow these tips to choose the right plants, prepare the soil, and care for your window box planters.
Choosing Suitable Plants
Pick plants that fit the space and get the right amount of sunlight. Look for varieties that do well in containers and suit your climate.
- Choose plants with similar water needs
- Use trailing plants for a cascading effect
- Include some flowering plants for color
- Add greenery plants for texture and contrast
- Pick drought-tolerant plants if you forget watering
Soil And Drainage Setup
Good soil and drainage help plants grow strong. Use light, well-drained soil to avoid water buildup.
| Soil Type | Purpose |
| Potting mix | Retains moisture and nutrients |
| Perlite or sand | Improves drainage |
| Organic compost | Provides nutrients |
| Gravel or small stones | Placed at bottom for drainage |
Watering And Fertilizing
Keep soil moist but not soggy. Water regularly, especially during hot, dry days.
- Water in the morning or evening to reduce evaporation
- Check soil moisture with your finger before watering
- Use balanced liquid fertilizer every two weeks
- Avoid over-fertilizing to prevent root damage
- Remove dead leaves and flowers to encourage growth
Seasonal Care For Longevity
Window box planters add beauty to your home all year. Proper care helps them last through different seasons. Knowing how to protect, clean, and refresh your planters keeps plants healthy and vibrant.
Follow simple seasonal steps to ensure your window boxes stay strong and attractive. This guide explains key care tips for lasting enjoyment.
Protecting Against Weather
Weather can damage window box planters. Strong sun, heavy rain, and cold winds affect plants and containers. Use these tips to protect them:
- Place planters where they get some shade in hot weather.
- Use waterproof liners inside boxes to stop water damage.
- Move planters to sheltered spots during storms or frost.
- Wrap boxes with burlap or frost cloth in winter for extra warmth.
Cleaning And Repairs
Regular cleaning removes dirt and pests. Fixing small damages keeps planters sturdy. Follow these steps for cleaning and repairs:
- Remove all plants before cleaning.
- Wash boxes with mild soap and water.
- Scrub off moss or mold using a soft brush.
- Check for cracks or loose parts.
- Use wood glue or sealant to fix minor damages.
- Let boxes dry completely before adding soil back.
Refreshing Plants
Changing plants with the seasons keeps window boxes fresh. Choose plants that suit the weather for best growth. Use this table to pick seasonal plants:
| Season | Recommended Plants | Care Tips |
| Spring | Pansies, Tulips, Daffodils | Keep soil moist, avoid frost |
| Summer | Petunias, Geraniums, Marigolds | Water daily, provide sun |
| Fall | Chrysanthemums, Asters, Ornamental Kale | Reduce watering, protect from frost |
| Winter | Evergreens, Hellebores, Cyclamen | Water sparingly, shield from cold |

Credit: www.hgtv.com
Frequently Asked Questions
What Tools Are Needed For Window Box Planters?
You’ll need a drill, screws, brackets, and a measuring tape. Choose weather-resistant materials for long-lasting durability. A level ensures proper alignment. Safety goggles are recommended for protection. Gathering all tools beforehand streamlines the installation process.
How Do You Measure For Window Box Planters?
Measure the window’s width and desired height for the planter. Ensure the planter is slightly shorter than the window width. This allows for balance. Consider plant growth space for optimal results. Precise measurements prevent installation errors.
Can Window Box Planters Damage Windows?
Proper installation prevents damage to windows. Use brackets and screws designed for the planter’s weight. Regular maintenance avoids rot and wear. Ensure drainage holes prevent water buildup. This preserves both window and planter integrity.
What Are The Best Materials For Planters?
Choose materials like wood, metal, or plastic for window box planters. Wood offers a natural look but requires sealing. Metal is durable but might rust without coating. Plastic is lightweight and versatile. Each material suits different aesthetic preferences.
Conclusion
Installing window box planters adds charm to any home. The process is simple and rewarding. Choose the right spot and secure the box firmly. Use good soil and pick plants that suit your climate. Water regularly and watch your garden grow.
Small effort, big impact. Enjoy fresh herbs or colorful flowers right outside your window. Start today and brighten your space with green beauty.