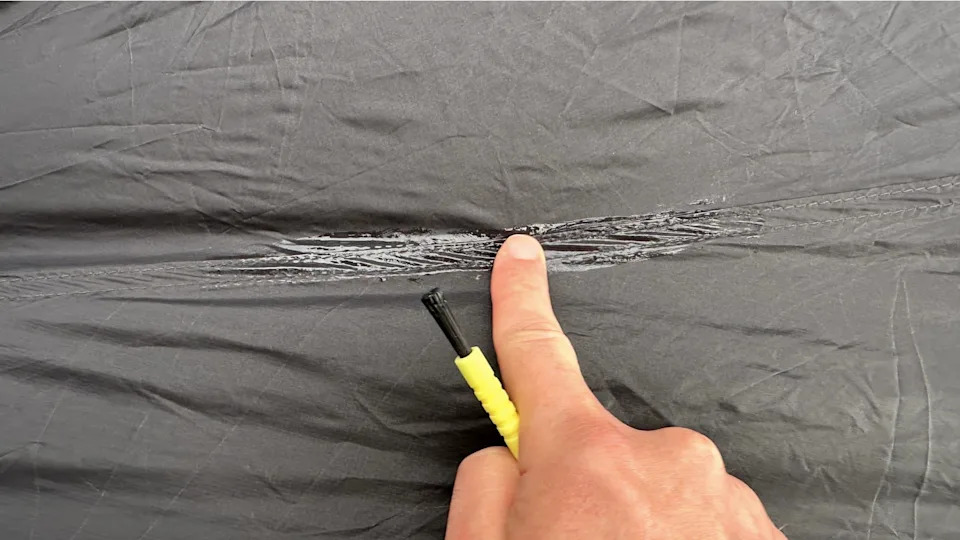
Have you ever set up your tent only to find water seeping through the seams during a rainstorm? It’s frustrating and can ruin your outdoor experience.
Seam sealing your tent is the simple step that can keep you dry and comfortable no matter the weather. You’ll learn exactly how to seam seal your tent quickly and effectively. By the end, you’ll have the confidence to protect your gear and enjoy your adventures without worrying about leaks.
Let’s get started!

Credit: www.yahoo.com
Choosing The Right Seam Sealer
Seam sealing your tent protects it from water leaks. Picking the right seam sealer is very important.
Different tents need different sealers. Using the wrong one can damage your tent fabric.
Types Of Seam Sealers
There are several types of seam sealers. Each works well for certain tents and conditions.
- Liquid seam sealers:Easy to apply and dry clear. Good for small repairs.
- Tape sealers:Stick over seams for quick sealing. Best for immediate use.
- Waterproof fabric glue:Bonds fabric and seals seams. Good for heavy-duty tents.
- Fluoropolymer sealers:Durable and flexible. Used for high-end tents.
Compatibility With Tent Materials
Not all seam sealers work on every tent material. Check your tent fabric before buying.
Seam sealers fit these common tent materials:
- Nylon:Most sealers work well on nylon. Use flexible sealers for better results.
- Polyester:Choose sealers made for polyester to avoid damage.
- Cotton canvas:Use special sealers for natural fabrics. Liquid sealers may not work.
- Silicone-coated fabrics:Use sealers made for silicone or waterproof coatings.
Preparing Your Tent
Seam sealing a tent keeps it waterproof and durable. Before you start, prepare your tent well. This helps the sealant stick better.
Focus on cleaning the tent and setting up a good workspace. Both steps make the process easier and more effective.
Cleaning The Tent
Make sure the tent is free of dirt and dust before sealing. Clean seams hold the sealant better and prevent leaks.
- Lay the tent flat on a clean surface.
- Use a soft brush or sponge to remove dirt.
- Spot clean with mild soap and water if needed.
- Rinse with clean water and let it dry completely.
- Avoid harsh detergents or bleach as they can damage fabric.
Setting Up A Workspace
Choose a dry, well-ventilated area for seam sealing. Good light helps you see the seams clearly.
| Workspace Needs | Description |
| Flat Surface | To spread the tent without wrinkles |
| Good Lighting | To inspect seams and apply sealant properly |
| Ventilation | To avoid inhaling fumes from sealant |
| Tools Ready | Brushes, sealant, and gloves within reach |
| Temperature | Avoid very cold or hot places for better drying |
Sealing The Tent Seams
Seam sealing protects your tent from water leaks. It keeps rain from soaking through stitched areas.
Proper sealing extends the life of your tent. It also improves comfort by keeping the inside dry.
Applying The Seam Sealer
Clean the tent seams before applying sealer. Use a damp cloth to remove dirt and dust.
Apply a thin layer of seam sealer along the stitch lines. Cover all needle holes and fabric edges.
- Use a small brush or applicator for control
- Work on one seam at a time
- Follow the tent manufacturer’s instructions
Techniques For Even Application
Spread the sealer evenly to avoid clumps. Thick areas may take longer to dry and crack later.
Use smooth, steady strokes to cover the seam. Make sure the sealer reaches both sides of the fabric.
- Apply multiple thin coats if needed
- Let each coat dry fully before adding another
- Check for missed spots and cover them

Credit: www.yahoo.com
Drying And Curing Process
Seam sealing a tent helps keep water out and extends its life. After applying the sealant, drying and curing are important steps. These steps ensure the sealant sticks well and works properly.
This guide explains the best drying conditions and the time needed for curing. Following these can make your tent stronger against rain and moisture.
Optimal Drying Conditions
Drying your tent seams in the right place helps the sealant set correctly. The area should be clean and free from dust or dirt. It should also have good air flow to help the sealant dry evenly.
- Keep the tent in a shaded area to avoid direct sunlight.
- Maintain a temperature between 60°F and 80°F (15°C to 27°C).
- Ensure the air is dry, not humid, for faster drying.
- Do not use heaters or dryers as they may damage the fabric.
- Place the tent on a flat surface to avoid stretching the seams.
Time Required For Curing
Curing is the time the sealant needs to fully bond with the fabric. It is different from just drying because the sealant hardens and becomes waterproof during curing.
| Sealant Type | Drying Time | Curing Time |
| Silicone-based | 2-4 hours | 24-48 hours |
| Polyurethane-based | 4-6 hours | 48-72 hours |
| Latex-based | 1-3 hours | 12-24 hours |
Testing For Waterproofing
Seam sealing a tent is important to keep water out. Testing helps you know if your tent is truly waterproof. This guide shows how to test your tent seams effectively.
Two main checks are simulating rain and checking for leaks. These tests show if your seam sealing worked well.
Simulating Rain Conditions
To simulate rain, use a garden hose or a large container of water. Spray or pour water evenly over all tent seams. Make sure water hits the tent as it would in real rain.
- Set up the tent outside or in a large space.
- Use a gentle spray to mimic rain, not a strong jet.
- Cover all seam areas carefully with water.
- Let the water run for 10-15 minutes.
- Check the inside of the tent for wet spots.
Checking For Leaks
After simulating rain, look inside the tent for leaks. Focus on seams and areas where water might seep through. Use a flashlight to see better in shaded parts.
| Leak Location | Signs of Water |
| Seam Edges | Wet fabric, damp spots |
| Stitch Holes | Small drips, water stains |
| Corner Joints | Pooling water, moisture |
| Door Zippers | Water inside zipper track |
Maintenance Tips
Seam sealing your tent helps keep water out and extends its life. Proper care keeps the tent strong and dry.
Regular maintenance prevents leaks and damage. Check your tent seams often to catch problems early.
Regular Inspections
Look over all the tent seams before and after every camping trip. Check for cracks, holes, or loose threads.
Use a flashlight to see smaller damage inside the tent. Pay close attention to high-stress areas like corners.
- Inspect seams for cracks or gaps
- Look for thread wear or loose stitches
- Check areas exposed to rain or sun more often
- Test waterproofing by spraying water on seams
Reapplying Seam Sealer
Seam sealer wears off over time and needs to be reapplied. This keeps your tent waterproof and protected.
Clean the seams before applying sealer. Use a soft cloth and mild soap to remove dirt and old sealer.
- Let seams dry completely before sealing
- Apply a thin, even layer of seam sealer
- Focus on cracked or worn areas first
- Allow sealer to dry fully before packing tent
- Use sealer recommended by your tent manufacturer
Common Mistakes To Avoid
Seam sealing a tent protects it from water leaks and extends its life. Many people make simple errors that reduce the seal’s effectiveness. Knowing what to avoid helps you get the best results.
This guide covers two common mistakes: applying too much sealant and ignoring tent material compatibility.
Over-application Issues
Applying too much seam sealer can cause problems instead of fixing them. Thick layers take longer to dry and can peel off. Over-application may also clog the tent fabric’s pores, reducing breathability.
- Excess sealant can crack when it dries, leading to leaks.
- Heavy layers add unnecessary weight to the tent fabric.
- Too much sealant wastes product and money.
- It can cause sticky patches that attract dirt and debris.
Ignoring Tent Material Compatibility
Not all seam sealers work with every tent fabric. Using the wrong type can damage the material or fail to seal the seams properly. Check your tent’s fabric type before buying sealant.
| Tent Fabric | Recommended Seam Sealer | Common Issues |
| Nylon | Silicone or polyurethane based | Sealant may not stick well to silicone-coated nylon |
| Polyester | Polyurethane based | Silicone sealers can damage coating |
| Cotton Canvas | Wax or specialized canvas sealers | Most synthetic sealers will not bond |

Credit: www.yahoo.com
Frequently Asked Questions
What Is Seam Sealing A Tent?
Seam sealing protects tent seams from water leaks. It involves applying a waterproof sealant to stitched areas. This process enhances your tent’s weather resistance and durability, keeping the interior dry during rain.
When Should I Seam Seal My Tent?
You should seam seal a new tent before first use. Also, reseal seams annually or after heavy use. Inspect seams for wear or leaks and reapply sealant as needed to maintain waterproofing.
Which Seam Sealer Is Best For Tents?
Choose a seam sealer compatible with your tent’s fabric. Silicone-based sealers work well for most nylon and polyester tents. Always check product labels and test a small area first for best results.
How Do I Prepare Tent Seams For Sealing?
Clean seams with mild soap and water. Let them dry completely before applying sealant. Avoid dirt or oil, as they reduce adhesion and waterproof effectiveness of the seam sealer.
Conclusion
Seam sealing a tent keeps you dry and comfortable outdoors. It stops water from leaking through tiny holes. Use the right sealant and apply it carefully. Let it dry fully before your next trip. This simple step helps your tent last longer.
Enjoy your adventures without worrying about rain. A well-sealed tent makes camping more fun and safe. Take the time to seal seams well—it’s worth it. Your tent will protect you better in bad weather. Keep your gear ready for every outdoor journey.