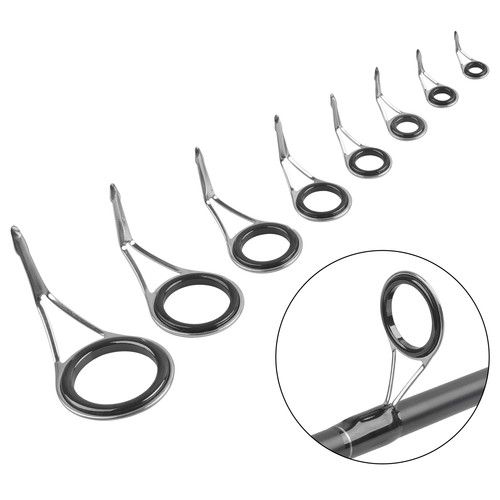
Have you ever been out fishing, only to find your rod’s eyelet broken or damaged? It’s frustrating when your gear lets you down at the worst moment.
But don’t worry—fixing a fishing rod eyelet is easier than you think. With a few simple steps, you can get your rod back in action quickly and save both time and money. Keep reading, and you’ll learn exactly how to repair your fishing rod eyelet like a pro, so you never miss a catch again.
Identifying The Problem
Fishing rod eyelets guide the fishing line and keep it safe. If an eyelet is damaged, it can cause problems while fishing. Knowing how to spot damage helps you fix it early.
This section explains how to recognize signs of a damaged eyelet and what usually causes these problems.
Signs Of A Damaged Eyelet
You can tell an eyelet is damaged by checking for these signs. Catching damage early prevents line breakage and keeps your rod working well.
- Visible cracks or chips on the ring
- Rough or sharp edges that can cut the line
- Loose or bent eyelet frame
- Unusual noise when the line passes through
- Corrosion or rust on metal parts
Common Causes Of Eyelet Damage
Eyelets get damaged for different reasons. Knowing these causes helps you avoid them and keep your rod in good shape.
| Cause | Description |
| Impact | Dropping the rod or hitting hard surfaces |
| Corrosion | Exposure to saltwater without proper cleaning |
| Wear and Tear | Frequent use causes gradual damage |
| Poor Maintenance | Not cleaning or checking the eyelets regularly |
| Improper Line Use | Using rough or heavy fishing lines |
Gathering Necessary Tools
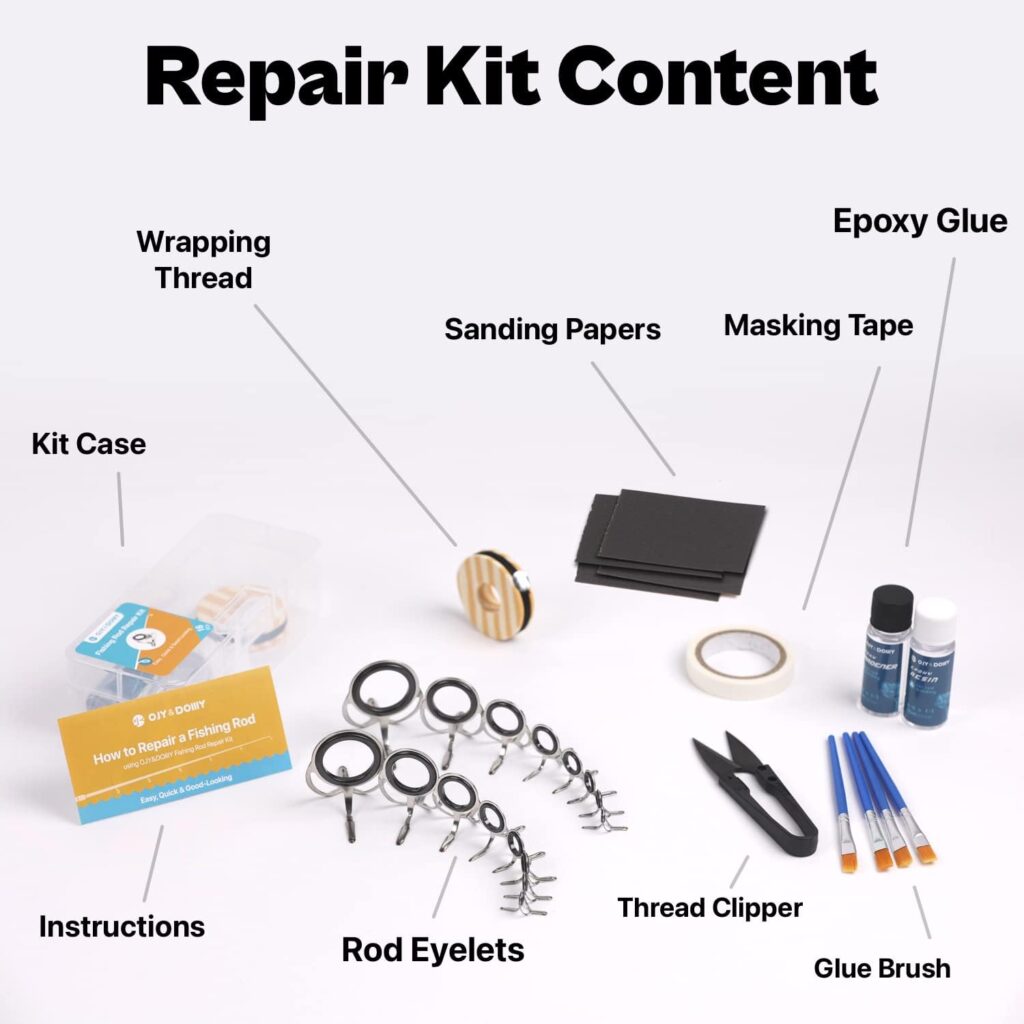
Fixing a fishing rod eyelet needs the right tools. Using proper tools makes the repair easier and lasts longer.
Before starting, gather all tools to avoid stopping in the middle. This guide shows what tools you need.
Essential Repair Tools
You need a few basic tools to fix a fishing rod eyelet. These tools help remove the broken eyelet and attach a new one.
- Small screwdriver or pick tool to remove old glue and thread
- Replacement eyelet that fits your rod size
- Strong fishing rod glue or epoxy for secure fixing
- Thread or wrapping material to bind the eyelet
- Sharp scissors or hobby knife to trim thread
Optional Tools For Better Results
These extra tools can improve your repair quality and make the process smoother. They are not required but helpful.
- Heat gun or hair dryer to dry glue faster
- Small paintbrush for applying glue evenly
- Rod wrapping jig for neat and tight thread wrapping
- Fine sandpaper to smooth the rod surface before gluing
- Masking tape to protect other rod parts during repair
Removing The Damaged Eyelet
Fixing a fishing rod starts with removing the damaged eyelet. This step is important to avoid harming the rod. Take your time and work carefully.
Using the right tools and gentle techniques helps protect the rod. You can then install a new eyelet easily.
Safe Eyelet Removal Techniques
Heat helps loosen the glue holding the eyelet. Use a heat gun or hair dryer on low heat. Do not overheat the rod.
Once warm, gently twist or pull the eyelet. Use pliers with soft covers to avoid scratches. Work slowly to prevent damage.
- Warm the eyelet to soften glue
- Use soft-covered pliers for grip
- Pull or twist gently
- Avoid forcing the eyelet
Handling The Rod Carefully
Hold the rod firmly but gently. Support the section near the eyelet to stop bending. Use a soft cloth to protect the rod’s finish.
Keep the rod steady on a flat surface. Avoid dropping or hitting the rod during removal. Careful handling keeps the rod safe and ready for repair.
- Support rod near the eyelet
- Use soft cloth to protect finish
- Keep rod steady on flat surface
- Handle with care to avoid damage

Credit: www.amazon.ca
Selecting A Replacement Eyelet
Fixing a fishing rod eyelet starts with choosing the right replacement. Picking the right eyelet ensures your rod works smoothly.
This guide helps you find the correct size and material. It also shows where to buy quality eyelets for your repair.
Choosing The Right Size And Material
Eyelets come in many sizes and materials. Picking the right size fits your rod and line properly. The material affects durability and performance.
- Size:Match the eyelet diameter to your rod’s original guide.
- Material:Choose stainless steel for saltwater rods.
- Ceramic inserts:Use for smooth line flow and less wear.
- Lightweight alloys:Good for ultralight rods.
Where To Purchase Replacement Eyelets
You can buy eyelets from many places. Some stores specialize in fishing gear, while others offer online options.
| Source | Benefits | Notes |
|---|---|---|
| Local fishing shops | See and touch before buying | May have limited sizes |
| Online retailers | Wide selection and brands | Check shipping times |
| Rod repair specialists | Expert advice and custom fit | Often more costly |
| General hardware stores | Easy access | May lack fishing-specific eyelets |
Attaching The New Eyelet
Fixing a fishing rod eyelet needs care and patience. Attaching the new eyelet correctly helps your rod work well.
This guide shows how to attach the new eyelet firmly and align it with the other eyelets.
Securing The Eyelet Properly
First, clean the rod area where the eyelet will go. This removes dirt and old glue for a strong hold.
Use a good adhesive made for fishing rods. Apply it evenly on the eyelet foot before placing it.
- Hold the eyelet firmly in place for a few minutes
- Make sure it does not move while drying
- Let the glue dry fully before using the rod
Ensuring Alignment With Other Eyelets
Check the new eyelet’s position against the other eyelets on the rod. They should line up in a straight line.
Good alignment helps the fishing line run smoothly and prevents damage to the rod or line.
- Place the rod on a flat surface
- Look down the rod to see if all eyelets line up
- Adjust the new eyelet before the glue dries

Credit: www.amazon.ca
Reinforcing The Repair
Fixing a fishing rod eyelet needs extra care to make it strong. Reinforcing the repair helps the eyelet last longer. It stops the eyelet from breaking again while fishing.
You can use glue or epoxy to hold the eyelet in place. Letting the repair dry well is very important. This guide explains how to do both steps right.
Applying Epoxy Or Glue
Pick a strong, waterproof epoxy or glue for the repair. Use a small brush or toothpick to apply it carefully. Cover the base of the eyelet and the rod where it attaches.
Make sure not to use too much glue. Extra glue can make the rod look messy and may affect casting. Spread the glue evenly for a smooth finish.
- Choose waterproof epoxy or strong adhesive
- Apply a thin layer to the eyelet base
- Use a brush or toothpick for control
- Spread glue evenly without making a mess
Allowing Sufficient Drying Time
After applying glue, let the repair dry fully. Drying time keeps the bond strong and prevents the eyelet from moving. Check the glue package for drying times.
Place the rod in a safe spot where it won’t be touched. Avoid moving or bending the rod until the glue cures. This makes the repair last longer and stay firm.
- Keep the rod still while drying
- Follow the glue’s recommended drying time
- Avoid using the rod before the glue hardens
- Dry in a warm, dry place if possible
Testing The Repair
After fixing the fishing rod eyelet, it is important to test the repair. This ensures the eyelet works well and does not cause problems while fishing.
Testing helps you find if the repair is strong and if the line runs smoothly through the eyelet.
Checking For Proper Functionality
Start by gently pulling the fishing line through the repaired eyelet. It should move without catching or resistance.
- Look for any rough spots or sharp edges on the eyelet.
- Make sure the eyelet is firmly attached to the rod.
- Check that the eyelet is aligned with the other guides on the rod.
- Test the rod’s flexibility to see if the eyelet holds under pressure.
Making Adjustments If Necessary
If you find problems during the test, adjust the repair to fix them. Small changes can make a big difference in performance.
| Issue | Adjustment |
| Line catches on eyelet | Smooth the edges with fine sandpaper |
| Eyelet is loose | Re-glue or wrap the eyelet securely |
| Eyelet misaligned | Reposition and secure it to match rod guides |
| Rod feels weak at repair | Reinforce with extra wrapping or epoxy |
Credit: collegeofems.com
Preventive Maintenance Tips
Keeping your fishing rod eyelets in good shape helps your rod last longer. Small problems can turn into big damage if you do not care for the eyelets regularly.
Use simple steps to check and protect your eyelets. These tips make fishing easier and more fun by stopping eyelets from breaking or bending.
Regular Inspection Of Eyelets
Look at your eyelets before and after every fishing trip. Check for cracks, rust, or loose parts. A small scratch can cause the fishing line to snap.
- Clean the eyelets with a soft cloth to remove dirt and salt.
- Use a magnifying glass to find tiny cracks or bends.
- Test the eyelets by gently moving them to see if they are loose.
- Replace damaged eyelets quickly to avoid line damage.
Storage And Handling Tips
Store your fishing rod properly to keep eyelets safe. Handle the rod with care to stop bending or breaking the eyelets.
| Storage Tip | Why It Helps |
| Keep rods in a rod rack or case | Prevents eyelets from bending or hitting hard surfaces |
| Store rods in a dry place | Stops rust and corrosion on metal parts |
| Lay rods flat or hang vertically | Keeps rods straight and eyelets aligned |
| Use rod sleeves during transport | Protects eyelets from scratches and dirt |
Frequently Asked Questions
How Do I Fix A Broken Fishing Rod Eyelet?
To fix a broken eyelet, remove the damaged one carefully. Use epoxy glue to attach a new eyelet. Align it properly and let it dry for 24 hours. This restores smooth line flow and prevents further damage.
What Tools Are Needed To Repair A Fishing Rod Eyelet?
You need epoxy glue, replacement eyelets, a small screwdriver, sandpaper, and a cloth. These tools help remove the old eyelet and securely attach the new one. Proper tools ensure a strong and lasting repair.
Can I Repair A Fishing Rod Eyelet Myself?
Yes, you can fix an eyelet yourself with patience. Follow step-by-step instructions, use the right tools, and choose quality glue. DIY repairs save money and extend your rod’s life efficiently.
How Long Does It Take To Fix A Fishing Rod Eyelet?
Fixing an eyelet usually takes 30 to 60 minutes. Drying time for epoxy glue is about 24 hours. Allowing full curing ensures the repair is strong and durable for future use.
Conclusion
Fixing a fishing rod eyelet keeps your gear ready for the next trip. Small repairs save money and extend your rod’s life. You can do this with simple tools at home. Take your time and follow each step carefully. A strong eyelet helps your line run smoothly.
Enjoy fishing without worry about broken parts. Try this fix before buying a new rod. Keep your fishing fun and stress-free. Easy maintenance makes a big difference. Now, your rod is ready to catch more fish!