Setting up a canopy tent might seem tricky at first, but with the right steps, you can have it ready in no time. Whether you’re planning a backyard party, a market stall, or just need some shade outdoors, knowing how to put up a canopy tent will make your day easier and more enjoyable.
Imagine having a cool, sheltered spot ready exactly when you need it—no stress, no hassle. Keep reading, and you’ll discover simple, clear instructions that anyone can follow. By the end, you’ll feel confident and ready to set up your tent like a pro.
Let’s get started!
Choosing The Right Canopy Tent
Picking the right canopy tent makes your outdoor event better. It protects from sun and rain. It also creates a comfortable space for guests.
Think about where you will use the tent and how many people will be inside. These details help you choose the best tent.
Types Of Canopy Tents
There are several types of canopy tents. Each type fits different needs and events. Choose one that matches your purpose.
- Pop-up Canopy:Easy to set up and take down. Good for short events.
- Frame Tent:Strong frame, no center poles inside. Ideal for larger gatherings.
- Marquee Tent:Stylish and spacious. Great for weddings or parties.
- Inflatable Tent:Quick to inflate and pack away. Used for promotions or small events.
Size And Capacity
Choose a tent size based on how many people will use it. Check the space needed for tables and chairs too. A tent too small feels crowded. Too big can be hard to move and set up.
- Small tents fit 2-6 people, good for camping or picnics.
- Medium tents hold 7-15 people, perfect for family events.
- Large tents fit 20 or more, used for big parties or markets.
Material And Durability
The tent fabric and frame affect how long the tent lasts. Strong materials resist wind and rain. Look for water-resistant and UV-protected fabrics. Metal or heavy-duty plastic frames offer better support.
- Fabric:Polyester and vinyl are common and durable.
- Frame:Steel is strong but heavy. Aluminum is light and rust-resistant.
- Coatings:Look for waterproof and UV-blocking coatings for longer use.
Preparing The Setup Area
Setting up a canopy tent starts with a good preparation of the area. A well-prepared site makes the process easier and safer.
Take time to check the ground and surroundings before you begin to put up your tent.
Selecting A Flat Surface
Choose a spot that is even and level. A flat surface keeps the tent stable and prevents it from tipping over.
- Look for a ground without big slopes or hills
- Avoid rocky or uneven soil that can damage the tent legs
- Grass or dirt surfaces work best for staking the tent
- Make sure the surface is firm, not soft or muddy
Clearing Obstacles
Remove any objects that may block the tent or cause hazards. Clear the area to give enough space for setup and use.
| Obstacle | Why Remove? |
|---|---|
| Stones and branches | They can damage the tent floor and cause tripping. |
| Low hanging branches | They block the tent frame and limit height. |
| Trash and debris | They make the area unsafe and dirty. |
| Sharp objects | They can puncture the tent fabric. |
Checking Weather Conditions
Check the weather before setting up your canopy tent. Wind, rain, or storms affect safety and stability.
- Look for calm or mild wind forecasts
- Avoid setting up in heavy rain or storms
- Prepare to secure the tent with weights or stakes if wind is expected
- Have a plan to take down the tent quickly if weather worsens
Unpacking And Organizing Components
Setting up a canopy tent starts with careful unpacking and organizing of its components. This makes the assembly process smooth and easy.
Ensure you have enough space to lay out all the parts. This helps in identifying any missing or damaged components before you begin.
Identifying Tent Parts
Each canopy tent comes with several parts that you need to identify. Knowing these parts helps in assembling the tent correctly.
- Canopy top
- Support poles
- Ropes and stakes
- Carrying bag
- Instruction manual
Laying Out Components
Once you identify the parts, lay them out on the ground. This helps in organizing and accessing them easily during assembly.
| Component | Purpose |
| Canopy Top | Provides shade and cover |
| Support Poles | Holds up the canopy |
| Ropes and Stakes | Secures the tent to the ground |
Checking For Damages
Before proceeding, check each component for damages. This ensures the tent is safe to use and will not collapse.
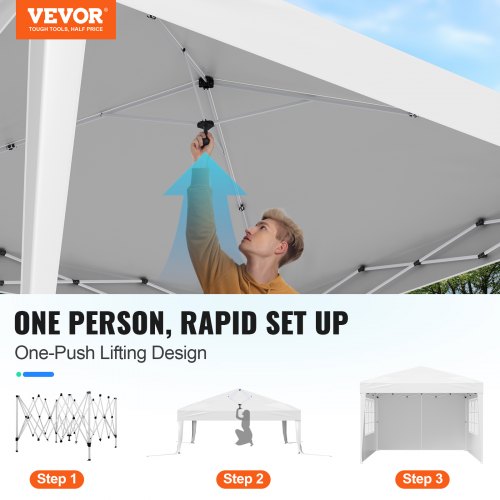
Setting Up The Frame
Putting up a canopy tent starts with setting up the frame. The frame holds the tent and gives it shape. It is important to set it up carefully.
Follow simple steps to expand and lock the frame. Check the frame parts for any damage before starting.
Expanding The Frame
Start by pulling the frame outward slowly. Use both hands to keep the frame balanced. Expand it until it reaches its full size.
Make sure the frame opens evenly on all sides. Stop if you feel strong resistance or hear unusual sounds.
Locking The Joints
Once the frame is fully expanded, lock the joints to keep it stable. Most tents have clips or pins at the joints. Secure each joint tightly.
Check all joints again after locking. Loose joints can cause the tent to collapse or wobble.
- Locate the locking mechanisms on each joint
- Engage clips or insert pins firmly
- Test the locked joints by gently moving the frame
Ensuring Stability
After locking the joints, make sure the frame stands firm. Adjust the legs so the tent is level on the ground. Use stakes or weights if needed.
Check that all legs touch the ground evenly. This prevents the tent from tipping or shaking in the wind.
- Place stakes at each leg and drive them into the ground
- Use sandbags or weights on legs on hard surfaces
- Tighten any adjustable leg sections for extra support
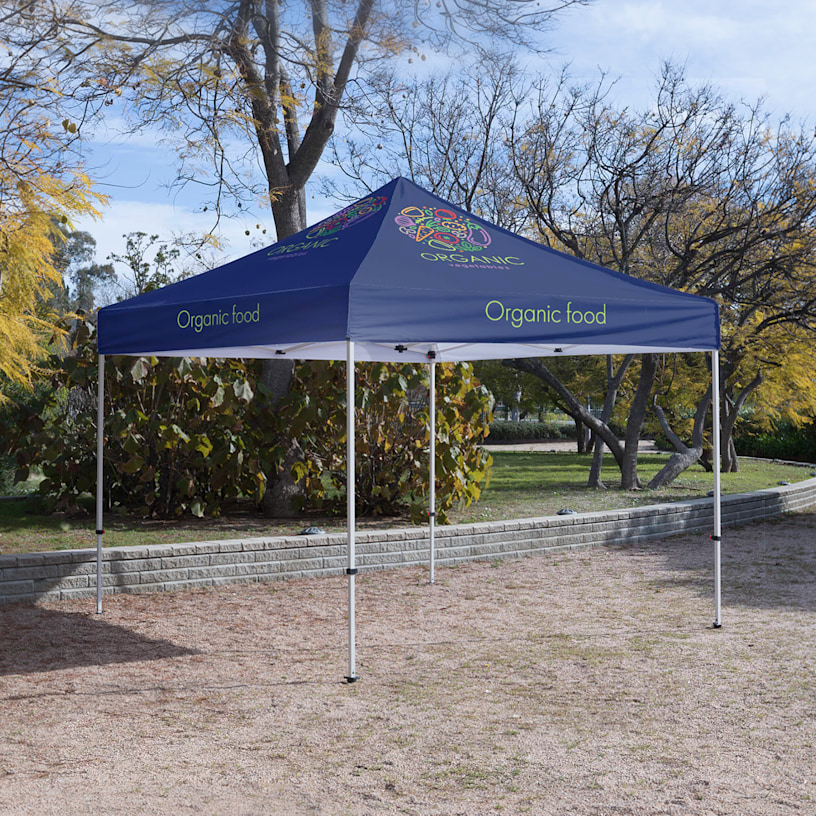
Attaching The Canopy Cover
Putting the canopy cover on the frame is an important step. It protects you from sun and rain. This guide helps you attach the cover properly.
Follow these tips to keep the cover secure and tight. This helps the canopy last longer and stay safe in wind.
Positioning The Cover
Start by unfolding the canopy cover. Place it over the frame so the corners match the legs. Make sure the cover is the right side up.
Align the cover so any logos or vents face the front or top. Check that the edges hang evenly on all sides before securing.
Securing With Straps And Velcro
Most canopy covers have straps or Velcro to keep them in place. Wrap the straps around the frame and fasten them tight. Use Velcro tabs to stick the cover to the legs.
Check each strap and Velcro point. Make sure they hold the cover snugly and do not slip. Tighten loose straps as needed.
- Attach straps to the frame corners
- Wrap Velcro around legs or crossbars
- Secure all fasteners firmly
Adjusting For Tension
Pull the canopy cover gently to remove wrinkles. Adjust the straps or Velcro to increase tension. A tight cover sheds water and resists wind better.
Check all sides of the canopy. Fix any sagging areas by tightening straps or repositioning the cover. Even tension helps keep the canopy stable.
Credit: www.vistaprint.ca
Securing The Tent To The Ground
Securing your canopy tent to the ground keeps it safe in wind and rain. It stops the tent from moving or falling.
Use strong anchors to hold the tent firmly. This guide covers stakes, weight bags, and checking anchors.
Using Stakes And Pegs
Stakes and pegs are pushed into the ground to hold the tent legs. They work best on soft soil or grass.
Drive stakes at an angle away from the tent. This gives better grip and stops them from pulling out.
- Choose sturdy metal stakes for strong hold
- Use a hammer or mallet to push stakes deep
- Attach tent straps tightly to each stake
- Place stakes on all four corners of the tent
Adding Weight Bags
Weight bags add extra weight to the tent legs. They work well on hard surfaces like concrete or pavement.
Fill bags with sand, water, or gravel. Secure them to each leg using straps or hooks.
- Use heavy bags designed for canopy tents
- Place bags evenly on all legs for balance
- Check bags for leaks if filled with water
- Keep bags stable to avoid tipping
Double Checking Anchors
After securing the tent, check all anchors before use. Make sure stakes and bags are tight and stable.
Test the tent by gently pulling each corner. If any anchor moves, fix it immediately.
- Look for loose straps or ropes
- Make sure stakes are fully in the ground
- Ensure weight bags are secure and heavy
- Re-tighten any loose parts
Final Adjustments And Safety Tips
Setting up a canopy tent takes more than just unfolding it. Final checks ensure the tent stays strong and safe. This guide helps you adjust and protect your canopy tent properly.
Follow these simple steps to inspect your setup, avoid common errors, and keep your tent in good shape.
Inspecting The Setup
After you set up the tent, check all parts carefully. Look at the frame, fabric, and stakes. Make sure everything is tight and secure. Loose parts can cause the tent to collapse.
- Check that all poles are locked in place
- Make sure the canopy fabric is stretched evenly
- Verify that stakes are driven fully into the ground
- Look for tears or holes in the fabric
- Test the stability by gently pushing the tent
Avoiding Common Mistakes
Many problems come from small mistakes. Avoid these to keep your canopy tent safe and long-lasting.
- Do not set up the tent on uneven ground
- Do not skip using all the stakes and ropes
- Do not ignore weather warnings before use
- Do not overload the tent with heavy objects
- Do not leave the tent unattended in strong winds
Maintaining The Tent
Keeping your canopy tent clean and stored right helps it last longer. Regular care prevents damage and wear.
| Maintenance Task | How to Do It |
| Cleaning | Use mild soap and water. Avoid harsh chemicals. |
| Drying | Let the tent dry completely before storing. |
| Storage | Store in a dry, cool place. Keep away from direct sunlight. |
| Inspecting | Check for damage before and after use. |
| Repairing | Fix small tears with patch kits immediately. |

Credit: kapscomoto.com

Credit: www.mastercanopy.com
Frequently Asked Questions
How Do I Set Up A Canopy Tent Quickly?
Start by choosing a flat surface. Unfold the frame and extend legs partially. Secure the canopy fabric, then fully extend legs. Use stakes and ropes to anchor the tent for stability. Follow the manufacturer’s instructions for specific steps.
What Tools Are Needed To Put Up A Canopy Tent?
Most canopy tents require no special tools. You may need stakes, mallet, and ropes for anchoring. Some models come with a carrying case and assembly instructions. Always check your tent kit before starting the setup.
How Can I Secure A Canopy Tent In Windy Conditions?
Use heavy-duty stakes and tie-down ropes. Attach sandbags or weights to the legs for extra stability. Position the tent so it faces away from the wind. Regularly check and tighten all connections during use.
What Size Canopy Tent Should I Choose?
Choose a tent size based on your expected number of guests or items. Common sizes range from 10×10 to 20×20 feet. Consider available space and purpose. Always opt for a slightly larger size to ensure comfort.
Conclusion
Setting up a canopy tent is simple with the right steps. Start with a flat space and clear area. Secure the frame first, then attach the canopy top. Use stakes or weights to keep it stable. Practice makes the process faster and easier.
Enjoy shade and shelter for your outdoor events. Follow these tips to have a safe, sturdy tent every time. Ready for your next outdoor gathering? A well-set canopy makes all the difference.