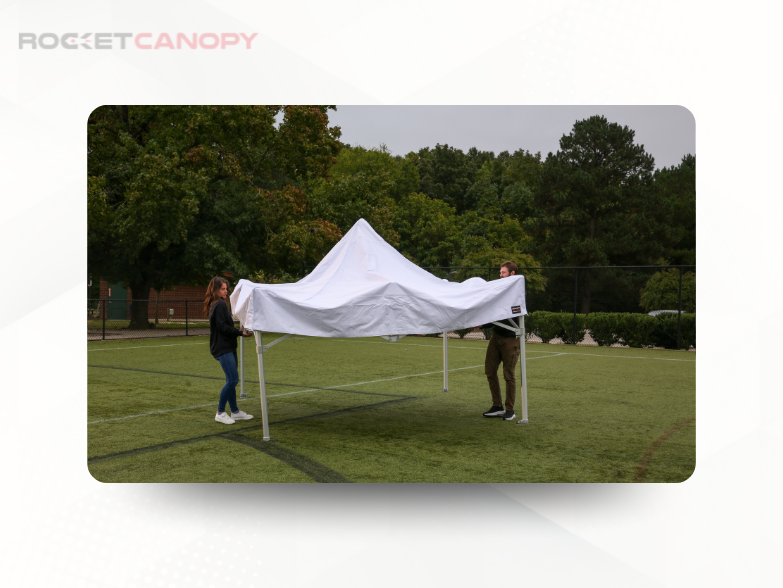
Setting up a canopy tent by yourself might sound tricky, but it doesn’t have to be. Imagine having a cool, shaded spot ready in minutes—without waiting for help.
In this guide, you’ll discover simple steps that make the whole process smooth and stress-free. Whether you’re preparing for a backyard party, a market stall, or a day at the beach, you’ll learn how to do it quickly and confidently.
Keep reading, and you’ll be amazed at how easy it is to set up your canopy tent on your own!
Choosing The Right Canopy Tent
Picking the right canopy tent makes setting it up easier. It also keeps you comfortable under the shade.
Think about where you will use the tent and how often. This helps you choose the best type and size.
Types Of Canopy Tents
Canopy tents come in different styles. Some are easy to carry, while others offer more space.
- Pop-up tents open quickly and fold easily.
- Frame tents have a sturdy metal frame for strong support.
- Inflatable tents use air beams instead of poles.
- Shade sails are simple fabric covers stretched over an area.
Size And Weight Considerations
Size matters for how many people the tent can fit. Weight affects how easy it is to carry.
| Size (Square Feet) | Capacity (People) | Weight (Pounds) |
| 64 | 4 to 6 | 15 to 25 |
| 100 | 8 to 10 | 25 to 35 |
| 144 | 10 to 12 | 35 to 50 |
Materials And Durability
Canopy tents use different materials for fabric and frame. Strong materials last longer and resist weather.
- Polyester fabric is common and water-resistant.
- Vinyl fabric is thicker and blocks more sun and rain.
- Aluminum frames are light and rust-resistant.
- Steel frames are heavier but very strong.

Credit: www.rocketcanopy.com
Preparing Your Setup Area
Setting up a canopy tent by yourself starts with preparing the right area. This helps you build the tent safely and quickly.
Focus on finding a good spot, clearing any obstacles, and checking the weather. These steps make your setup easier.
Selecting A Suitable Location
Choose a flat place with enough space for your canopy tent and surrounding area. Avoid spots near trees or power lines.
- Pick level ground to keep the tent stable
- Look for open areas without overhead hazards
- Make sure there is room to move around the tent
- Avoid places prone to flooding or mud
Clearing The Ground
Remove rocks, sticks, and other debris from the setup area. This protects your tent and makes setup easier.
- Pick up sharp objects that may damage the tent floor
- Clear away loose dirt and leaves
- Flatten any bumps or holes as much as possible
- Check for insect nests or animal burrows
Checking Weather Conditions
Good weather helps you set up and keep your canopy tent safe. Check the forecast before starting.
| Weather Condition | Action |
| Strong Wind | Delay setup or secure tent with extra weights |
| Heavy Rain | Choose a sheltered spot or wait for clear skies |
| Sunny and Dry | Ideal for setup and use |
| Cold Weather | Dress warmly and check tent materials for frost resistance |
Unpacking And Organizing Parts
Setting up a canopy tent by yourself can be easy if you are organized. The first step is to unpack and organize all the parts. This ensures you have everything you need before starting the setup.
Having a clear inventory and knowing the components will make the process smoother. Let’s dive into the details.
Inventory Checklist
Before setting up the canopy tent, make sure you have all the necessary parts. This will prevent delays and ensure a smooth assembly process.
- Canopy fabric
- Frame poles
- Connecting joints
- Ground stakes
- Guy ropes
Sorting Components
Once you have all the items, it’s time to sort them. Sorting helps you find parts easily during assembly. Lay out the components in a way that makes sense to you.
| Component Type | Quantity |
| Frame Poles | 4 |
| Connecting Joints | 4 |
| Ground Stakes | 8 |
| Guy Ropes | 4 |
Tools You Might Need
Having the right tools can make setting up your canopy tent easier. Here are some tools you might find helpful.
- Rubber mallet for securing stakes
- Measuring tape for spacing
- Step ladder for height adjustments
- Wrench for tightening bolts
Assembling The Frame
Setting up your canopy tent starts with building the frame. The frame holds the entire tent structure. It must be strong and secure.
This guide focuses on three main parts: expanding the frame, locking mechanisms, and securing joints. Follow each part carefully for a safe setup.
Expanding The Frame
Begin by pulling the frame open. Most canopy frames fold like an accordion. Pull gently to avoid bending the metal.
- Stand on one side and hold the corners.
- Pull the frame outward slowly and evenly.
- Stop when the frame is wide but not fully stretched.
- Check that all parts move freely and are not stuck.
Locking Mechanisms
Locking parts hold the frame in place. Use locks to keep the frame from folding back. Locks may be buttons, pins, or clips.
- Press buttons or push pins into holes.
- Make sure each lock clicks or fits firmly.
- Double check all locks before moving on.
- Do not force locks if they do not fit easily.
Securing Joints
Joints connect frame bars and keep the structure stable. Secure them tightly to prevent wobbling.
| Joint Type | How to Secure | Check |
|---|---|---|
| Hinge Joint | Lock hinges fully open | Joint is flush and locked |
| Sliding Joint | Push sliding parts until they click | No gap between bars |
| Connector Joint | Insert pins and secure clips | Clip is fastened tightly |
Attaching The Canopy
Setting up a canopy tent alone can be easy with the right steps. Attaching the canopy fabric is a key part of the process.
This guide will help you attach the canopy securely to your tent frame.
Aligning The Fabric
Place the fabric over the frame evenly. Make sure all sides hang over the edges equally.
Check that the top of the fabric is centered on the frame to avoid wrinkles or uneven spots.
Fastening Corners
Secure the fabric corners to the frame first. This locks the canopy in place and keeps it from moving.
Use straps, Velcro, or clips to attach each corner tightly to the frame.
- Start with one corner and move diagonally across
- Pull the fabric slightly as you fasten each corner
- Ensure each corner is fastened firmly to prevent sagging
Adjusting Tension
Tighten the fabric by adjusting the straps or clips. The canopy should be smooth without wrinkles.
Check all sides and corners again. Adjust any loose areas to keep the fabric taut and stable.
- Pull straps evenly on each side
- Double-check corners after tightening
- Make small adjustments to avoid tearing the fabric

Credit: www.customtent.com
Securing The Tent
Setting up a canopy tent is only part of the job. Securing it well is important to keep it safe and steady. A properly secured tent will stay in place and protect you from wind and weather.
Use different ways to hold down your tent. This guide explains how to use stakes, ropes, anchors, and weights for the best stability.
Using Stakes And Ropes
Stakes and ropes are the most common tools to secure a tent. Stakes go into the ground to hold the tent legs or corners. Ropes tie the tent to the stakes or other fixed objects.
Make sure the stakes are driven deep into firm soil. Tie ropes tightly but leave some slack to avoid tearing. Check that ropes do not trip people walking nearby.
- Use strong metal stakes for better hold
- Drive stakes at a 45-degree angle for extra grip
- Attach ropes to tent loops or grommets
- Tighten ropes evenly on all sides
Anchoring For Windy Conditions
Wind can make your tent move or even blow away. Anchoring helps keep it safe during strong gusts. Use heavy-duty anchors if the ground is soft or sandy.
Place anchors away from the tent at an angle. This gives better resistance against wind pull. Regularly check anchors and tighten ropes if needed.
- Use screw anchors for loose soil
- Place anchors opposite the wind direction
- Check and retighten anchors during windy days
Adding Weight For Stability
Weights add extra support to your tent, especially on hard surfaces. Sandbags, water weights, or heavy blocks work well to hold down tent legs.
Place weights on each leg and make sure they are stable. This method prevents the tent from shifting or lifting in strong winds.
- Use sandbags or water weights around legs
- Choose weights heavy enough for your tent size
- Check that weights do not block walkways
Final Adjustments And Checks
After setting up your canopy tent, you must make final adjustments. These checks help keep your tent safe and sturdy.
Spend time testing stability, adjusting height, and inspecting for safety before using the tent.
Testing Stability
Check if your canopy tent stands firm on the ground. Push gently on different sides to see if it moves or wobbles.
- Press down on each leg to test strength.
- Look for any loose joints or parts.
- Ensure all stakes are secure in the ground.
- Tighten any loose screws or bolts.
Adjusting Height
Set the canopy height to fit your needs. Make sure all legs are even to avoid tilting.
| Height Setting | Purpose |
| Lowest | Use for windy days or low clearance |
| Medium | Most common height for shade |
| Highest | Allows more headroom and airflow |
Inspecting For Safety
Look closely at all parts of the canopy for safety risks. Fix issues before using the tent.
- Check for torn fabric or holes in the canopy cover.
- Make sure all locking pins are in place and secure.
- Confirm ropes and tie-downs are tight and untangled.
- Clear the area around the tent of sharp objects or debris.
Tips For Solo Setup
Setting up a canopy tent alone can feel hard but is possible with the right approach. Simple tips help you save time and stay safe.
This guide focuses on how to use tools, save time, and keep safety in mind during a solo setup.
Using Support Tools
Support tools make lifting and holding the tent easier. Use items like clamps, ropes, or straps to keep parts stable. A folding stool or small ladder can help you reach higher areas safely.
- Use clamps to hold tent fabric in place.
- Secure ropes to stakes for extra support.
- Employ a stool or ladder to reach top parts.
- Keep a mallet handy for driving stakes.
Time-saving Techniques
Plan your setup before starting. Lay out all parts and tools in order. This helps avoid searching for pieces during setup.
| Task | Tip |
| Unfolding Tent | Do it on soft ground to avoid damage. |
| Raising Frame | Lift from the center to balance the weight. |
| Securing Canopy | Attach clips firmly before lifting. |
| Anchoring Tent | Use stakes on all corners for stability. |
Safety Precautions
Safety is key when working alone. Avoid rushing and use protective gear. Keep the area clear to prevent trips. If weather changes, pause setup and secure the tent.
- Wear gloves to protect your hands.
- Clear debris from your work area.
- Check weather forecast before setup.
- Keep a phone nearby in case of emergency.

Credit: www.eaglepeak.com
Frequently Asked Questions
How Do I Choose The Right Canopy Tent Size?
Choosing the right size depends on your space and purpose. Measure the area and consider the number of people. Standard sizes range from 10×10 to 20×20 feet. Pick a size that allows easy movement and fits your event needs.
What Tools Do I Need To Set Up A Canopy Tent?
Most canopy tents require no special tools. Basic models use hand assembly with push-button locks. For larger tents, you might need a mallet or hammer to secure stakes. Always check the manufacturer’s instructions for specific tool recommendations.
How Can I Secure My Canopy Tent In Windy Conditions?
Use heavy-duty stakes or weights to anchor the tent. Attach guy ropes to sturdy points around the tent. Avoid setting up in extremely windy weather. Proper securing prevents damage and ensures safety during use.
How Long Does It Take To Set Up A Canopy Tent Alone?
Setup time varies by tent size and design. Small tents typically take 10-20 minutes. Larger or more complex tents may take 30-45 minutes. Practice and preparation can speed up the process significantly.
Conclusion
Setting up a canopy tent by yourself is doable with the right steps. Take your time and follow each part carefully. Stay organized and check your tools before starting. Remember to secure all corners firmly for safety. You can enjoy your outdoor space quickly and easily.
Practice makes the process faster and less stressful. Soon, putting up a canopy tent will feel natural. Enjoy your shaded area and the outdoors comfortably.