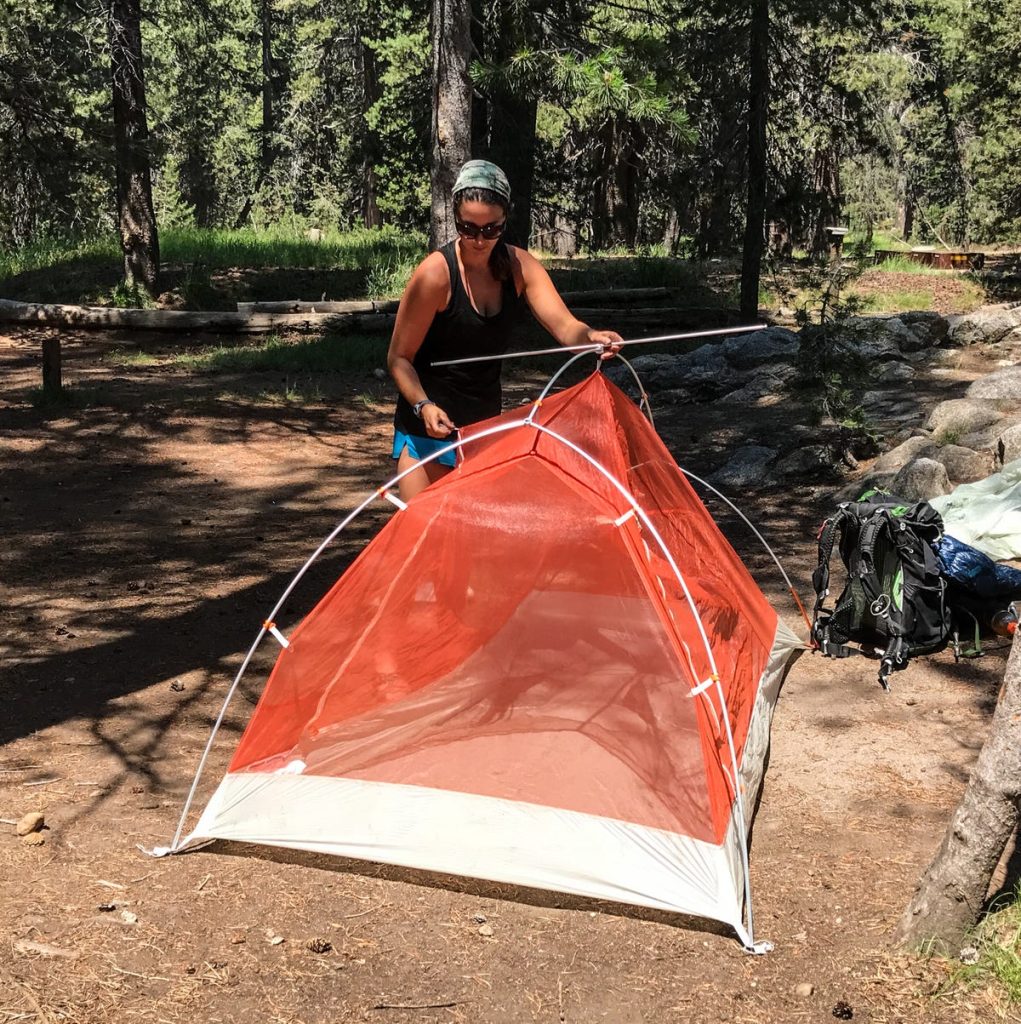
Are you ready to enjoy the great outdoors but unsure how to set up your tent? Pitching a tent might seem tricky at first, but with the right steps, you can do it quickly and confidently.
Imagine waking up in your cozy shelter, protected from the wind and rain, feeling proud of your camping skills. In this guide, you’ll learn simple, clear instructions that make pitching a tent easy—whether you’re a beginner or just need a refresher.
Keep reading, and soon you’ll be ready to create your perfect outdoor home in no time.
Choosing The Right Spot
Picking the best place to pitch your tent is important for comfort and safety. A good spot helps you stay dry and sleep well.
Look closely at the ground and surroundings before you set up your tent. This guide will help you choose the right spot.
Look For Flat Ground
Choose ground that is flat and even. This will keep your tent stable and make sleeping easier.
- Check for bumps or holes that can be uncomfortable.
- Avoid slopes where you might slide or roll in your sleep.
- Clear rocks and sticks before pitching your tent.
Avoid Hazards
Stay away from places that can cause danger or damage to your tent and gear.
| Hazard | Reason to Avoid |
| Dead Trees | Branches can fall and hurt you |
| Ant Hills | Insects may bite or crawl inside your tent |
| Low Areas | Water may collect and flood your tent |
| Steep Cliffs | Risk of falling or strong winds |
Consider Wind Direction
Set your tent so the door faces away from the wind. This helps keep the inside dry and warm.
Tips for wind:
- Use natural windbreaks like trees or rocks.
- Secure your tent stakes tightly to prevent blowing away.
- Avoid open ridges where wind is strongest.

Credit: www.yahoo.com
Preparing The Ground
Getting the ground ready is key for a good tent setup. A flat, clean surface helps keep your tent safe and comfortable.
This guide covers how to clear debris, level the surface, and lay a groundsheet before pitching your tent.
Clear Debris
Remove sticks, rocks, and sharp objects from the area. These can damage your tent floor or make sleeping uncomfortable.
- Pick up any sharp stones or glass
- Clear fallen branches and twigs
- Remove leaves and loose dirt patches
- Check for insect nests or animal burrows
Level The Surface
A flat surface prevents your tent from tipping or water pooling inside. Use your hands or a small tool to smooth the ground.
| Task | Why It Matters |
| Remove bumps and holes | Improves tent stability |
| Fill low spots with soil | Prevents water collection |
| Press down soft soil | Creates firm base for tent stakes |
Lay A Groundsheet
Place a groundsheet under your tent to protect it from moisture and wear. This layer adds comfort and keeps your tent clean.
Tips for laying a groundsheet:
- Choose a groundsheet slightly smaller than your tent floor
- Spread it flat to avoid folds
- Secure edges with stones or stakes
- Keep it dry and clean before use
Unpacking And Sorting
Getting ready to pitch a tent starts with unpacking your gear. Make sure you have all the parts before you begin setting up. Organizing the components will make the process smoother and faster.
Once everything is sorted, you can focus on assembling the tent correctly. Knowing where each part goes is key to a successful setup.
Check Tent Components
Before you start, check that you have all the tent components. Missing parts can cause problems during setup and can leave you without shelter.
Lay out each piece in a clear, open space. This helps you see everything and ensures nothing is missing.
- Check the tent body for damage.
- Ensure all poles are present and intact.
- Count the stakes to match the required amount.
- Look for the rainfly and any necessary accessories.
Organize Stakes And Poles
Stakes and poles are essential for your tent’s structure. Organizing them will help you assemble the tent quickly.
Group similar items together. This makes it easy to find what you need when you need it.
- Lay out poles in order of use.
- Separate stakes into a pile for easy access.
- Check for any damaged parts and replace them if necessary.
Setting Up The Tent
Setting up your tent correctly makes camping safer and more comfortable. Follow simple steps to pitch your tent with ease.
Focus on assembling the poles, attaching the tent body, and securing the corners firmly.
Assemble Poles
Start by laying out all the tent poles. Most poles connect with elastic cords inside.
Fit the poles together by joining each section until you have full-length poles.
- Check each pole for damage before use
- Connect sections carefully to avoid bending
- Organize poles by length if needed
Attach Tent Body
Spread the tent body flat on the ground. Align it with the tent footprint if you have one.
Slide the poles through the tent sleeves or clip the body to the poles. This holds the tent upright.
- Thread poles through sleeves gently
- Secure clips firmly on each pole
- Make sure the tent body is taut
Secure Corners
Find the tent corners with loops or grommets. Attach them to the tent stakes or pegs.
Hammer stakes into the ground at a 45-degree angle. Pull the tent fabric tight for stability.
- Use a mallet or rock to drive stakes in
- Check that all corners are secure
- Tighten guy lines if your tent has them
Raising The Tent
Raising a tent is an important part of camping. It creates a shelter to keep you safe and dry. Follow simple steps to raise your tent properly.
Start by handling the tent poles carefully. Then shape the tent and secure it to the ground. This will keep your tent stable during your stay.
Insert Poles Into Sleeves
First, lay your tent flat on the ground. Find the poles that came with your tent. Slide each pole into the matching sleeve on the tent fabric.
Make sure the pole fits all the way through the sleeve. This helps the tent keep its shape. Check that the poles are not bent or broken before inserting.
Lift And Shape
Once the poles are in place, gently lift the tent by the poles. This will start to give the tent its form. Move carefully to avoid pulling the fabric too hard.
Adjust the poles so the tent stands upright. The tent should feel tight and stable. This step makes the tent ready to be anchored to the ground.
Stake Down
After the tent is shaped, use stakes to fix it to the ground. Place stakes through the loops at the tent’s base. Push them firmly into the soil.
- Start with the corners of the tent
- Pull the tent fabric tight before staking
- Check all stakes are secure and straight
- Use extra stakes if the ground is soft or windy

Credit: stouttent.com
Adding The Rainfly
The rainfly is an extra layer that protects your tent from rain. It keeps you dry during wet weather.
Placing the rainfly correctly is important for good shelter and comfort. Follow these tips to add it right.
Position The Rainfly
First, spread the rainfly over the tent roof. Make sure it covers the tent fully, including all sides.
Check that the rainfly’s door matches the tent’s door. This allows easy entry and exit without getting wet.
Secure Attachments
Attach the rainfly to the tent poles or hooks tightly. This prevents it from blowing away in wind.
- Use clips or Velcro straps to fasten the rainfly
- Secure all corners firmly to the ground or tent base
- Tighten guylines if your rainfly has them
Check all points to avoid gaps where rain can enter. A well-secured rainfly keeps water out.
Check Ventilation
Good airflow helps reduce condensation inside the tent. Make sure vents are open and not blocked.
- Leave space between the rainfly and tent walls
- Use rainfly vents if available
- Avoid sealing the rainfly too tight
Proper ventilation keeps you comfortable and your tent dry from inside moisture.
Final Adjustments
After setting up your tent, it is important to make final adjustments. These small steps help keep your tent stable and comfortable.
Check everything carefully to ensure your tent is safe and ready for use.
Tighten Guy Lines
Tighten the guy lines to secure the tent in place. Loose lines can make the tent shaky or collapse in wind.
Pull each line firmly and tie it tightly to a stake or anchor point. Adjust the tension as needed for even support.
- Check all guy lines for slack
- Pull lines tight but avoid over-stretching
- Tie strong knots to prevent slipping
- Recheck after windy conditions
Double-check Stakes
Make sure all stakes are fully driven into the ground. Partially placed stakes can come loose and cause the tent to fall.
Press the stakes at a slight angle away from the tent for better hold. Use a hammer or rock if needed to secure them well.
- Check each stake’s depth
- Drive stakes at a 45-degree angle
- Confirm stakes hold firm in the soil
- Replace any bent or weak stakes
Organize Interior
Arrange your gear inside the tent neatly. This keeps the space clear and makes your stay comfortable.
Place sleeping bags and mats evenly. Store backpacks and shoes near the tent entrance to save room.
- Lay out sleeping areas first
- Keep walkways clear inside tent
- Store gear in corners or vestibules
- Use small containers for loose items
Tips For A Comfortable Campsite
Pitching a tent is just the start of a great camping trip. Creating a comfortable campsite makes your stay more enjoyable.
Simple setups can help you cook, relax, and keep your gear safe and dry. These tips will help you do that.
Set Up A Cooking Area
Choose a flat spot away from your tent for cooking. This keeps smoke and smells out of your sleeping area.
Clear leaves and sticks to avoid fire hazards. Use a portable stove or fire pit for cooking.
- Keep cooking tools organized and close by
- Store food in sealed containers to avoid animals
- Have water nearby for cleaning and safety
Create A Seating Space
Pick a dry, level spot for seating near your tent and cooking area. Use camping chairs or a blanket.
Arrange seats to face each other for easy conversation. Keep the area tidy to avoid tripping.
- Bring cushions or pads for extra comfort
- Set up a small table for drinks and snacks
- Use a tarp or canopy for shade if possible
Keep Gear Dry
Store your gear under a tarp or inside waterproof bags. This protects items from rain and damp ground.
Elevate gear off the ground using logs or a small platform. Keep wet clothes separate from dry ones.
- Use waterproof containers for electronics and food
- Check weather updates to prepare for rain
- Keep your tent door closed when not in use

Credit: woodsworthexploring.co.uk
Frequently Asked Questions
How Do You Choose The Best Spot To Pitch A Tent?
Choose a flat, dry area free of rocks and debris. Avoid low spots that collect water. Look for natural windbreaks like trees or bushes to protect your tent.
What Equipment Is Essential For Pitching A Tent?
You need tent stakes, poles, a rainfly, and a ground tarp. These items ensure stability, weather protection, and comfort while camping.
How Can You Secure A Tent Against Strong Winds?
Use sturdy stakes and guy lines to anchor your tent. Tighten all straps and avoid pitching near unstable trees. Position the tent with the narrow end facing the wind.
What Is The Proper Way To Set Up Tent Poles?
Insert poles carefully into corresponding tent sleeves or clips. Ensure they are fully extended and locked. This creates a stable frame that supports the tent fabric.
Conclusion
Pitching a tent can be simple with the right steps. Choose a flat, clear spot first. Lay out your tent and secure the corners tightly. Use stakes to keep it steady in the wind. Always check the tent poles and fabric for damage.
Practice a few times before your trip. Enjoy your camping experience with a safe and cozy shelter. A well-pitched tent makes outdoor adventures more fun and relaxing. Keep these tips in mind to camp comfortably every time.