Are you looking for a simple way to make your meetings, parties, or classrooms more organized and personal? Making name tents is an easy and creative solution that anyone can do.
Imagine having your guests or students feel welcomed the moment they see their own name right in front of them. In this guide, you’ll discover step-by-step tips to create name tents that stand out, save you time, and make a great impression.
Keep reading, and you’ll learn how to turn a small piece of paper into a powerful tool for connection and clarity.
Materials Needed
Making name tents is easy and fun. You only need a few materials to create clear and neat tents.
Gathering the right supplies helps your name tents look great and last longer.
Choosing The Right Paper
Pick paper that stands up well when folded. Thick paper holds its shape better than thin paper.
White or light-colored paper makes names easy to read. Avoid very glossy papers that can reflect light.
- Cardstock (around 80-110 lb weight)
- Construction paper for color options
- Matte finish paper for less shine
- Standard printer paper for easy printing
Essential Tools
Use simple tools to cut and write on the name tents. These tools keep your work neat and fast.
- Scissors or paper cutter to trim paper
- Ruler for straight folds and cuts
- Markers or pens for writing names
- Printer if you want typed names
Optional Decorative Items
Add decorations to make name tents more fun or match a theme. Use items that are easy to attach.
- Stickers for simple designs
- Colored tape for borders
- Stamps with ink pads for patterns
- Glitter pens for sparkle
Basic Folding Techniques
Making name tents is easy with simple folding techniques. These folds help your name tents stand firmly on tables.
Learn three common folds that work well for name tents. Each fold has a unique shape and style.
Simple Tent Fold
The simple tent fold is the classic shape for name tents. It looks like a small house or a tent.
Fold a piece of paper in half lengthwise. Then fold it again in the middle to create a tent shape.
Triangle Fold
The triangle fold creates a strong, triangular base. It is stable and easy to read from both sides.
- Start with a rectangular sheet of paper.
- Fold one corner diagonally to the opposite edge.
- Fold the other corner in the same way, forming a triangle.
- Crease all folds well to keep the shape firm.
Standing Fold
The standing fold uses two folds to stand upright without support. It looks neat on any table.
| Fold Action | Description |
| First Fold | Fold the paper in half widthwise. |
| Second Fold | Fold the bottom edge up about one third. |
| Final Shape | The tent stands on the folded base. |
Design Ideas
Creating name tents can be fun and creative. There are many ways to design them to suit any occasion. Let’s explore some unique styles and templates you can use.
Handwritten Styles
Handwritten styles add a personal touch to name tents. They can be artistic and unique.
- Use colorful markers to make names stand out
- Add small doodles or drawings for decoration
- Experiment with different handwriting fonts
Printed Templates
Printed templates offer a professional look. They are easy to create using a computer.
| Template Type | Usage |
| Formal | Business meetings |
| Casual | Family gatherings |
| Themed | Parties |
Using Calligraphy
Calligraphy adds elegance to name tents. It requires practice but looks stunning.
Here is a simple calligraphy tip: Use a dip pen for fine lines and a brush pen for thicker strokes.
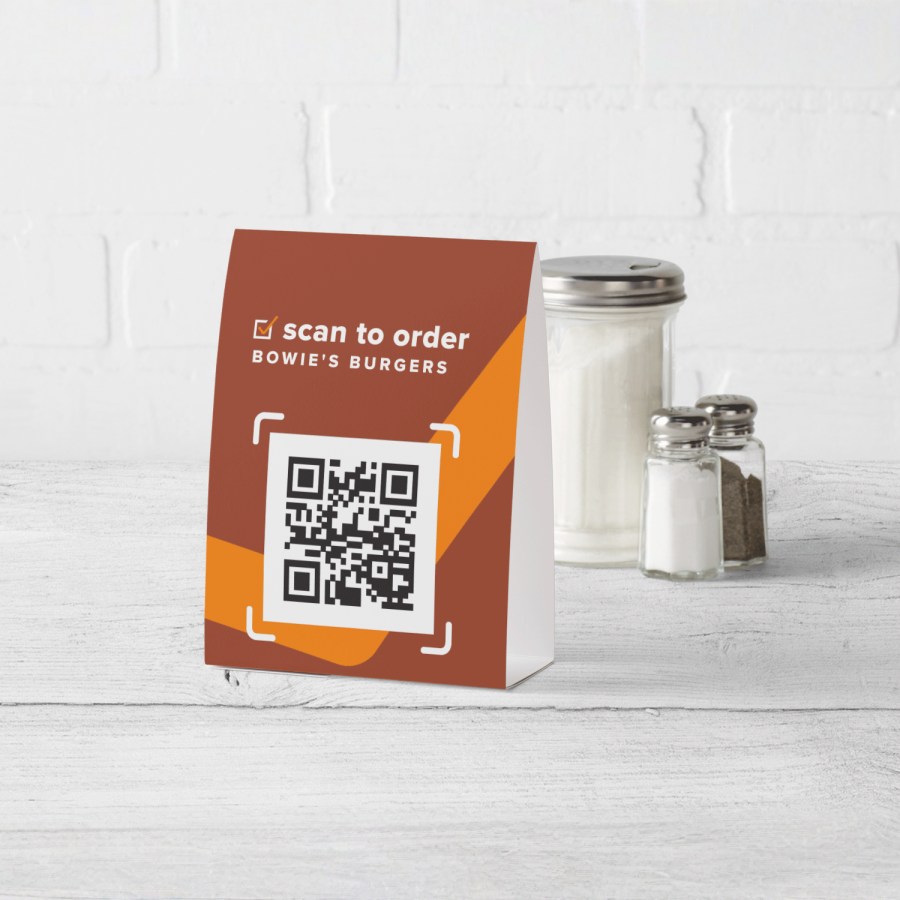
Credit: www.vistaprint.ca
Personalizing Name Tents
Name tents help people find their seats easily. Personalizing them makes events more fun and welcoming.
You can add colors, themes, and decorations to match the occasion or personality.
Adding Colors And Patterns
Use bright colors or soft pastels to catch attention. Patterns add style and make name tents unique.
- Choose colors that match the event’s mood
- Use stripes, polka dots, or chevron patterns
- Combine solid colors with patterned borders
- Try watercolor or gradient effects for a soft look
Incorporating Themes
Themes tie the name tents to the event. They create a consistent and fun atmosphere.
| Theme | Color Ideas | Design Tips |
| Beach | Blue, Sand, Coral | Use seashell shapes and waves |
| Garden | Green, Pink, Yellow | Add flower stickers or leaf patterns |
| Space | Black, Silver, Purple | Include stars and planet drawings |
| Birthday | Bright Rainbow | Use balloons and confetti designs |
Using Embellishments
Embellishments add texture and interest. They make name tents stand out.
- Attach small ribbons or bows to corners
- Use glitter pens to write names
- Glue on buttons, beads, or stickers
- Try washi tape for colorful borders
Tips For Perfect Placement
Placing name tents correctly helps guests find their seats easily. Good placement makes your event look organized and welcoming.
Use these tips to position name tents well at your table settings for a smooth seating experience.
Aligning With Table Settings
Place name tents so they match the table layout. Keep them near the center of each guest’s plate or place setting.
- Set tents in front of each plate, not behind or to the side
- Keep name tents upright and stable
- Match tent size with the table size and decoration style
- Avoid blocking utensils or glassware
Ensuring Visibility
Make sure guests can see their names without bending or moving items. Visibility is key for easy seat finding.
| Tip | Why It Helps |
| Use clear, large fonts | Names are easy to read from a distance |
| Place tents at eye level | Guests spot their names quickly |
| Avoid glare or shadows | Names stay visible under lighting |
| Use contrasting colors | Text stands out from the background |
Considering Guest Preferences
Think about your guests’ needs when placing name tents. Comfort and ease improve their experience.
- Place tents so guests with glasses or limited vision can read easily
- Keep name tents away from hot dishes or drinks
- For kids, use fun colors and place tents where parents can see them
- Adjust placement for guests with mobility aids to avoid crowding
Creative Variations
Name tents add a personal touch to any event or classroom. You can make them in many creative ways to fit your style.
Try different materials and designs to create unique name tents. Here are some ideas to inspire you.
Eco-friendly Materials
Using eco-friendly materials makes your name tents better for the planet. Choose recycled or natural items to keep it green.
- Recycled cardboard or paper
- Bamboo sheets or thin wood pieces
- Fabric scraps from old clothes
- Biodegradable markers or paints
- Leaves or pressed flowers for decoration
Interactive Elements
Add interactive parts to make name tents fun and useful. This helps people learn names and start conversations.
| Interactive Feature | How to Use |
| Flip panels | Write fun facts under a flap |
| Chalkboard paint | Let guests write messages |
| Attachable magnets | Hold small notes or photos |
| Pop-up designs | Add 3D shapes that stand up |
Seasonal Designs
Change your name tents to match seasons or holidays. This adds charm and fits the event mood.
Try these seasonal decoration ideas:
- Spring: Pastel colors and flower stickers
- Summer: Bright colors and sun shapes
- Fall: Leaf cutouts and warm tones
- Winter: Snowflakes and silver glitter
Troubleshooting Common Issues
Making name tents can be simple, but sometimes problems happen. These issues can affect how your name tents look and work.
Knowing how to fix common problems saves time and makes your name tents neat and strong.
Paper Stability Problems
Name tents need sturdy paper to stand well. Thin or weak paper can bend or fall easily.
Use thicker paper or card stock for better stability. Also, fold the paper sharply to help it stand.
- Choose card stock over regular paper
- Make sharp, clean folds
- Use a ruler or bone folder to crease the paper
- Avoid using too large or heavy decorations
Ink Smudging Solutions
Ink can smudge if the paper is wet or if the ink is slow to dry. Smudges make name tents look messy.
Print or write on dry paper and let the ink dry fully before handling. Use quick-drying ink or markers to reduce smudging.
- Wait a few seconds before folding or touching the ink
- Use fast-drying pens or markers
- Avoid rubbing the ink while it is wet
- Print on quality paper that absorbs ink well
Fixing Uneven Folds
Uneven folds make name tents look crooked and unstable. This happens when paper is folded without guides.
Use a ruler or folding tool to make straight, even folds. Fold on a flat surface to keep edges aligned.
- Measure and mark fold lines lightly with pencil
- Use a ruler to guide the fold
- Fold slowly and press firmly along the crease
- Practice folding on scrap paper first

Credit: www.teacherspayteachers.com

Credit: www.teacherspayteachers.com
Frequently Asked Questions
What Materials Do I Need To Make Name Tents?
You need cardstock or thick paper, scissors, markers, and a ruler. Optional items include stickers and decorative tape. These materials help create sturdy, clear, and attractive name tents for any event.
How Do I Fold A Name Tent Correctly?
Fold the paper in half lengthwise to create a tent shape. Ensure the edges align perfectly for stability. This fold allows the name tent to stand upright on tables.
Can I Customize Name Tents For Different Occasions?
Yes, customize colors, fonts, and decorations to match your event theme. Personalizing name tents adds a professional and welcoming touch. Use event-specific designs for more impact.
How Long Does It Take To Make Each Name Tent?
Making a simple name tent takes about 5 minutes. Decorating may add extra time depending on complexity. Efficient preparation ensures all tents are ready before your event.
Conclusion
Making name tents is simple and fun. Use paper, markers, and creativity. Fold the paper to stand on its own. Write names clearly and decorate if you want. Name tents help people find their seats fast. They also add a nice touch to any event.
Try different styles to match your occasion. Practice a few times for neat results. Soon, you will make name tents with ease. Enjoy personalizing your space with these easy crafts.