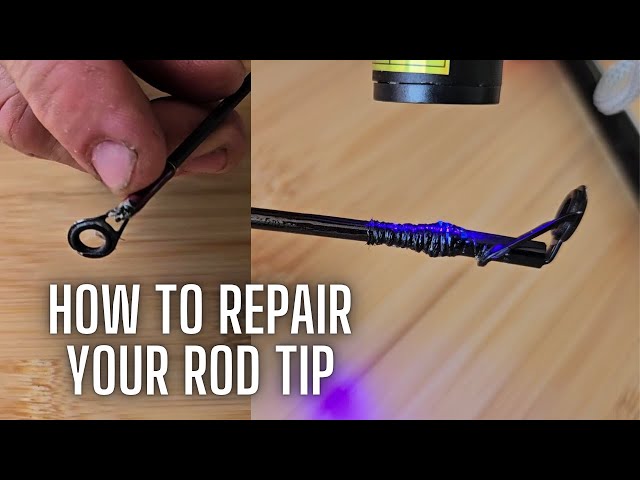
Your fishing rod tip is more than just the end of your rod—it’s the part that connects you to every catch. When it breaks or bends, it can ruin your entire fishing experience.
But don’t worry, fixing it is easier than you think. You’ll discover simple, step-by-step ways to repair your fishing rod tip quickly and get back to doing what you love. Keep reading, and you’ll learn how to save your rod without spending a fortune or waiting for professional help.
Identify The Damage
Fixing a fishing rod tip starts with finding the damage. Careful checks help know what needs repair.
Look closely at the rod tip to see cracks, broken parts, or worn guides. These signs show where the problem is.
Check For Cracks And Breaks
Cracks or breaks in the rod tip weaken its strength. Small cracks can grow bigger over time and cause the rod to snap.
- Run your fingers along the tip to feel for rough spots or breaks.
- Look for shiny lines or discoloration that show cracks.
- Use a bright light to see small cracks clearly.
Assess Guide Ring Condition
The guide rings hold the fishing line and help it move smoothly. Damaged rings can cut the line or cause poor casting.
| Condition | Effect |
| Cracked ring | Line may fray or break |
| Loose ring | Rod balance is affected |
| Missing ring | Line can tangle or catch |
| Rusty ring | Line gets damaged easily |
Inspect The Tip Top
The tip top is the last guide at the rod’s end. It is very important for line control and casting.
Check the tip top for these issues:
- Is the tip top bent or misshaped?
- Does it feel loose or wobble?
- Is the ring inside smooth and free of cracks?
If you spot any damage, the tip top may need replacement or repair.
Gather Repair Tools
Fixing a fishing rod tip needs the right tools. Getting these tools ready helps you work faster and better.
Some tools are must-haves. Others help make the repair easier or last longer.
Essential Materials Needed
You need these materials to fix the fishing rod tip properly. They help hold the tip in place and protect it.
- Replacement rod tip guide
- Rod tip adhesive or super glue
- Sandpaper or fine file
- Clean cloth
- Rubbing alcohol
Optional Tools For Better Results
These extra tools are not required but can improve your repair quality and ease the process.
| Tool | Purpose |
| Heat gun or hair dryer | Softens adhesive for easier removal |
| Small pliers | Helps remove old rod tip safely |
| Masking tape | Protects rod surface during repair |
| Fine paintbrush | Applies glue evenly |
| Magnifying glass | Helps see small details clearly |
Remove The Damaged Tip
Fixing a broken fishing rod tip is simple. Removing the damaged tip is the first step. Follow the guidelines to ensure smooth removal.
Proper removal avoids further damage to the rod. It also prepares the rod for a new tip installation.
Soften The Adhesive
Adhesive holds the tip to the rod. You need to soften it before removal. Heat is a safe way to do this.
Use a lighter or candle. Gently heat the tip area. This softens the adhesive for easy removal.
- Keep the flame moving to avoid damage
- Avoid overheating the rod itself
- Test the adhesive softness with gentle pressure
Careful Tip Removal Techniques
After softening the adhesive, remove the tip carefully. Use pliers or your hands for this task. The goal is to avoid damaging the rod or blank.
Grip the tip firmly, but not too tightly. Twist gently back and forth while pulling. This action helps loosen the tip from the rod.
- Ensure your grip is steady
- Work slowly to avoid snapping the rod
- Inspect the rod for adhesive residue

Credit: www.reddit.com
Select A Replacement Tip
Fixing a broken fishing rod tip starts with choosing the right replacement. Picking a tip that fits well ensures your rod works properly again.
This guide helps you find the correct size and style. It also points out where to buy good replacement tips.
Matching Size And Style
The new tip must match the original in size and style. This keeps your rod balanced and strong.
- Measure the diameter of the broken tip’s base.
- Match the length of the new tip to the original.
- Choose a style that fits your fishing type, like ceramic or metal.
- Check if the tip fits the rod’s action and power.
Where To Buy Replacement Tips
You can find replacement tips at several places. Each has options for quality and price.
| Place | What to Expect |
| Local tackle shops | Personal help, immediate purchase |
| Online fishing stores | Wide selection, reviews available |
| General e-commerce sites | Competitive prices, varied brands |
| Rod manufacturers | Exact matches, higher price |
Attach The New Tip
Attaching a new tip to your fishing rod helps restore its performance. It is important to do this carefully for a strong hold.
The process involves applying adhesive and aligning the tip properly. Follow the steps to ensure the new tip fits well.
Apply Adhesive Properly
Use a suitable adhesive made for fishing rods. Avoid using too much glue as it may cause a mess and weaken the bond.
- Clean the rod end before applying glue.
- Apply a thin, even layer of adhesive inside the new tip.
- Do not overfill the tip with glue.
- Use a small brush or applicator for better control.
- Allow the adhesive to become tacky before sliding the tip on.
Secure And Align The Tip
Proper alignment keeps the fishing line straight and prevents damage. Secure the tip firmly after placing it.
| Task | Instructions |
| Position the Tip | Slide the tip onto the rod end carefully. |
| Check Alignment | Make sure the tip lines up with other guides. |
| Secure the Tip | Hold the tip firmly in place for a few minutes. |
| Let Dry | Leave the rod to dry as per adhesive instructions. |

Credit: anglersresource.net
Let The Repair Set
After fixing your fishing rod tip, it is important to let the repair set properly. This ensures the glue or epoxy hardens well. A strong bond will prevent future breaks and keep your rod working.
Patience during this time helps the repair last longer. Avoid using the rod until the repair is fully dry and set.
Drying Time Guidelines
Drying time depends on the type of adhesive used and the environment. Follow these general guidelines to get the best result.
- Use epoxy? Let it dry for at least 24 hours.
- Super glue usually sets in 10 to 30 minutes, but full strength takes a few hours.
- Keep the rod in a warm, dry place to speed up drying.
- Do not touch or move the tip during drying time.
- Avoid exposing the repair to water before it is fully dry.
Avoiding Common Mistakes
Many repairs fail because of simple mistakes. Avoid these to make sure your fix holds well.
| Common Mistake | How to Avoid |
| Using too much glue | Apply a thin, even layer to avoid weak spots |
| Not cleaning the broken tip | Clean and dry the area before gluing |
| Moving the tip while drying | Keep the rod still until the adhesive sets |
| Exposing repair to water early | Wait full drying time before fishing again |
| Ignoring temperature and humidity | Dry in a warm, dry place for best results |
Test The Rod
Testing your fishing rod tip is important after repairs. It helps you know if the fix worked well.
Try simple checks before using the rod in water. This saves time and avoids more damage.
Check For Stability
Hold the rod tip firmly and gently move it up and down. It should not wobble or feel loose. If it shakes, the repair needs more work.
- Look for cracks or splits around the tip.
- Ensure the tip is tightly attached to the rod.
- Press lightly to check if it bends evenly.
- Compare the tip’s movement with the rest of the rod.
Ensure Smooth Casting
Cast your line slowly to feel if the tip moves smoothly. Rough or jerky motions mean the tip is not fixed well.
| Test Action | What to Expect | Problem Signs |
| Slow casting | Even, smooth movement | Jerks or catches |
| Line release | Line flows freely | Line snags or sticks |
| Rod flex | Tip bends with rod | Tip stays rigid or loose |
Prevent Future Damage
Fixing your fishing rod tip is only part of care. You need to protect your rod from damage next time.
Proper storage and regular maintenance keep your rod strong and ready for use.
Proper Rod Storage
Store your fishing rod in a dry place away from direct sunlight. Avoid leaning it against walls, which can bend the rod tip.
- Use rod racks or holders to keep rods straight
- Keep rods in protective sleeves or tubes
- Store rods horizontally or hang them vertically by the handle
- Keep rods away from heat sources and moisture
Regular Maintenance Tips
Check your fishing rod often for cracks or loose parts. Clean it after every trip to remove dirt and salt.
| Maintenance Task | Frequency | Purpose |
| Clean rod guides and tip | After each use | Remove dirt and salt to prevent corrosion |
| Inspect rod tip and guides | Monthly | Find cracks or damage early |
| Tighten reel seat | Monthly | Ensure reel stays secure |
| Apply light oil to metal parts | Every 3 months | Prevent rust |

Credit: www.youtube.com
Frequently Asked Questions
How Do I Fix A Broken Fishing Rod Tip?
To fix a broken fishing rod tip, first remove the damaged tip. Use a replacement tip that fits snugly. Secure it with strong adhesive or epoxy. Allow it to dry completely before use. This method restores your rod’s functionality quickly and cost-effectively.
What Tools Are Needed To Repair A Fishing Rod Tip?
You need replacement rod tips, epoxy glue, sandpaper, and a small knife. These tools help remove the broken tip and attach the new one securely. Having a heat source like a lighter can soften the tip for easy removal.
How Long Does It Take To Fix A Fishing Rod Tip?
Fixing a fishing rod tip usually takes 15 to 30 minutes. Drying time for adhesive can add a few hours. Proper curing ensures the repair is strong and durable. Quick fixes can get you back fishing the same day.
Can I Fix A Fishing Rod Tip Myself?
Yes, fixing a fishing rod tip is simple and doable at home. Basic tools and patience are all you need. Follow step-by-step guides carefully for best results. This saves money and extends your rod’s life.
Conclusion
Fixing a fishing rod tip is easier than it seems. Small tools and patience bring big results. A strong tip keeps your rod working well. Regular checks help spot damage early on. Taking care of your rod saves money and time.
Try these steps next time your tip breaks. Enjoy fishing without worries or interruptions. Keep your gear ready for every catch. Simple fixes make a big difference out on water.