Your tent is more than just a shelter—it’s your safe space when you’re out in nature. But what happens when it gets a tear or a broken zipper?
You might feel stuck, thinking you need to buy a new one. The good news is, you don’t. With a few simple steps, you can fix your tent quickly and easily. Imagine saving money, avoiding frustration, and getting back to your adventure faster.
Ready to learn how to repair your tent like a pro? Keep reading, because your next camping trip depends on it.
Credit: www.montbell.com
Gather Repair Materials
Fixing a tent needs the right materials to work well. Getting tools and supplies ready helps make the repair easy and strong.
Learn what to gather before you start fixing your tent. This will save time and avoid mistakes during the repair process.
Essential Tools And Supplies
You need some basic tools and supplies to repair a tent properly. Having these items ready can make the job faster and better.
- Fabric patches or repair tape
- Seam sealer or waterproof glue
- Scissors or a sharp knife
- Cleaning cloth and rubbing alcohol
- Needle and strong thread (for sewing)
- Small brush for applying glue or sealer
- Sandpaper for roughening surfaces
Choosing The Right Patch Material
Pick patch material that matches your tent fabric. This helps keep the repair strong and waterproof.
| Patch Type | Description | Best Use |
| Fabric Patch | Similar material as tent fabric | Small to medium tears or holes |
| Vinyl Patch | Strong, waterproof plastic material | Waterproof repairs on floor or rainfly |
| Repair Tape | Sticky tape for quick fixes | Temporary or emergency repairs |
| Iron-On Patch | Heat-activated adhesive patch | Lightweight fabric repairs |
Identify Damages
Checking your tent for damage is the first step before repair. Look carefully to find any problems that need fixing.
Damages can be small or large. Finding them early helps keep your tent safe and dry.
Locating Tears And Holes
Tears and holes can let rain and bugs inside your tent. Look closely at the fabric for cuts or worn spots.
Check areas that bend or fold often. These spots wear out faster and may have small holes.
- Inspect seams and corners
- Look under the tent floor
- Use a flashlight to see small holes
- Feel for rough or thin fabric
Finding Leaks In The Tent
Leaks let water inside and make camping uncomfortable. To find leaks, check inside after rain or spray water outside.
Look for wet spots or water drops on the inside fabric. These marks show where water passes through.
- Spray water slowly over tent walls
- Check for damp spots inside
- Pay attention to seams and zippers
- Look under rain fly and vestibules
Clean And Prepare Surface
Fixing a tent starts with a clean surface. Dirt or wet fabric can stop patches from sticking well.
Prepare the tent fabric carefully before repair. This helps your repair last longer and work better.
Removing Dirt And Debris
Clean the tent fabric gently to avoid damage. Use soft tools and mild cleaners for best results.
- Brush off loose dirt with a soft brush
- Use a damp cloth to wipe away stubborn spots
- Do not use harsh chemicals or bleach
- Check seams and corners for trapped debris
- Let the fabric dry before moving to the next step
Drying The Tent Fabric
Make sure the fabric is completely dry before repairing. Moisture can cause patches to peel off.
| Drying Method | How to Do It | Notes |
| Air Dry | Hang tent in a shaded, breezy area | Avoid direct sun to protect fabric |
| Towel Dry | Pat fabric gently with a dry towel | Use for quick moisture removal |
| Indoor Dry | Place tent in a dry room with good airflow | Useful on rainy days |
Credit: www.pomoly.com
Fixing Tears
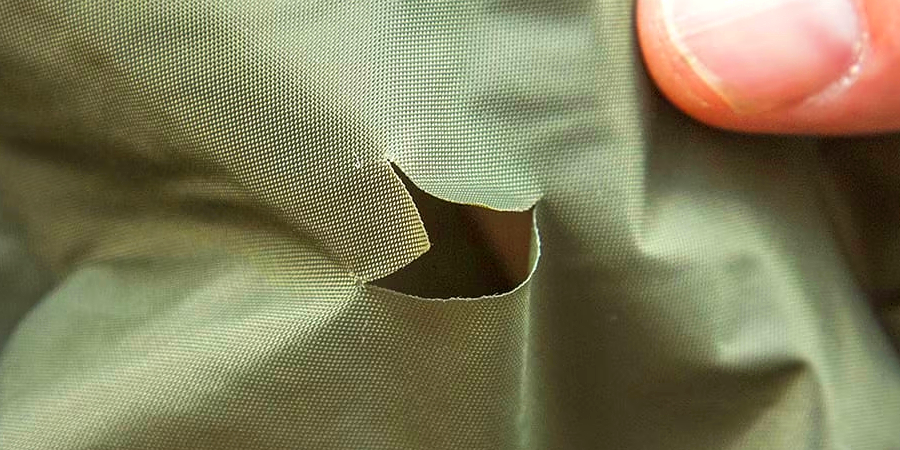
Tents can tear easily from wind, branches, or rough use. Fixing tears quickly keeps the tent waterproof and safe.
Use simple tools and materials to repair small or medium tears. This guide helps you fix your tent step by step.
Applying Tent Tape
Tent tape is a strong and sticky material made for quick repairs. It works well on clean, dry fabric to cover holes and tears.
- Clean the area around the tear with a damp cloth.
- Cut a piece of tent tape larger than the tear.
- Round the edges of the tape to stop peeling.
- Place the tape on the inside and outside of the tear if possible.
- Press firmly to remove air bubbles and ensure good adhesion.
- Let the tape set for several hours before packing the tent away.
Using Seam Sealer For Reinforcement
Seam sealer adds extra protection to taped areas. It seals tiny holes and strengthens the repair against water and wind.
| Material | Use | Dry Time |
| Silicone-based sealer | Waterproofing seams | 24 hours |
| Polyurethane sealer | Flexible sealant | 12 hours |
| Latex-based sealer | Easy to apply | 6 hours |
Apply seam sealer with a small brush. Cover edges of the tape and any exposed fabric. Let it dry fully before use.
Repairing Leaks
Tents can develop leaks over time. Fixing them helps keep you dry during your camping adventures.
There are simple ways to repair tent leaks. Let’s look at sealing seams and using waterproof sprays.
Sealing Seams And Joints
Seams and joints can let water in. Sealing them stops the leaks.
Use a seam sealer. Apply it along the inside seams. Make sure the tent is dry before you start.
- Clean the seam area first
- Apply sealer evenly with a brush
- Let it dry completely before packing
Using Waterproof Sprays
Waterproof sprays add an extra layer of protection. They are easy to use and effective.
Spray the tent fabric evenly. Cover the entire surface for best results.
- Choose a spray made for tents
- Apply in a well-ventilated area
- Wait for the tent to dry before use
Drying And Testing Repairs
Fixing a tent is only part of the job. You must dry and test your repairs carefully. This keeps the tent safe and ready for use.
Proper drying stops mold and damage. Testing repairs ensures no leaks remain. Both steps protect your tent for many trips.
Allowing Proper Drying Time
After repairing, let your tent dry fully. Wet fabric or patches can weaken the repair. Drying also stops mold growth.
- Set up the tent in a shaded, well-ventilated area.
- Avoid direct sunlight for long times to prevent fabric damage.
- Open all doors and windows to increase airflow.
- Check the repaired area daily to confirm it is dry.
- Wait at least 24 hours before packing the tent away.
Checking For Remaining Leaks
After drying, test the repairs for leaks. This step confirms your fix will hold during rain or damp weather.
| Test Method | How to Do It |
| Water Spray | Spray water on repair spots and watch for leaks inside. |
| Flashlight Test | Shine light inside tent at repair areas and look for light showing through. |
| Touch Check | Feel inside fabric for dampness or wet spots after rain. |
| Visual Inspection | Look closely at repair edges for peeling or cracks. |
Preventing Future Damage
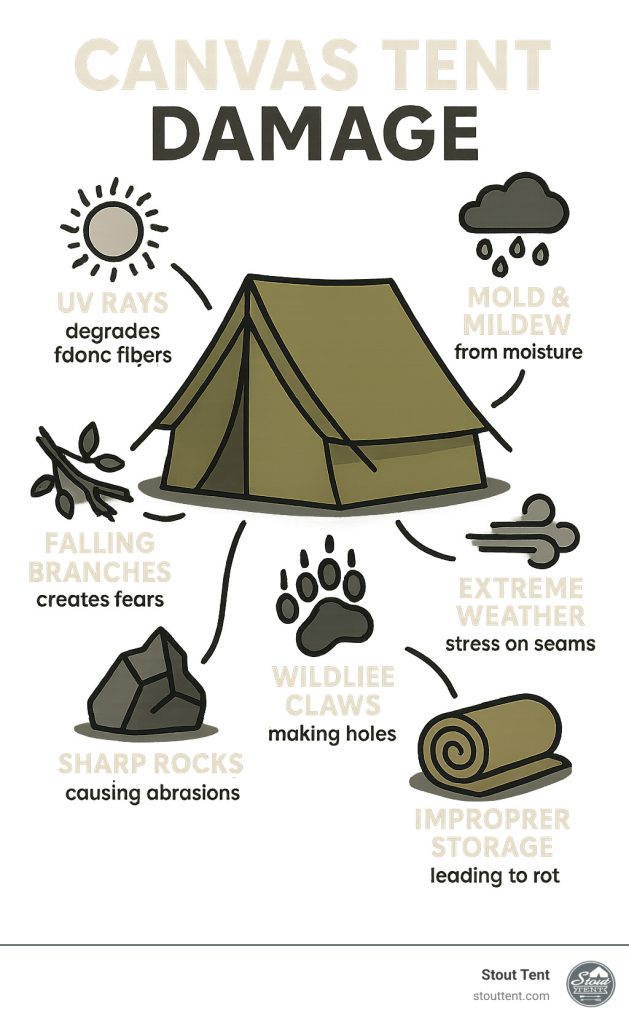
Repairing your tent is important, but preventing damage is better. Proper care extends your tent’s life. It keeps your shelter strong and safe.
Follow simple habits to avoid tears, leaks, and broken parts. Take time to set up and store your tent well.
Proper Tent Setup And Care
Choose a flat, clean area to pitch your tent. Remove sharp rocks and sticks that can poke holes. Use a groundsheet to protect the tent floor.
Make sure all poles and stakes are secure. Tighten the rainfly and guy lines to avoid flapping in the wind. Flapping causes fabric wear over time.
- Clear the site of sharp objects
- Use a groundsheet or footprint
- Secure poles and stakes firmly
- Tighten rainfly and guy lines
- Keep tent clean and dry
Storage Tips
Clean your tent before storing it. Remove dirt, sand, and moisture. Dry the tent completely to stop mold and mildew growth.
Store your tent loosely in a cool, dry place. Avoid tight bags or plastic containers. Folding or rolling gently helps keep fabric strong.
- Wash off dirt and debris
- Dry the tent fully before storage
- Store in a breathable bag or loose sack
- Keep in a cool, dry area away from sunlight
- Check tent regularly for damage or pests

Credit: www.gearaid.com
Frequently Asked Questions
How Do I Fix A Small Tear In My Tent?
To fix a small tear, clean the area, apply a patch with strong adhesive, and press firmly. Waterproof tape or a repair kit works well. Let it dry completely before use to ensure durability and prevent leaks during camping.
What Materials Are Best For Tent Repairs?
Silicone or polyurethane repair tape and patches are best for tent repairs. They are waterproof, flexible, and durable. Seam sealant also helps reinforce stitches. These materials maintain the tent’s integrity and protect against weather damage effectively.
Can I Repair Tent Poles Myself?
Yes, you can repair tent poles using a pole repair sleeve or splint. Align broken pieces, slide the sleeve over the break, and secure with tape or epoxy. This fixes the pole temporarily or permanently, depending on damage severity.
How To Prevent Future Tent Damage?
Prevent damage by setting up on smooth ground, avoiding sharp objects, and storing the tent dry. Regularly inspect seams and poles for wear. Proper care extends your tent’s life and reduces repair frequency.
Conclusion
Repairing a tent can save money and extend its life. Small tears and holes do not need replacement. Use simple tools like patches and tape for quick fixes. Regular checks help find damage early. Proper care keeps your tent strong and dry.
Enjoy your camping trips without worry. Stay prepared and fix problems right away. Your tent will stay ready for many adventures.