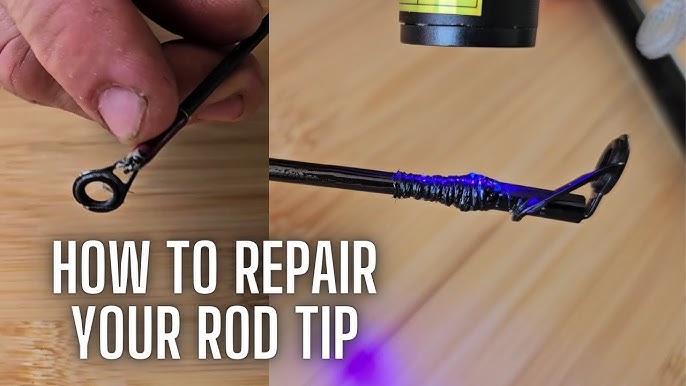
Have you ever felt the frustration of a broken fishing rod just when you were ready to cast your line? It’s a common problem that can quickly ruin your fishing trip.
But don’t worry—fixing your fishing rod might be easier than you think. You’ll discover simple, step-by-step methods to repair your rod and get it back in action. Keep reading, and you’ll be ready to enjoy your next fishing adventure without the hassle of buying a new rod.
Your fishing gear deserves a second chance, and you’re just a few easy fixes away from making that happen.

Credit: www.youtube.com
Identify The Damage
Fixing a broken fishing rod starts with finding where it is damaged. Careful checking helps you know what to repair or replace.
Look closely at different parts of your rod. Damage can be small but affect how the rod works.
Check For Cracks And Splits
Examine the rod’s blank carefully. Look for cracks or splits along the length. These can weaken the rod and cause it to break more easily.
- Run your fingers slowly along the rod’s surface.
- Look for any places that feel rough or raised.
- Use a bright light to see small cracks or splits clearly.
- Check near the tip and the joints where sections connect.
Inspect The Guides
Guides help the fishing line move smoothly. Broken or bent guides can cause line damage or poor casting.
| Guide Issue | Signs | Effect |
| Cracked Ring | Visible cracks or missing pieces | Line may catch or fray |
| Bent Frame | Guide not aligned with rod | Line runs unevenly |
| Loose Wraps | Guide moves or wiggles | Guide can fall off |
Assess The Handle And Reel Seat
Check the handle and reel seat for damage. Cracks or looseness here affect how you hold the rod and attach the reel.
Look for these common problems:
- Cracks or splits in the handle material (cork or foam)
- Loose reel seat that spins or moves
- Rust or corrosion on metal parts
- Broken or missing reel seat threads
Gather Essential Tools
Fixing a broken fishing rod requires the right tools. Gathering these tools makes the repair easier.
Having everything ready helps you work safely and efficiently. You avoid stopping mid-repair to find missing items.
List Of Repair Materials
- Epoxy glue or rod repair resin
- Replacement rod guides
- Thread for wrapping guides
- Sandpaper (fine grit)
- Masking tape
- Scissors or small knife
- Heat source (like a lighter or heat gun)
- Small brush for epoxy
- Cloth or rag
Safety Precautions
| Safety Step | Reason |
|---|---|
| Wear gloves | Protect skin from epoxy and sharp tools |
| Work in a ventilated area | Avoid inhaling fumes from glue and heat |
| Keep tools organized | Prevent accidents and loss of items |
| Use heat carefully | Prevent burns and fire hazards |
| Read instructions | Ensure correct use of repair materials |
Fixing A Broken Rod Blank
A broken fishing rod can be frustrating. Fixing it yourself is possible with some basic tools. This guide will help you repair the rod blank.
Understanding the process will make your rod as good as new. Follow these simple steps to fix your broken rod blank.
Using Rod Sleeves
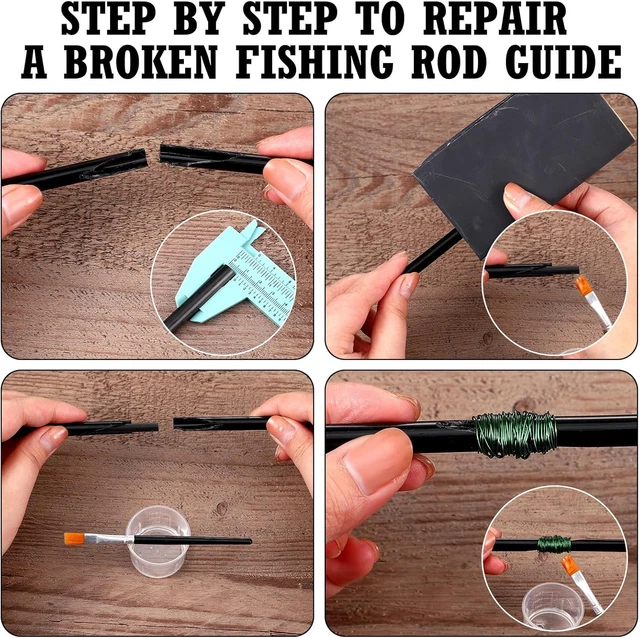
Rod sleeves are essential for fixing breaks. They provide support and ensure the rod stays strong.
Choose a sleeve that fits tightly over the broken area. This prevents the rod from bending or snapping again.
- Measure the broken part of the rod
- Select a sleeve slightly larger than the break
- Slide the sleeve over the break
- Ensure a snug fit for stability
Applying Epoxy Glue
Epoxy glue is crucial for holding the rod together. It creates a strong bond that withstands pressure.
Apply the glue carefully to avoid mess. Make sure it covers the entire break evenly.
- Mix the epoxy glue as instructed
- Apply glue to the broken area and the sleeve
- Press the sleeve firmly onto the rod
- Let it dry completely for a strong bond
Sanding And Finishing
Sanding smooths out rough edges after the glue dries. It also prepares the rod for a neat finish.
Finish the repair by sanding the area evenly. A smooth finish makes the rod look and feel better.
- Use fine sandpaper for a smooth surface
- Sand gently to avoid damaging the rod
- Wipe the rod clean after sanding
- Apply a protective coat if desired

Credit: www.amazon.ca
Repairing Or Replacing Guides
Fishing rod guides help control the fishing line. Broken guides cause poor casting and line damage. Fixing or replacing guides improves your rod’s performance and life.
This guide explains how to remove damaged guides, install new ones, and align them properly for the best fishing experience.
Removing Damaged Guides
Start by removing the old guide carefully. Use a sharp blade to cut the thread wrapping the guide. Heat the area with a lighter to soften the glue.
Pull off the guide gently to avoid damaging the rod blank. Clean any leftover glue or thread with fine sandpaper or rubbing alcohol.
Installing New Guides
Place the new guide on the rod where the old one was. Wrap strong thread tightly around the guide foot and the rod blank. Make sure the wraps are close and even.
Apply rod finish or epoxy to the thread wraps. This protects the thread and holds the guide firmly in place. Let it dry completely before use.
- Use thread color that matches your rod
- Keep wraps tight and smooth
- Apply enough epoxy for durability
Aligning Guides Properly
Align the guides in a straight line along the rod. This helps the line flow smoothly during casting and retrieval. Use a marker to mark guide positions before wrapping.
Check alignment by sighting down the rod from the handle to the tip. Adjust guides before the epoxy dries to ensure perfect line flow and rod balance.
Handle And Reel Seat Repairs
Fishing rods often need repairs to keep performing well. Two common issues are loose reel seats and damaged handles. Fixing these problems can extend the life of your rod.
This guide covers simple ways to fix loose reel seats, replace damaged handles, and rewrap handle grips. You can do these repairs with basic tools and materials.
Fixing Loose Reel Seats
A loose reel seat can cause the reel to wobble. Start by cleaning the seat and checking for cracks. Tighten any screws or bolts that hold the reel seat in place.
- Remove the reel and clean the seat area with rubbing alcohol.
- Inspect the seat for cracks or damage.
- If screws are loose, tighten them carefully.
- Apply a small amount of epoxy glue inside the seat if it still feels loose.
- Let the glue dry fully before reattaching the reel.
Replacing Damaged Handles
If the handle is cracked or broken, replace it with a new one. You can buy replacement handles that fit most rods. Remove the old handle by cutting off any wraps and pulling it free.
- Cut off old wraps and remove the damaged handle.
- Clean the rod blank where the handle sat.
- Apply strong adhesive or epoxy to the new handle.
- Slide the new handle onto the rod blank firmly.
- Let the adhesive dry completely before use.
Rewrapping Handle Grips
Handle grips can wear out or become slippery. Rewrapping them improves comfort and grip. Use cork tape or fishing rod grip tape for best results.
| Material | Use | Tip |
|---|---|---|
| Cork Tape | Soft, comfortable grip | Wrap tightly with slight overlap |
| Grip Tape | Durable and water-resistant | Stretch evenly while wrapping |
| Heat Shrink Tubing | Protects grip and rod | Use heat gun carefully to shrink |
Credit: picclick.ca
Preventive Care Tips
Taking care of your fishing rod helps avoid breaks and damage. Good habits can make your rod last longer.
Simple steps in storage and maintenance keep your rod strong and ready for fishing trips.
Proper Storage Methods
Store your fishing rod in a dry and cool place. Avoid leaving it in direct sunlight or damp areas.
Keep your rod upright or horizontal on a rack to stop it from bending or warping.
- Use rod holders or racks to keep rods straight
- Keep rods away from heat sources and moisture
- Store rods with the tip up to avoid pressure on the tip
- Use protective covers or sleeves to prevent scratches
Regular Maintenance Practices
Check your fishing rod often for cracks or loose parts. Early fixes can stop bigger problems.
Clean your rod after each use to remove dirt, salt, or debris that can cause damage.
- Wipe down the rod with a soft cloth
- Use mild soap and water for cleaning
- Check guides and reel seats for tightness
- Lubricate moving parts with proper oil
- Store rods only when fully dry
Frequently Asked Questions
How Can I Repair A Broken Fishing Rod Tip?
To fix a broken rod tip, remove the damaged tip and replace it with a matching rod tip. Use epoxy glue to secure it firmly. Allow the glue to dry completely before using the rod again. This restores the rod’s functionality efficiently.
What Materials Do I Need To Fix A Fishing Rod?
You need epoxy glue, replacement rod tip or rod blank, sandpaper, and masking tape. These tools help in cleaning, securing, and replacing the broken parts safely. Having the right materials ensures a strong and lasting repair.
Can I Fix A Cracked Fishing Rod Blank Myself?
Yes, you can fix a cracked blank using rod wrapping thread and epoxy. Sand the cracked area gently, apply thread wraps tightly, and coat with epoxy. Let it cure fully. This DIY method can restore strength to minor cracks effectively.
How Long Does A Fishing Rod Repair Take?
Most fishing rod repairs take about 1 to 3 hours including drying time. Epoxy glue needs sufficient curing to ensure durability. Quick repairs might be possible, but proper drying is essential for lasting results.
Conclusion
Fixing a broken fishing rod can save time and money. Small cracks or breaks do not always mean you must buy new gear. Using simple tools and materials, you can make effective repairs at home. Taking care of your rod after fixing it helps prevent future damage.
Remember to test your rod gently before your next fishing trip. A well-maintained rod lasts longer and improves your fishing experience. Keep patience and follow the steps carefully to restore your fishing rod. You will enjoy fishing again without worry.