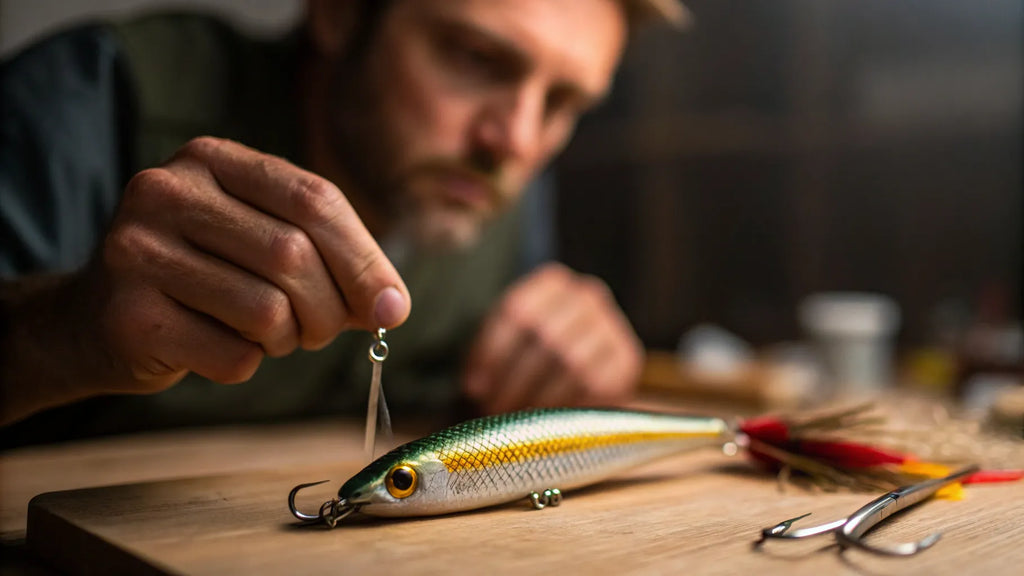
Have you ever wanted to catch more fish by using a lure you made yourself? Making a fishing lure at home is easier than you think.
With just a few simple materials and a bit of creativity, you can create a lure that attracts fish like a pro. Imagine the satisfaction of reeling in a big catch with something you crafted by hand. You’ll learn step-by-step how to make your own fishing lure, saving money and adding a personal touch to your fishing trips.
Ready to boost your fishing game? Let’s dive in!

Credit: fishgenix.com
Choosing The Right Materials
Making a fishing lure at home needs the right materials. Good materials help the lure last long and work well in water.
Choose materials that fit your fishing style and the type of fish you want to catch. This guide covers wood, plastic, hooks, eyes, paints, and finishes.
Types Of Wood And Plastic
Wood and plastic are common materials for lures. Wood offers natural buoyancy and easy shaping. Plastic is durable and allows bright colors.
- Balsa wood:Light and easy to carve, ideal for floating lures.
- Cedar:Strong and water-resistant, good for sinking lures.
- Plastic blocks:Can be molded or cut, perfect for detailed shapes.
- Foam plastic:Lightweight and buoyant, useful for topwater lures.
Selecting Hooks And Eyes
Hooks and eyes attach to the lure and help catch fish. Choose sizes that match your lure and target fish species.
| Component | Description | Tip |
| Hooks | Available in many sizes and styles. | Use sharp, rust-resistant hooks for durability. |
| Eyes | Plastic or glass eyes add realism. | Choose eyes that fit the lure size and shape. |
Paints And Finishes
Paint and finish protect the lure and attract fish. Use waterproof paints and clear coats for best results.
- Use acrylic paint for bright colors and quick drying.
- Apply multiple thin layers for even coverage.
- Seal with a clear epoxy or polyurethane finish.
- A smooth finish helps the lure move well in water.
Essential Tools For Lure Making
Making a fishing lure at home is a fun and creative project. You need the right tools to cut, shape, paint, and assemble the lure. These tools help you create a lure that looks good and works well.
This guide covers the essential tools for lure making. You will learn about cutting and shaping tools, painting supplies, and assembly equipment.
Cutting And Shaping Tools
Cutting and shaping tools help you form the base of the lure. You start with wood, plastic, or metal and shape it to the right size and form.
Sharp tools make clean cuts and smooth edges. Sanding tools help refine the shape and remove rough spots.
- Hobby knife or craft knife for precise cuts
- Small saw or coping saw for larger cuts
- Files to smooth edges and detail shapes
- Sandpaper in different grits for smoothing
- Dremel rotary tool for fine shaping and drilling
Painting Supplies
Painting supplies give your lure a lifelike look. Choose colors that attract fish in your area. Paint also protects the lure from water damage.
Use tools that help you apply paint evenly and add details. Clear coatings add shine and durability to the finish.
- Acrylic paints for bright, water-resistant colors
- Fine brushes for detailed patterns and eyes
- Airbrush for smooth, even coats
- Masking tape for sharp paint edges
- Clear varnish or epoxy for a protective finish
Assembly Equipment
Assembly tools help you put the lure parts together. Hooks, eyes, and split rings need secure attachment for safe fishing.
Use tools that make it easy to connect small parts without damaging the lure or yourself.
- Split ring pliers to open and close rings easily
- Small needle nose pliers for bending and holding parts
- Drill or pin vise to make holes for hooks and eyes
- Super glue or epoxy for strong bonds
- Tweezers to handle tiny parts
Shaping The Lure Body
Making a fishing lure at home can be fun. Shaping the lure body is a crucial step. It affects how the lure moves in water.
Understanding the shape is key to creating effective lures. A well-shaped lure attracts more fish.
Designing The Lure Shape
Designing the shape starts with a simple sketch. Think about the kind of fish you want to catch.
Consider the lure’s size and weight. These factors influence its movement in water.
- Sketch different shapes
- Choose a shape that mimics baitfish
- Keep the lure balanced
Carving Techniques
Carving is an important part of shaping the lure. Use a sharp knife for precise cuts. Follow your design closely.
Carve slowly to avoid mistakes. Take your time to shape the lure accurately.
- Start with rough cuts
- Refine the shape gradually
- Use small tools for details
Sanding For Smoothness
Sanding makes the lure smooth. A smooth surface helps in painting and finishing. It also ensures the lure moves well in water.
Begin with coarse sandpaper. Gradually switch to finer grit for a polished finish.
- Use 80-grit sandpaper to start
- Finish with 220-grit for smoothness
- Check for any rough spots
Adding Color And Patterns
Painting your fishing lure is a fun way to make it look real and catch fish. Colors and patterns help lure fish by copying their food.
You can use simple paints and easy designs to create a great fishing lure at home. This guide helps you add color and patterns step by step.
Choosing Paint Colors
Pick colors that match the fish in your area. Bright colors work well in clear water. Dark colors show better in murky water.
Use water-resistant and non-toxic paints made for outdoor use. Acrylic paints are a good choice because they dry fast and stick well.
- Match local baitfish colors
- Choose bright colors for sunny days
- Use dark or natural colors for cloudy days
- Pick waterproof acrylic paint
Creating Realistic Patterns
Patterns make your lure look alive and natural. Try stripes, spots, or scales to copy real fish skin. Use a small brush for details.
Layer colors lightly and let each dry before adding the next. You can use a sponge or toothpick to make small dots or lines.
- Start with a base color
- Add stripes or spots on top
- Use small brushes or sponges
- Let paint dry between layers
Sealing The Paint
Seal your painted lure to protect the colors and patterns. Use a clear waterproof sealant made for fishing gear. This also gives a shiny finish.
Apply two or three thin coats of sealant. Let each coat dry fully. This keeps the paint safe from water and damage while fishing.
- Choose a clear waterproof sealant
- Apply thin, even coats
- Wait for each coat to dry
- Use 2 to 3 coats for best protection
Attaching Hooks And Hardware
Attaching hooks and hardware is a key part of making a fishing lure at home. This step ensures your lure is strong and effective in the water.
Careful placement and secure fastening of hooks and hardware improve lure performance and durability.
Proper Hook Placement
Place hooks where they catch fish easily and do not affect lure movement. Usually, hooks go at the front, middle, and rear of the lure.
- Attach front hooks near the lure’s head for quick strikes.
- Place middle hooks where the lure bends or moves most.
- Set rear hooks at the tail to catch fish that follow.
- Make sure hooks do not tangle with each other or the lure body.
Securing Eyes And Split Rings
Eyes and split rings connect hooks to the lure. Use strong glue and proper tools for secure attachment.
| Component | How to Secure |
| Eyelets | Glue inside the lure and let dry fully |
| Split Rings | Use pliers to open and close tightly |
| Hooks | Attach firmly to split rings and check for movement |
Testing Hook Strength
Test hook strength before using the lure. Weak hooks can bend or break and lose fish.
Follow this simple test:
- Hold the lure firmly.
- Pull each hook with steady force.
- Check if hooks or rings move or come loose.
- Replace or tighten any weak parts.
Finishing Touches And Testing
After shaping and painting your fishing lure, it needs finishing touches. These steps help the lure work well in water. Testing your lure is important to see how it moves and catches fish.
This guide covers adding weight and balance, testing the lure action, and making adjustments for better performance.
Adding Weight And Balance
Weight affects how deep the lure sinks and how it moves. Balance keeps the lure stable and natural-looking in water. Add small weights inside or outside the lure to find the right feel.
Try different weight spots to keep the lure level. A balanced lure swims straight and attracts fish better.
- Use small lead or steel weights
- Place weights near the front for diving lures
- Put weights evenly for floating lures
- Test balance by holding the lure horizontally
Testing Lure Action In Water
Testing helps you see how the lure moves. Throw it in a bucket or small pond first. Watch if it wiggles, spins, or dives as planned.
Check if the lure looks natural. If it swims oddly, note what needs fixing before fishing.
- Throw the lure with a fishing rod or by hand
- Observe the lure’s movement and depth
- Look for smooth, natural actions
- Note any spinning or flipping problems
Making Adjustments For Performance
Adjust the lure to improve how it swims and catches fish. Change weight, shape, or hook position if needed.
Test again after each change. Keep adjusting until the lure moves well and feels balanced.
- Add or remove weight to fix sinking speed
- Smooth rough edges to improve water flow
- Move hooks for better hook-ups
- Repaint if colors need touch-ups
Tips For Improving Success
Making your own fishing lure at home can be fun and rewarding. Using the right tips will help you catch more fish.
Focus on understanding fish behavior, trying different designs, and keeping your lures in good shape.
Learning From Fish Behavior
Fish react to colors, shapes, and movement. Watch how fish behave in your fishing area. Notice what they eat and when they feed. This helps you make lures that attract them.
- Observe fish feeding times
- Note water clarity and light conditions
- Match lure color to local baitfish
- Use lures that mimic local prey movements
Experimenting With Designs
Try different shapes and colors to see what works best. Small changes can make a big difference. Test your lures in the water often and keep notes on what catches fish.
| Design Element | Effect on Fish |
| Bright Colors | Attracts fish in clear water |
| Dark Colors | Works well in murky water |
| Shiny Finish | Reflects light to mimic scales |
| Wobbly Movement | Triggers fish to strike |
Maintaining Your Lures
Keep your lures clean and in good condition. Replace hooks that are dull or rusted. Proper care helps your lures last longer and catch more fish.
- Rinse lures with fresh water after use
- Store lures in a dry place
- Sharpen or replace hooks regularly
- Check for cracks or damage before fishing

Credit: www.amazon.com

Credit: www.amazon.com
Frequently Asked Questions
How Do I Start Making A Fishing Lure At Home?
Begin by selecting basic materials like wood, hooks, and paint. Gather simple tools such as a knife and sandpaper. Follow step-by-step instructions to shape, paint, and assemble the lure carefully for best results.
What Materials Are Best For Homemade Fishing Lures?
Wood, plastic, metal, and rubber are common materials. Choose based on lure type and target fish. Wood offers natural buoyancy; plastic and rubber provide flexibility and durability.
How Can I Make My Fishing Lure More Attractive?
Use bright colors, reflective paint, or glow-in-the-dark finishes. Add feathers or shiny tape to mimic prey movement. Experiment with shapes and sizes that appeal to your target fish species.
Is Making Fishing Lures At Home Cost-effective?
Yes, homemade lures reduce costs by using affordable materials. It saves money compared to buying branded lures. Plus, you can customize designs to suit personal fishing needs.
Conclusion
Making your own fishing lure at home is simple and fun. You need just a few materials and some patience. This skill saves money and lets you create lures that fish really like. Try different colors and shapes to see what works best.
Practice helps you improve each time. Enjoy the process and the time spent outdoors. Crafting lures can make fishing more exciting and personal. Give it a try and see the difference yourself.