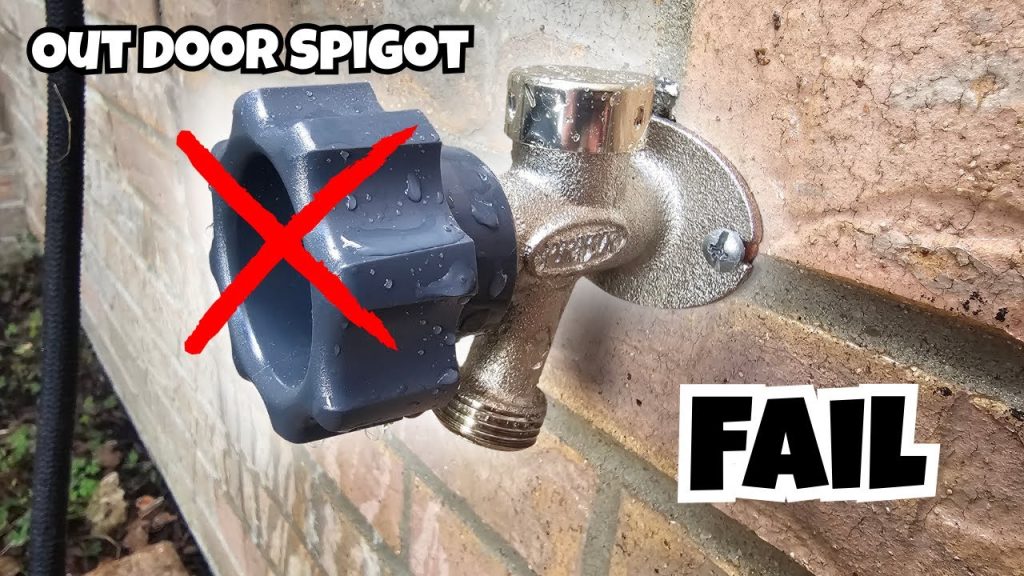
Is your garden hose spigot leaking or not working properly? Replacing it might sound tricky, but you can do it yourself with just a few simple tools.
Imagine having a steady water flow again, without the frustration of drips or breaks. In this guide, you’ll learn exactly how to replace your garden hose spigot quickly and easily, saving time and money. Keep reading, and you’ll be surprised at how simple the process really is!
Tools And Materials Needed
Replacing a garden hose spigot is a simple task with the right tools. Knowing what you need before starting saves time.
This guide covers the essential tools and how to pick the correct spigot for your garden.
Essential Tools
You need a few tools to remove the old spigot and install the new one. Make sure these are ready before you begin.
- Adjustable wrench to loosen and tighten fittings
- Pipe wrench for extra grip on tight pipes
- Teflon tape to seal threaded connections
- Hacksaw if pipe cutting is required
- Bucket to catch any water left in the pipe
- Wire brush to clean pipe threads
- Safety gloves to protect your hands
Choosing The Right Spigot
Select a spigot that fits your pipe size and type. Check if you need a frost-free or standard spigot.
Think about how you will use the spigot and the water pressure in your area.
- Match the spigot size to your pipe diameter (usually ¾ inch or ½ inch)
- Choose frost-free spigots for cold climates to avoid freezing
- Pick durable materials like brass or stainless steel for long life
- Consider a spigot with a vacuum breaker to prevent backflow
- Look for easy-to-turn handles for comfort

Credit: www.youtube.com
Preparing For Replacement
Replacing a garden hose spigot needs good preparation. You must get ready before starting.
This guide will help you prepare safely and avoid water damage during the replacement.
Shutting Off Water Supply
First, find the main water shut-off valve for your garden hose. This valve stops water flow to the spigot.
- Locate the valve near the house or water meter.
- Turn the valve clockwise to close it.
- Check that water stops flowing from the spigot.
- If no valve is nearby, turn off the main water supply to your home.
Draining The Hose And Spigot
Drain all water from the hose and spigot to prevent leaks and spills during replacement.
Follow these steps to drain water safely:
- Disconnect the garden hose from the spigot.
- Lift and coil the hose to let water flow out.
- Open the spigot handle to release trapped water.
- Wait until no more water comes out.
- Close the spigot handle after draining.
Removing The Old Spigot
Replacing a garden hose spigot is a simple task. It helps to stop leaks and improve water flow.
Before you start, gather your tools. You’ll need a wrench, pliers, and perhaps some lubricant.
Loosening The Spigot
First, locate the main water valve. Turn it off to prevent water flow.
Use a wrench to grip the spigot’s base. Turn it counterclockwise to loosen it.
- If it’s stuck, apply some lubricant.
- Let it sit for a few minutes to soak in.
- Try loosening it again gently.
Handling Common Issues
Sometimes, old spigots can be difficult to remove. Corrosion or rust might be the cause.
If the spigot won’t budge, don’t force it. You might damage the pipe.
- Use a rust remover to dissolve corrosion.
- If you see cracks, consider replacing the entire pipe section.
- Consult a plumber if issues persist.

Credit: www.familyhandyman.com
Installing The New Spigot
Replacing a garden hose spigot requires care to avoid leaks. Installing the new spigot correctly ensures a tight seal. This guide shows how to apply thread seal tape and attach the spigot.
Applying Thread Seal Tape
Thread seal tape prevents water leaks by filling gaps on the spigot threads. Wrap the tape evenly for the best seal.
- Clean the spigot threads to remove dirt and old tape.
- Hold the tape at the end of the threads.
- Wrap the tape clockwise around the threads, overlapping slightly.
- Cover the threads with 3 to 4 layers of tape.
- Press the tape firmly to secure it.
Attaching The New Spigot
Attach the new spigot by hand first, then tighten it with a wrench. Do not overtighten to avoid damage.
| Action | Details |
|---|---|
| Hand-tighten | Turn the spigot clockwise until snug by hand. |
| Use wrench | Use an adjustable wrench to tighten slightly more. |
| Check for leaks | Turn on the water and inspect for drips. |
| Tighten if needed | If leaks appear, tighten a bit more carefully. |
Testing And Finishing Touches
After installing your new garden hose spigot, it is important to test it carefully. This ensures it works correctly and does not leak.
Once you confirm everything works, finish the installation by securing the spigot properly. This helps prevent damage and keeps it stable.
Checking For Leaks
Turn on the water supply slowly and watch the spigot area. Look closely for any drips or wet spots that show leaks.
- Check around the base where the spigot connects to the pipe.
- Inspect the handle and the spout for water escaping.
- Feel for moisture with your hand on all joints.
- Listen for any hissing sounds indicating small leaks.
If you find leaks, tighten connections or apply plumber’s tape as needed. Test again until no leaks remain.
Securing The Spigot
Secure the spigot firmly to avoid movement that can cause leaks or damage. Use the right tools to fasten it properly.
| Tool | Use |
| Adjustable wrench | Tighten nuts and fittings |
| Pipe wrench | Hold pipe steady while tightening |
| Plumber’s tape | Seal threaded connections |
| Screwdriver | Attach mounting brackets if needed |

Credit: www.reddit.com
Tips For Maintenance
Replacing a garden hose spigot is an important task. Proper care helps it last longer. Regular maintenance saves money and effort.
Keep your spigot working well by following simple tips. These help avoid leaks and damage throughout the year.
Seasonal Care
Check the spigot every season. Winter is the most critical time for protection. Water inside the spigot can freeze and cause cracks.
- Turn off the water supply before winter.
- Drain all water from the spigot and hose.
- Cover the spigot with an insulated cover.
- Inspect for leaks or cracks in spring.
- Replace washers or parts if needed.
Preventing Future Damage
Use the right tools and materials to avoid damage when replacing the spigot. Tighten fittings carefully. Over-tightening can cause leaks.
| Common Cause | Prevention Tip |
| Freezing water | Drain and cover spigot in winter |
| Over-tightening | Use moderate force when installing |
| Corrosion | Choose brass or stainless steel spigots |
| Loose fittings | Check and tighten regularly |
Frequently Asked Questions
How Do I Turn Off Water Before Replacing A Spigot?
Locate the main water shutoff valve for your garden hose. Turn it off completely to stop water flow. This prevents leaks and water damage during spigot replacement. Always relieve pressure by opening the spigot before removal.
What Tools Are Needed To Replace A Garden Hose Spigot?
You will need an adjustable wrench, plumber’s tape, pipe thread sealant, and possibly a pipe cutter. These tools help remove the old spigot and install the new one securely and leak-free.
How Can I Prevent Leaks After Spigot Installation?
Apply plumber’s tape or pipe thread sealant on the spigot threads before installation. Tighten the spigot firmly but avoid over-tightening. Test by turning on the water slowly and check for drips around the connection.
How Long Does It Take To Replace A Garden Hose Spigot?
Replacing a garden hose spigot typically takes 15 to 30 minutes. The process depends on your experience and if any plumbing issues arise. Proper preparation and tools speed up the task significantly.
Conclusion
Replacing a garden hose spigot is easier than it seems. With the right tools and steps, anyone can do it. Take your time to avoid leaks and ensure a good fit. A new spigot helps save water and keeps your garden healthy.
Don’t rush; small mistakes can cause problems later. Now, you can enjoy a steady water flow for your plants. Give it a try and see how simple home repairs can be. Your garden will thank you for it.