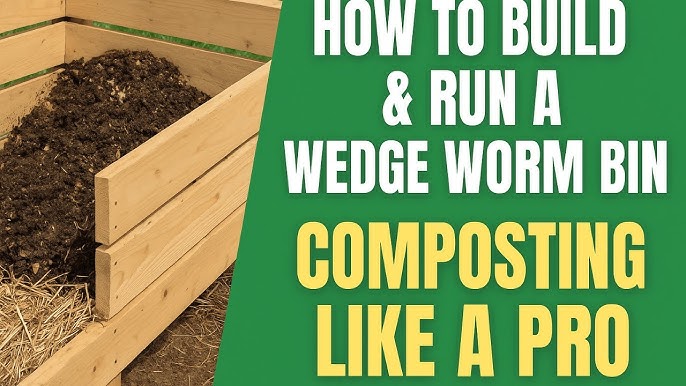
Are you looking for an easy way to turn your kitchen scraps into rich, natural fertilizer? Making a worm compost bin is a simple and effective solution that anyone can do at home.
Not only will you reduce waste, but you’ll also create nutrient-packed compost that your plants will love. In this guide, you’ll discover step-by-step how to build your own worm bin, choose the right worms, and keep your compost healthy. By the end, you’ll have everything you need to start transforming waste into garden gold.
Ready to get your hands a little dirty and make a real difference? Let’s dive in!

Credit: www.youtube.com
Benefits Of Worm Composting
Worm composting helps turn food scraps into rich soil. It is a simple way to recycle waste at home. Many gardeners use worm compost bins to improve their plants.
This method uses worms to break down kitchen waste quickly. The result is nutrient-filled compost that helps gardens grow better.
Improving Soil Health
Worm compost adds natural nutrients to the soil. It improves soil structure and water retention. Healthy soil supports strong plant roots and growth.
- Increases soil aeration
- Boosts beneficial microbes
- Enhances nutrient availability
- Improves moisture retention
Reducing Kitchen Waste
Worm bins help reduce the amount of food waste sent to landfills. This lowers greenhouse gas emissions. Using scraps for compost is better for the environment.
| Kitchen Waste | Worm Compost Result |
| Vegetable peels | Rich compost |
| Fruit scraps | Natural fertilizer |
| Coffee grounds | Soil conditioner |
| Eggshells | Calcium source |
Eco-friendly Gardening Advantages
Worm composting supports organic gardening. It reduces the need for chemical fertilizers. This keeps the garden safe for pets and wildlife.
Benefits include:
- Lower water pollution
- Less plastic waste from fertilizer packaging
- Supports sustainable gardening practices

Credit: www.youtube.com
Choosing The Right Bin
Choosing the right bin is key to making a successful worm compost bin. The bin must suit your space and compost needs. It also affects how easy it is to care for your worms.
This guide covers the types of compost bins available and what size and material work best for worm composting.
Types Of Compost Bins
There are several types of bins you can use for worm composting. Each type has different features that affect how the composting process works.
- Plastic bins:Lightweight and easy to clean. They keep moisture in but need air holes for ventilation.
- Wooden bins:Natural and breathable. They absorb some moisture but may break down over time.
- Stackable bins:Designed for easy harvesting of compost. They save space and can be expanded as needed.
- DIY bins:Made from old containers or crates. Customizable but need proper ventilation and drainage.
Size And Material Considerations
Choosing the right size and material depends on how much food waste you generate and where you will keep the bin.
| Factor | Recommended Size | Material Tips |
| Small household | 10-15 gallons | Plastic or wood with good ventilation |
| Medium household | 20-30 gallons | Stackable plastic bins or sturdy wooden bins |
| Large household or garden | 40+ gallons | Wooden bins or larger plastic bins with drainage |
Setting Up Your Worm Bin
Creating a worm compost bin is a great way to recycle food scraps. It also produces nutrient-rich compost for your garden.
Worm composting is simple and can be done indoors or outdoors. Follow these steps to set up your worm bin successfully.
Preparing The Bedding
Bedding is crucial as it creates a habitat for the worms. It should be moist but not soggy.
Use shredded newspaper, cardboard, or coconut coir for bedding. These materials allow air circulation and help control moisture.
- Shred paper into small strips
- Soak in water, then wring out excess
- Fluff up the bedding to allow air
Adding Worms
Red wigglers are the best worms for composting. They thrive in organic waste and can process large amounts of food scraps.
Introduce the worms gently into the prepared bedding. Give them time to adjust to their new home.
- Buy worms from a reliable supplier
- Add one pound of worms per square foot
- Cover them with a light layer of bedding
Selecting The Bin Location
The bin location affects the composting process. It should be cool, shaded, and easy to access.
Place the bin in a spot with a stable temperature. Avoid direct sunlight and areas with heavy rain exposure.
- Indoor: laundry room or basement
- Outdoor: covered porch or garage
- Ensure good air circulation
Feeding Your Worms
Feeding your worm compost bin is simple and helps keep your worms healthy. You can use many kitchen scraps and garden waste to feed them.
Knowing what to feed, what to avoid, and how often to feed your worms makes your composting effective and odor-free.
What To Feed
Worms like soft, moist food scraps that break down easily. They eat many fruit and vegetable scraps, coffee grounds, and crushed eggshells.
- Apple cores and peels
- Banana peels
- Carrot and cucumber scraps
- Tea bags (without staples)
- Used coffee grounds
- Shredded newspaper or cardboard (for bedding)
- Crushed eggshells
Foods To Avoid
Some foods can harm your worms or cause bad smells. Avoid meat, dairy, oily foods, and citrus peels.
| Food Type | Reason to Avoid |
| Meat and fish scraps | Attract pests and create bad odors |
| Dairy products | Cause strong smells and mold growth |
| Oily or greasy foods | Slow decomposition and repel worms |
| Citrus peels and onions | Too acidic and can harm worms |
| Processed or salty foods | Unhealthy for worms and slow to break down |
Feeding Frequency
Feed your worms regularly but in small amounts. Too much food can cause bad smells and attract pests.
- Start by adding small amounts once a week.
- Watch how fast the worms eat the food.
- Add more food if the worms finish it quickly.
- Remove uneaten food if it stays too long.
- Adjust feeding based on worm activity and bin size.
Maintaining The Bin
Keeping your worm compost bin healthy helps worms stay active. Proper care makes composting easier and faster.
Check the bin regularly to avoid problems. Small changes can keep worms happy and working well.
Moisture And Temperature Control
Worms need the right moisture to live. Keep the bin damp but not wet. Too much water can harm the worms.
- Spray water lightly if the bin feels dry
- Drain extra water if it pools at the bottom
- Keep the bin in a place between 55°F and 77°F (13°C to 25°C)
- Avoid placing the bin in direct sunlight or cold spots
Aeration And Turning
Air helps worms breathe and speeds up compost. Turn the bedding every few weeks to add air.
| Action | Purpose |
| Gently stir the bedding | Mix air into the compost |
| Break up clumps | Help worms move easily |
| Check for compaction | Prevent bad smells and slow composting |
Managing Odors And Pests
Good care stops bad smells and pests. Avoid adding too much food or meat scraps.
- Use only fruit and vegetable scraps
- Cover fresh food with bedding material
- Keep the bin closed but allow air flow
- Remove any pests by hand if you see them

Credit: sustaintrust.org.nz
Harvesting Worm Castings
Worm castings are rich, natural fertilizer made by worms. Harvesting them from your worm compost bin helps your garden grow strong.
This guide explains when to harvest, how to collect castings, and how to use them in your garden.
When To Harvest
Wait until the worm bin looks mostly like dark, crumbly soil. This means worms have finished breaking down the food scraps.
You may notice fewer worms on the surface and a fresh, earthy smell. This is a good sign to start harvesting.
Harvesting Methods
There are several ways to collect worm castings from your bin. Choose the one that fits your setup best.
- Side Harvest:Push finished compost to one side and add fresh food scraps to the other. Worms move to the new food side, so you can collect castings from the empty side.
- Light Separation:Spread compost on a tarp. Worms avoid light, so they crawl down, letting you scoop up castings from the top.
- Hand Sorting:Remove castings by hand and place worms back into the bin.
Using Castings In Your Garden
Worm castings improve soil health and help plants grow better. Use them in many ways around your garden.
| Use | How to Apply |
| Potting Mix | Mix castings with soil for potted plants |
| Garden Beds | Sprinkle a thin layer on top and water in |
| Seed Starting | Add a small amount to seed trays for better germination |
| Compost Booster | Mix castings into new compost to speed breakdown |
Troubleshooting Common Issues
Making a worm compost bin is simple but sometimes problems happen. Knowing how to fix common issues helps your compost work well.
This guide covers worm health problems, bin overfeeding, and excess moisture or drainage troubles.
Worm Health Problems
Worms can get sick or die if conditions are wrong. Watch for weak worms or bad smells in your bin.
- Check the temperature; keep it between 55°F and 77°F (13°C to 25°C).
- Avoid adding citrus or spicy foods that harm worms.
- Keep bedding moist but not wet to protect worm skin.
- Remove dead worms quickly to stop bad odors.
- Use natural materials like shredded paper for bedding.
Bin Overfeeding
Giving too much food makes the bin smell and attracts pests. Worms cannot eat it all fast enough.
| Signs of Overfeeding | What to Do |
|---|---|
| Food stays uneaten for days | Stop adding food for a week |
| Strong foul smell | Remove some food and mix bedding |
| Flies or pests inside the bin | Cover food with dry bedding |
Excess Moisture And Drainage
Too much water makes worms drown or stops air flow. Drainage problems cause bad smells.
- Check bin drainage holes are open and not blocked.
- Add dry bedding like shredded cardboard to soak excess water.
- Keep the bin in a shaded place to avoid rain filling it.
- Turn the contents gently to let air in and dry the bin.
Frequently Asked Questions
How Do I Start A Worm Compost Bin At Home?
Begin with a container and bedding like shredded paper. Add red wigglers and kitchen scraps. Keep the bin moist and aerated. Worms will break down waste into nutrient-rich compost.
What Materials Can I Compost In A Worm Bin?
You can compost fruit peels, vegetable scraps, coffee grounds, and eggshells. Avoid meat, dairy, oily foods, and citrus as they harm worms and attract pests.
How Often Should I Feed Worms In The Compost Bin?
Feed worms small amounts every 2-3 days. Avoid overfeeding to prevent odors and pests. Observe worm activity to adjust feeding frequency.
What Temperature Is Ideal For A Worm Compost Bin?
Worms thrive between 55°F and 77°F (13°C to 25°C). Keep the bin indoors or in a shaded area to maintain this temperature.
Conclusion
Creating a worm compost bin is simple and rewarding. It helps reduce waste and makes rich soil for plants. Start with basic materials and follow easy steps. Watch your worms work and enjoy the process. Small efforts lead to big benefits for your garden.
Try it today and see the difference. Worm composting is a smart, natural way to care for your plants. Keep it clean and feed your worms regularly. Soon, you will have healthy compost ready to use. Give your garden the boost it needs.