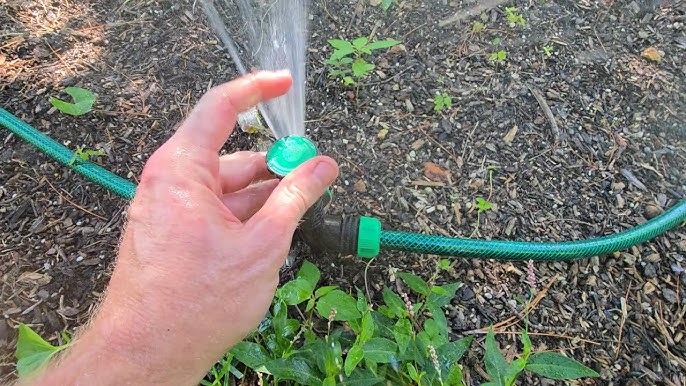
Are you tired of dragging your heavy watering cans or standing with a hose for hours just to keep your garden healthy? What if you could create a simple, effective sprinkler system using just your garden hose?
Imagine saving time, water, and effort while giving your plants the perfect shower they need. In this guide, you’ll discover easy steps to build your own sprinkler system that fits your garden and budget. Keep reading, and you’ll soon enjoy a lush, thriving garden without the hassle.

Credit: www.youtube.com
Materials Needed
Creating a sprinkler system with a garden hose is easy and cost-effective. You only need some basic materials to get started.
Gather the right items before you begin. This guide covers the main materials for your project.
Garden Hose Selection
Choose a garden hose that fits your garden size and water needs. A longer hose covers more area but may reduce water pressure.
- Length: 50 to 100 feet depending on garden size
- Diameter: 5/8 inch is common for good water flow
- Material: Reinforced vinyl or rubber for durability
- Connector type: Standard fittings for easy attachment
Sprinkler Components
You will need basic parts to build the sprinkler system. These parts connect to the hose and control water flow.
| Component | Purpose |
| Hose connector | Joins hose to faucet or sprinkler |
| Sprinkler head | Distributes water evenly over the area |
| Hose splitter | Allows multiple hoses to connect |
| End cap | Closes hose ends to keep water in |
Tools Required
Some simple tools help you assemble and adjust the sprinkler system parts.
- Utility knife or scissors to cut the hose
- Adjustable wrench for tightening fittings
- Measuring tape to measure hose lengths
- Marker to mark hose cutting points
Planning Your Sprinkler Layout
Creating a sprinkler system with a garden hose needs careful planning. A good layout saves water and keeps plants healthy.
Start by measuring your garden and deciding where to place sprinklers. This guide helps you plan well.
Assessing Your Garden Size
Measure the length and width of your garden. Note any areas that need more water, like flower beds or vegetable patches.
- Use a tape measure for accurate dimensions.
- Draw a simple map of your garden.
- Mark trees, paths, and other obstacles.
- Divide the garden into zones if it is large.
Determining Water Coverage
Check how far your garden hose can reach with sprinkler attachments. Different sprinklers cover different areas.
| Sprinkler Type | Coverage Radius (feet) | Best Use |
| Rotary Sprinkler | 15-30 | Large lawns |
| Oscillating Sprinkler | 10-20 | Rectangular areas |
| Stationary Sprinkler | 5-10 | Small flower beds |
Marking Sprinkler Positions
Place sprinkler marks on your garden map to ensure full coverage. Avoid watering paths or driveways.
- Start at one corner of the garden.
- Place marks where sprinkler heads will cover the entire area.
- Check for overlap to prevent dry spots.
- Use flags or stakes in the garden to mark spots physically.
Assembling The Sprinkler System
Creating a sprinkler system with a garden hose is simple. You need a few basic materials and some time.
This guide will show you how to connect everything. Soon, your garden will be watered efficiently.
Connecting Hose To Water Source
First, attach the garden hose to your water source. This is usually an outdoor faucet.
Make sure the connection is tight. This prevents any water leaks.
- Screw the hose onto the faucet
- Use a hose connector for a secure fit
- Check for leaks before proceeding
Attaching Sprinkler Heads
Next, attach sprinkler heads to the hose. You may choose different types for varied spray patterns.
Position them where you want water coverage. This ensures your plants receive the right amount of water.
- Select appropriate sprinkler heads
- Attach them to the end of the hose
- Adjust the direction and spray range
Securing Hose Sections
Finally, secure the hose sections to keep them in place. This helps in maintaining the layout of your system.
You can use stakes or clips for this task. This prevents the hose from moving during use.
- Use garden stakes to pin down the hose
- Apply clips at regular intervals
- Ensure the hose is straight and not twisted
Testing And Adjusting
After building your sprinkler system with a garden hose, testing is essential. It helps you see if everything works well and find areas to improve.
Adjusting the system ensures your garden gets water evenly. You can fix issues like weak spray or leaks by testing carefully.
Checking Water Pressure
Water pressure controls how far and strong the sprinkler sprays. Low pressure means weak water flow. High pressure can cause damage or waste water.
To check pressure, turn on the water and watch how the sprinkler sprays. If the water does not reach plants, pressure may be low.
- Make sure the hose is fully open
- Remove any kinks or bends in the hose
- Use a pressure gauge if available
- Adjust water source if pressure is too low or high
Adjusting Spray Patterns
Spray patterns control how water spreads across your garden. Different plants need different watering styles, like mist or strong jets.
Adjust the sprinkler heads or nozzles to change the spray. Turn them gently to change the angle or size of the water spray.
- Use wide spray for large areas
- Use targeted spray for specific plants
- Adjust angles to avoid watering paths or walls
- Test spray after each change
Fixing Leaks And Issues
Leaks waste water and reduce system pressure. Check all hose connections and sprinkler parts for drips or wet spots.
Fix leaks by tightening connections or replacing damaged parts. Use plumber’s tape on threaded joints to seal leaks well.
- Inspect hose joints and connectors
- Replace cracked or broken sprinkler heads
- Use clamps to secure loose hoses
- Test system after repairs
Maintenance Tips
Keeping your sprinkler system working well needs some care. Regular checks help it last longer. This guide gives simple tips to maintain your garden hose sprinkler system.
Following these tips will keep your system clean and efficient. It also stops damage from weather and dirt.
Seasonal Care
Season changes affect your sprinkler system. Prepare the system for winter and summer to avoid problems. Turn off water supply during cold months to stop freezing.
Check all parts for cracks or leaks before each season starts. Replace broken parts quickly to keep water flowing well.
Cleaning Sprinkler Heads
Dirty sprinkler heads block water and reduce coverage. Clean them often to keep water spraying evenly. Remove dirt, grass, and small stones from the heads.
- Turn off the water before cleaning
- Use a soft brush or cloth to wipe heads
- Clear any holes with a thin wire or pin
- Rinse heads with water after cleaning
Storing The System
Store your sprinkler system properly when not in use. Drain all water from hoses and sprinklers. This stops damage from freezing and mold growth.
Keep hoses coiled and dry in a cool place. Avoid sharp bends to prevent cracks. Check the system before next use to find any issues early.
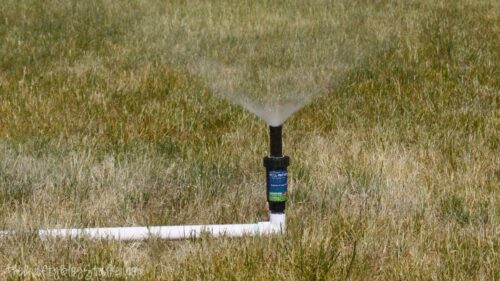
Credit: thecraftyblogstalker.com

Credit: www.youtube.com
Frequently Asked Questions
How Do I Make A Sprinkler System With A Garden Hose?
To make a sprinkler system, attach sprinkler heads to a garden hose. Use connectors and stakes for stability. Connect the hose to a water source and adjust water pressure for even coverage.
What Materials Are Needed For A Hose Sprinkler System?
You need a garden hose, sprinkler heads, hose connectors, stakes, and a water source. Optional items include timers and pressure regulators for automation and control.
Can I Automate A Garden Hose Sprinkler System?
Yes, you can use a timer attached to your hose faucet. This allows scheduled watering without manual effort, saving time and ensuring consistent lawn care.
How Do I Ensure Even Water Distribution?
Place sprinkler heads evenly and adjust their spray patterns. Check water pressure to avoid weak or overly strong sprays. Test the system before full use.
Conclusion
Creating a sprinkler system with a garden hose is simple and cost-effective. You can water your plants evenly without buying expensive tools. This DIY project saves time and effort in your garden. Just follow the steps carefully, and you will have a working sprinkler in no time.
Enjoy a healthy, green garden with less hassle. Try it today and see the difference!