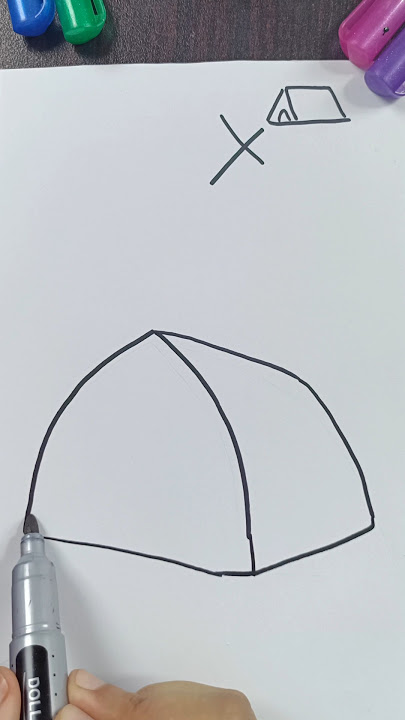
Have you ever wanted to draw a tent but felt unsure where to start? You’re in the right place.
Drawing a tent can be simple and fun, even if you’re a beginner. Imagine creating a cool camping scene with just a few easy steps. By the end of this guide, you’ll know exactly how to draw a tent that looks great and feels satisfying to make.
Ready to unlock your creativity and impress yourself with your drawing skills? Let’s dive in and make drawing a tent easier than you ever thought!
Materials Needed
Drawing a simple tent can be fun and easy. You only need a few basic tools to get started.
Optional supplies can help add color and style to your drawing. Gather what you like before you begin.
Basic Drawing Tools
These tools help you sketch and outline the tent clearly. Use good quality items for best results.
- Pencil for sketching
- Eraser to fix mistakes
- Sharpener to keep your pencil point fine
- Ruler for straight lines
- Paper or sketchbook
Optional Coloring Supplies
Coloring tools add life to your tent drawing. Choose any of these to decorate your art.
| Supply | Description |
| Colored pencils | Easy to blend and control |
| Markers | Bright colors but can bleed through paper |
| Crayons | Good for soft coloring and texture |
| Watercolors | Use with thick paper for a smooth finish |

Credit: www.youtube.com
Choosing Your Tent Style
Selecting the right tent style makes drawing easier and more fun.
Different tents have unique shapes and features to explore.
Classic A-frame Tent
The A-frame tent looks like the letter “A” from the side. It has two sloping sides that meet at the top.
- Start with a triangle shape for the main frame.
- Add a door in the middle of one side.
- Draw lines for the supporting poles on each side.
- Include simple details like ropes or stakes at the bottom.
Dome Tent Basics
Dome tents have rounded tops and curved sides. They look like half circles or bubbles.
| Feature | Description |
| Shape | Rounded, dome-like |
| Frame | Flexible poles that cross |
| Space | Good headroom inside |
| Common Use | Camping and backpacking |
Sketching The Tent Shape
Drawing a tent is simple and fun. You just need to follow a few easy steps.
Start by understanding the basic shape. A tent is a combination of triangles and rectangles.
Drawing The Tent Outline
First, draw a triangle for the tent’s main body. This will be the front view.
- Draw a horizontal line for the base.
- Add two slanted lines meeting at a point above the base.
- This forms the triangle shape of the tent.
Adding The Tent Flaps
Next, sketch the tent flaps. These will look like two smaller triangles.
Use a ruler for straight lines. This helps keep the shapes even and neat.
| Shape | Description |
| Main Triangle | Tent body |
| Flaps | Smaller triangles |
Adding Details
Adding details makes your tent drawing look real and interesting. Small touches bring the tent to life and show its structure.
Focus on parts like poles, stakes, shadows, and textures to improve your sketch. These details help people understand the tent better.
Tent Poles And Stakes
Draw the tent poles clearly to show how the tent stands. Use straight or slightly curved lines for poles. Add small loops or ties where the fabric connects.
- Show stakes by drawing small triangles or pegs at the base.
- Use thin lines to connect stakes to the tent ropes.
- Make poles look round by adding light shading on one side.
- Draw extra pole sections for a big tent.
Shadows And Textures
Add shadows under the tent and near poles to create depth. Use soft, short lines or light shading to show where light does not reach.
| Area | Shadow Technique | Texture Tip |
| Under Tent | Dark, wide shading | Use smooth strokes |
| Tent Fabric | Light shading along folds | Add small lines for wrinkles |
| Poles | Shading on one side | Draw thin lines to show roundness |
| Ground Stakes | Small shadows near base | Use dots or short lines for dirt |
Coloring Techniques
Adding color to your tent drawing makes it more lively and real. Use simple methods to apply colors smoothly.
Shading helps show the tent’s shape and gives a sense of depth. This makes your drawing look three-dimensional.
Simple Color Application
Start by choosing the main color for your tent. Apply this color evenly to all tent surfaces. Use light strokes for a smooth finish.
- Use colored pencils or markers for clean color.
- Fill small areas first to avoid smudging.
- Keep your hand steady to avoid uneven patches.
- Layer colors lightly to build brightness.
Creating Depth With Shading
Shading shows where light hits the tent and where shadows fall. This adds depth and realism to your drawing.
| Shading Technique | Description |
| Light Shading | Use light pressure to add soft shadows on curved surfaces. |
| Cross-Hatching | Draw crisscross lines to create darker shadow areas. |
| Blending | Use a blending tool or finger to smooth color transitions. |
| Highlighting | Leave some parts white or use a white pencil for light spots. |

Credit: www.youtube.com
Common Mistakes To Avoid
Drawing a simple tent can be fun and easy. Some mistakes can make your tent look strange.
Knowing what to avoid helps you draw a better tent quickly. Let’s look at common errors.
Proportion Errors
One common mistake is getting the tent’s proportions wrong. The sides or roof may look too long or short.
Keep the tent balanced by making sure the base is wider than the roof. This helps it look stable.
- Make the tent base wider than the top
- Avoid very tall or thin tent shapes
- Keep doors and windows sized for the tent size
Overcomplicating The Design
Adding too many details can make your tent drawing confusing. Simple shapes work best for easy tents.
Focus on basic shapes like triangles and rectangles. This keeps the tent clear and easy to draw.
- Use simple lines and shapes
- Avoid too many windows or decorations
- Draw a clear outline before details
Tips For Practice
Drawing an easy tent gets better with practice. It helps you learn shapes and lines.
Try different ways to draw tents. Practice often to improve your skills.
Using References
Look at pictures of tents to understand their shapes. References show how tents fold and stand.
Use photos or real tents as guides. They help you draw tents more clearly and correctly.
- Find simple tent images online
- Observe the tent’s roof and sides
- Notice how the tent poles support the structure
- Sketch tents from different angles
Experimenting With Styles
Try drawing tents in different styles. You can make them look cartoonish, realistic, or simple.
Changing styles helps you find what you enjoy most. It also improves your creativity.
- Draw tents with thick or thin lines
- Add colors or keep your drawing black and white
- Use shapes like triangles or rectangles for tents
- Try shading to show light and shadow

Credit: www.youtube.com
Frequently Asked Questions
How Do I Start Drawing An Easy Tent?
Begin with a simple triangle to form the tent’s main shape. Add a rectangle base for the entrance. Use straight lines for clarity and symmetry.
What Materials Do I Need To Draw A Tent Easily?
You only need paper, a pencil, an eraser, and a ruler. These basic tools help create clean, straight lines and simple shapes.
How Can I Add Details To My Tent Drawing?
Add ropes, stakes, and fabric folds for realism. Use light shading to show depth and texture. Keep details minimal for an easy drawing.
What Drawing Style Suits An Easy Tent Sketch?
A minimalist style works best for easy tent drawings. Focus on basic shapes and avoid intricate details. This keeps the drawing simple and clear.
Conclusion
Drawing a tent can be simple and fun. Just follow the easy steps and practice. You will see your skills improve quickly. Use basic shapes and lines to build your tent. Don’t rush; take your time to get details right.
Anyone can draw a nice tent with patience. Keep practicing, and soon you will create different tent styles. Drawing helps you relax and enjoy your creativity. Try it today and share your art with friends. Simple tools and a little effort make great drawings.