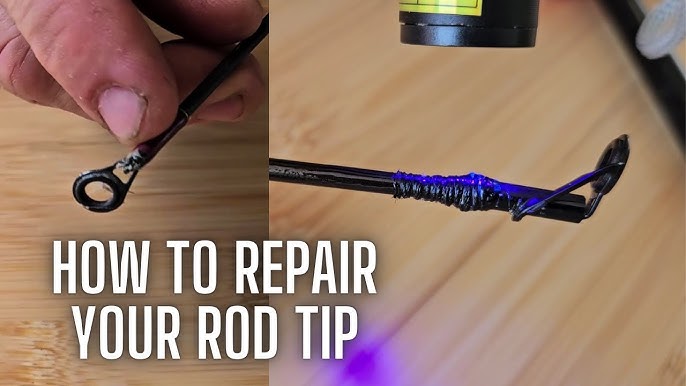
Have you ever been excited for a fishing trip, only to find the tip of your fishing rod broken? It’s frustrating and can ruin your plans in an instant.
But don’t worry—fixing the tip of your fishing rod is easier than you might think. In this guide, you’ll learn simple, step-by-step methods to repair your rod quickly and get back to fishing without spending a lot of money. Keep reading, and by the end, you’ll feel confident handling this common problem on your own.

Credit: anglersresource.net
Tools And Materials Needed
Repairing the tip of a fishing rod requires the right tools and materials. Using proper items helps make the repair strong and lasting.
This guide covers the main tools you need, how to pick replacement tips, and the best adhesives and tapes to use.
Essential Repair Tools
You need a few basic tools to fix a rod tip safely and correctly. These tools help remove the broken tip and attach the new one.
- Heat source (like a lighter or heat gun) to loosen old glue
- Needle-nose pliers to pull off the broken tip
- Fine sandpaper to smooth the rod end
- Measuring tape to size the new tip
- Small brush for applying glue
Choosing Replacement Tips
Select a replacement tip that matches the rod’s original size and style. The tip should fit snugly without forcing it on.
| Tip Size | Rod Outer Diameter (mm) | Common Use |
| Small | 1.5 – 2.0 | Light spinning rods |
| Medium | 2.1 – 3.0 | Medium action rods |
| Large | 3.1 – 4.5 | Heavy casting rods |
Adhesives And Tapes
Use strong adhesives that can hold the tip firmly under tension. Some tapes help secure the tip while the glue dries.
- Two-part epoxy glue for a solid, permanent bond
- Super glue for quick repairs and light use
- Heat shrink tubing to cover and protect the joint
- Electrical tape to hold the tip in place during drying

Credit: www.reddit.com
Assessing The Damage
Fixing the tip of a fishing rod starts with checking the damage carefully. This helps you know what repairs are needed.
Look closely at the broken tip and the rod itself. This step is important before you try to fix anything.
Identifying Tip Break Types
There are different ways a rod tip can break. Knowing the type helps you pick the right repair method.
Common tip breaks include cracks, full breaks, and bent tips. Each needs a different approach to fix.
- Cracks:Small splits that may not break the rod fully.
- Full breaks:The tip is completely separated from the rod.
- Bent tips:The tip is twisted or bent but not broken.
Checking Rod Integrity
Check the whole rod for other damage. A broken tip might mean the rod has more weak spots.
Look for cracks, dents, or soft areas. These can cause problems while fishing.
- Run your fingers along the rod to feel for rough spots.
- Use a bright light to spot cracks or splits.
- Gently bend the rod to see if it feels weak or soft.
Removing The Broken Tip
Repairing the tip of a fishing rod involves careful steps. Follow these guidelines to safely remove the broken tip. This ensures your rod is ready for your next fishing adventure.
Begin by softening the glue holding the tip. Then, gently pull off the tip without causing more damage to the rod.
Softening The Old Glue
Softening the glue is crucial for easy removal of the broken tip. Heat is often used to achieve this.
- Use a hairdryer to apply heat evenly around the tip.
- Hold the dryer at a safe distance to avoid burning the rod.
- Check if the glue is soft by gently touching it.
Safely Pulling Off The Tip
Once the glue is soft, proceed with caution. Removing the tip requires a steady hand to avoid further damage.
Gently twist and pull the tip off the rod. If resistance is felt, apply more heat to loosen the glue further.
With the old tip removed, the rod is now ready for a new one. Ensure the rod end is clean before attaching a new tip.
Preparing The Rod For A New Tip
Fixing the tip of a fishing rod starts with good preparation. You need to clean and smooth the rod end before attaching the new tip.
This helps the new tip fit better and hold firmly. Let’s look at how to prepare the rod end properly.
Cleaning The Rod End
Remove old glue and dirt from the rod end. This makes the surface clean for the new tip.
- Use a soft cloth to wipe away dust and debris.
- Apply rubbing alcohol to remove sticky residue.
- Let the rod dry completely before moving on.
Sanding For Better Adhesion
Sanding the rod end roughens the surface. This helps glue stick stronger to the rod.
| Sandpaper Grit | Purpose |
|---|---|
| 120 grit | Remove old glue and smooth rough spots |
| 220 grit | Make surface slightly rough for glue |
| 400 grit | Final smooth touch without polish |
Attaching The New Tip
Fixing the tip of your fishing rod is simple with the right tools. Attaching the new tip carefully ensures your rod works well.
This guide helps you apply glue and align the new tip correctly for a strong, straight repair.
Applying Glue Correctly
Use the right glue for fishing rods, such as epoxy or super glue. Apply a small amount inside the new tip.
Too much glue can cause mess and weak bonds. A thin layer keeps the tip secure without overflow.
- Clean the rod end before gluing
- Apply glue evenly inside the tip
- Avoid excess glue on the outside
- Work quickly before glue dries
Positioning And Aligning
Slide the new tip onto the rod end carefully. Make sure it fits snugly without forcing it.
Align the tip with the other guides on the rod. This keeps your line running straight during fishing.
- Match the new tip with the rod’s original angle
- Check alignment by sighting along the rod
- Adjust quickly before glue sets
- Hold the tip steady while the glue dries

Credit: www.youtube.com
Securing And Finishing The Repair
Fixing the tip of a fishing rod is not complete without securing it well. This step keeps the repair strong and lasting. Finishing the repair right also helps your rod look neat and ready to use.
Use simple tools and materials to make sure the tip stays in place. Take your time to let everything dry and harden before you use the rod again.
Using Thread Wraps Or Tape
Thread wraps or tape hold the tip firmly during and after repair. Wrap the thread tightly around the tip and rod. This keeps the pieces from moving and adds strength.
You can use special fishing rod thread or strong tape. Wrap several layers for a secure hold. Make sure the wraps are even and smooth to avoid bumps.
- Start wrapping just below the break point
- Wrap upwards toward the tip firmly
- Cover the whole repaired area evenly
- Secure the end with a knot or tape
- Trim any loose thread or tape ends
Letting The Glue Cure
After securing the tip, let the glue dry fully. This step is very important to make the repair strong. Do not use the rod until the glue is hard.
Place the rod in a safe spot where it can stay still. Check the glue instructions for curing time. Usually, it takes several hours to a full day.
- Keep the rod steady during curing
- Avoid touching the glued area
- Check for any loose parts after curing
- Remove any extra glue carefully
Testing The Repair
After fixing the tip of your fishing rod, you must test it. Testing shows if the repair works well.
Check the rod’s strength and shape before using it again on water.
Checking Flexibility
Bend the rod tip slowly to see if it moves naturally. The tip should not feel stiff or weak.
Look for cracks or unusual bends that may mean the repair is not strong enough.
- Hold the rod near the handle firmly
- Bend the tip gently downward
- Watch the tip’s movement closely
- Stop if you hear cracking sounds
Ensuring Proper Alignment
Check if the repaired tip lines up with the rest of the rod. Proper alignment helps the rod work well.
Look along the rod from the handle to the tip to spot any bends or twists.
- Place the rod on a flat surface
- Look from the side and from above
- Make sure the tip points straight
- Adjust if the tip leans or bends wrongly
Preventing Future Tip Damage
Fishing rod tips are delicate and can break easily. Taking care of the tip helps your rod last longer.
Using simple habits can protect the tip from cracks and bends. These habits keep your fishing fun and safe.
Safe Handling Tips
Handle your rod with care to avoid hitting the tip on hard surfaces. Always watch where the tip is during use.
Do not use the tip to push or pull heavy objects. This can cause the tip to bend or break easily.
- Hold the rod by the handle, not the tip
- Be gentle when casting and retrieving
- Avoid knocking the tip on rocks or boats
- Use rod covers or tip protectors during travel
Storage Recommendations
Store your fishing rod in a safe place where the tip cannot get damaged. Keep it away from heavy items that can fall on it.
Use racks or holders that support the rod evenly. This stops the tip from bending or warping over time.
- Store rods vertically or horizontally on racks
- Use padded cases or sleeves for extra protection
- Keep rods dry to prevent material weakness
- Separate rods to avoid tangling or pressure on tips
Frequently Asked Questions
How Do I Fix A Broken Fishing Rod Tip?
To fix a broken rod tip, remove the damaged tip, clean the area, and attach a replacement tip using strong adhesive or rod tip glue. Allow it to dry completely before use for a secure, long-lasting repair.
What Materials Are Needed To Repair A Rod Tip?
You need a replacement rod tip, adhesive (epoxy or super glue), sandpaper, and a small file. These materials help ensure a smooth, secure fix and restore the rod’s functionality effectively.
Can I Repair A Fishing Rod Tip At Home?
Yes, repairing a fishing rod tip at home is simple. With basic tools and careful steps, you can fix minor breaks without professional help, saving time and money while extending your rod’s life.
How Long Does A Rod Tip Repair Last?
A properly repaired rod tip can last for years. The durability depends on the adhesive quality and repair precision, so follow instructions carefully for a strong, lasting fix.
Conclusion
Repairing the tip of a fishing rod saves money and extends its life. Small cracks or breaks do not mean the rod is useless. With the right tools and steps, you can fix it yourself. Take your time and follow the instructions carefully.
A repaired rod works almost like new again. Keep your rod ready for your next fishing trip. Stay patient and enjoy the process. Fishing will feel better with a strong, fixed rod tip.