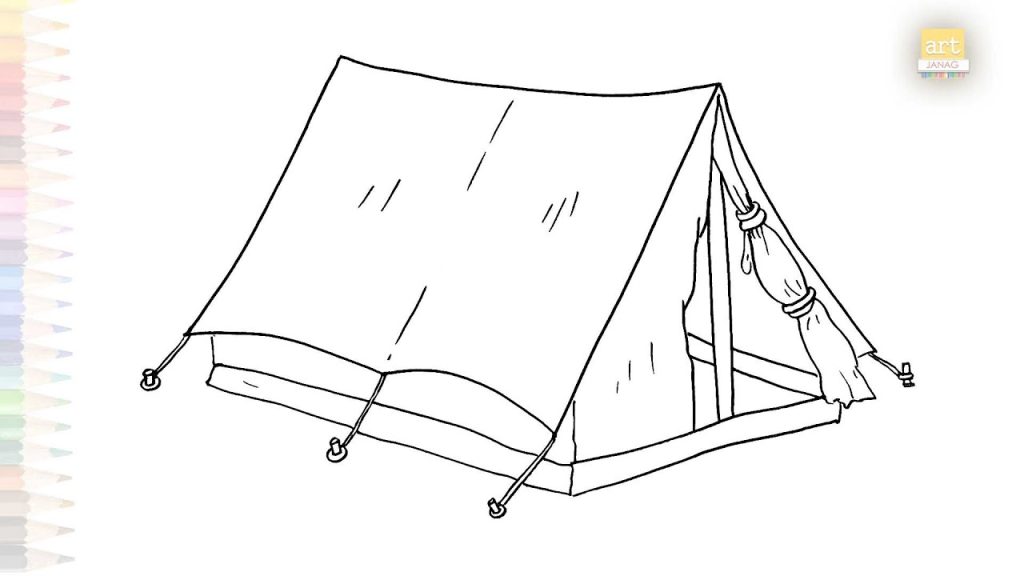
Have you ever wanted to draw a tent but didn’t know where to start? Whether you’re planning a camping scene, creating a storybook illustration, or just looking to improve your drawing skills, learning how to draw a tent can be simple and fun.
In this guide, you’ll discover easy steps that anyone can follow, no matter your experience level. By the end, you’ll have a clear, eye-catching tent drawing that you’ll be proud to show off. Ready to bring your sketch to life?
Let’s get started!

Credit: www.youtube.com
Materials Needed
Drawing a tent requires some basic materials to help you create a clear and detailed picture. Using the right tools can make your drawing easier and more enjoyable.
Prepare your workspace with all the materials before you start. This will help you focus on your drawing without interruptions.
Essential Drawing Tools
You need some basic drawing tools to start your tent sketch. These tools help you draw lines, add details, and erase mistakes.
- Pencils (HB and 2B are good choices)
- Eraser (soft and clean)
- Ruler (for straight lines)
- Sharpener (to keep pencils sharp)
- Colored pencils or markers (optional for coloring)
Choosing The Right Paper
Picking the right paper is important for your drawing quality. The paper type affects how your pencils and colors will look.
| Paper Type | Best For | Texture |
| Sketch Paper | Practice and quick sketches | Smooth |
| Drawing Paper | Final drawings | Medium texture |
| Watercolor Paper | Using watercolors or wet media | Rough |
Basic Tent Shapes
Drawing a tent starts with simple shapes. These shapes help form the base of your tent.
Understanding these shapes makes sketching easier and more accurate.
Simple Geometric Forms
Tents usually have basic shapes like triangles and rectangles. These shapes create the tent’s main parts.
Start with these forms to build the tent’s body and roof.
- Triangle for the tent’s roof
- Rectangle for the tent’s base
- Lines to show tent poles
Sketching The Tent Frame
Begin by drawing light lines to map the tent’s frame. This helps keep the shape balanced.
Use straight lines to connect the shapes. These lines show the structure and support of the tent.
- Draw a triangle for the roof frame
- Add vertical lines for the tent poles
- Connect the bottom with a rectangle for the floor
Drawing Tent Details
Learning how to draw a tent can be fun. Focus on the details to make your drawing more realistic.
This guide will help you add fabric folds and include tent poles and stakes in your drawing.
Adding Fabric Folds
Fabric folds give life to your tent drawing. They show how the fabric reacts to wind and tension.
- Draw curved lines to indicate folds.
- Make some lines thicker for deeper folds.
- Use shorter lines for lighter creases.
Including Tent Poles And Stakes
Tent poles and stakes are essential for structure. They provide stability and shape to your tent.
Visualize the poles as straight lines that support the tent fabric. Stakes are small but crucial for anchoring.
| Part | Description |
| Pole | Long, straight lines |
| Stake | Short, angled lines |

Credit: www.youtube.com
Shading Techniques
Shading makes your tent drawing look real and full of life. It shows how light hits the tent and where shadows fall.
Good shading helps the tent look three-dimensional. It adds depth and texture to simple shapes.
Creating Depth With Shadows
Shadows show parts of the tent that light cannot reach. They give the tent a solid and realistic look.
Use darker shades where the tent folds or where parts overlap. This contrast helps the shape stand out.
- Shade under the tent’s roof edges
- Add shadows inside the tent’s opening
- Darken areas near the ground where the tent meets the surface
- Use soft shading for gradual curves
Highlighting Textures
Textures make the tent’s fabric look real. They show wrinkles, folds, and the material type.
Use light and short strokes to show fabric creases. Highlights show where light hits the smooth parts.
- Draw small lines along folds to suggest wrinkles
- Use lighter shading on raised fabric areas
- Blend softly between light and dark for smooth fabric
- Vary pressure on your pencil for different textures
Adding Background Elements
Drawing a tent is fun, but adding background elements makes it look real. Background details help set the scene.
Simple landscape features and extra touches improve your drawing. They give depth and interest to your artwork.
Landscape Features
Start by adding natural parts like trees, hills, and rocks. These show where the tent is placed.
- Draw trees behind or beside the tent for scale.
- Add hills or mountains far in the background.
- Sketch some rocks or bushes near the tent’s base.
- Include a simple river or path to guide the eye.
Enhancing The Scene
Adding small details brings your drawing to life. Use light and shadow to show depth.
| Detail | How to Draw | Effect |
| Shadows | Shade under the tent and trees | Makes objects stand out |
| Grass | Short strokes around the tent | Gives texture to the ground |
| Sky | Add clouds or a sun | Sets mood and time of day |
| Animals | Small birds or insects near the tent | Adds life to the scene |
Common Mistakes To Avoid
Drawing a tent can be simple, but many beginners make mistakes. These errors can make your tent look odd or unclear.
Knowing what to avoid helps you draw better tents faster. Focus on common problems like proportions and details.
Proportions And Perspective Errors
Many drawings have tents that look flat or strange. This happens when proportions are wrong or perspective is ignored.
Remember, tents have a base, sides, and a peak. The size of these parts must match and look natural.
- Keep the base wider than the top for stability.
- Use lines that show depth, like angled sides.
- Avoid making the tent too tall or too short.
- Draw the tent in 3D by showing front and side panels.
Overcomplicating The Sketch
Adding too many details early can confuse the drawing. Start simple to get the main shape right.
Focus on the basic tent shape before drawing ropes, textures, or patterns. These come later.
- Begin with simple triangles or rectangles.
- Use light lines to adjust shapes easily.
- Skip unnecessary details on the first try.
- Add features only after the main form looks correct.
Tips For Practice
Drawing a tent takes patience and practice. Simple tips help you improve your skills.
Practice regularly and use helpful tools to make your drawings better.
Step-by-step Repetition
Repeat the drawing steps many times to build muscle memory. This makes drawing easier.
Focus on each part of the tent. Draw the base, roof, and details in order.
- Start with simple shapes like triangles and rectangles
- Add lines for tent poles and ropes
- Practice shading to show depth
- Draw the tent from different angles
Using Reference Images
Look at real tent pictures or drawings as you practice. Reference images guide your hand.
Study how the fabric folds and where shadows fall. This helps make your drawing realistic.
- Find clear images of tents in different styles
- Notice the shape and structure carefully
- Use references to check your work and improve
- Try tracing the image first to learn shapes

Credit: www.youtube.com
Frequently Asked Questions
What Materials Do I Need To Draw A Tent?
To draw a tent, you need paper, pencils, an eraser, and colored pencils or markers. These tools help create clean, detailed sketches and vibrant colors.
How Do I Start Drawing A Simple Tent Shape?
Begin by sketching a triangle for the tent’s front. Add lines for the sides and base. This forms the basic structure.
What Techniques Improve Tent Drawing Realism?
Use shading to show light and shadow. Add textures like fabric folds. These techniques enhance depth and make the tent look realistic.
Can I Draw Different Tent Styles Easily?
Yes, start with basic shapes for each style. Adjust angles and details for dome, A-frame, or cabin tents. Practice helps mastery.
Conclusion
Drawing a tent can be simple and fun. Start with basic shapes and add details step by step. Practice helps you improve your lines and angles. Don’t worry about mistakes; they help you learn. Keep your drawing clear and neat for best results.
Soon, you will enjoy creating different tent styles. Grab your pencil and paper, and try again today!