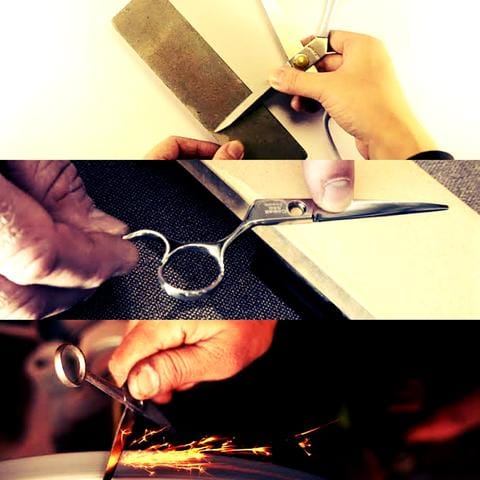
Are your hair shears not cutting as smoothly as they used to? Dull blades can make your haircuts uneven and frustrating.
But don’t worry—you can bring your shears back to life with a simple sharpening process. In this guide, you’ll learn easy, step-by-step tips to sharpen your hair shears at home. By the end, you’ll save money, improve your cutting precision, and keep your tools in top shape.
Ready to make every snip count? Let’s get started!
Choosing The Right Tools
Sharpening shears for hair needs the right tools to keep blades sharp and safe.
Using proper stones and equipment helps you get the best edge without damage.
Types Of Sharpening Stones
Different sharpening stones fit different types of shears and sharpening skills.
- Whetstones:These stones come in coarse and fine grits. Use coarse for dull blades and fine for finishing.
- Diamond Stones:These have a rough surface with diamond grit. They sharpen fast and last long.
- Ceramic Stones:Good for fine sharpening. They remove less metal and keep the edge smooth.
- Oil Stones:Use oil to lubricate these stones. They work well for small touch-ups.
Additional Equipment Needed
Besides sharpening stones, other tools help keep your shears in top shape.
| Equipment | Purpose |
| Leather Strop | Polishes and smooths the blade edge after sharpening |
| Lubricating Oil | Prevents rust and keeps shears moving smoothly |
| Clamp or Vice | Keeps shears steady during sharpening |
| Cleaning Cloth | Removes metal dust and oil from blades |

Credit: shihanshears.com
Preparing Your Shears
Before sharpening your hair shears, you need to prepare them properly. This helps protect the blades and gives better results.
Preparation includes cleaning, disassembling, and checking the shears for any damage.
Cleaning And Disassembling
Start by removing dirt, hair, and oils from your shears. Use warm water and mild soap with a soft cloth. Dry them well afterward.
Next, carefully take the shears apart. Most hair shears have a screw or bolt in the middle. Unscrew it to separate the blades. Keep all parts safe.
- Use a soft cloth for cleaning
- Remove all hair and residue
- Dry blades completely before proceeding
- Unscrew the center bolt slowly
- Keep screws and parts in a safe place
Inspecting For Damage
Look over each blade closely. Check for chips, cracks, or rust on the edges. These can affect sharpening and cutting quality.
Also check the screw or bolt. It should not be loose or stripped. Tighten or replace any damaged parts before sharpening.
- Examine blade edges for chips or dents
- Check for rust spots on the blades
- Inspect the screw for wear or damage
- Replace any broken or worn parts
- Do not sharpen damaged shears without fixing
Sharpening Techniques
Keeping hair shears sharp is vital for a clean cut. Proper sharpening techniques ensure longer-lasting tools.
Learn the essential steps to sharpen your shears effectively. This guide helps maintain their performance.
Setting The Correct Angle
Finding the right angle is key for effective sharpening. Hold the shears at a consistent angle to the sharpening tool.
- Place the shears on a flat surface.
- Check the manufacturer’s angle recommendation.
- Align the blades with the sharpening tool.
Using A Sharpening Stone
A sharpening stone is a handy tool. It smooths and sharpens the blades with ease.
Honing The Blades
Honing refines the edge of the blades. It removes small nicks and aligns the metal.
| Tool | Use |
| Honing Rod | Fine-tune blade edges |
| Leather Strop | Polish and refine |

Credit: www.youtube.com
Testing Sharpness
Checking if your hair shears are sharp is important for good cutting results. Sharp shears cut cleanly and avoid damaging hair.
There are simple tests you can use to see how sharp your shears are. Two easy methods are the paper test and the hair strand test.
Paper Test Method
This test uses a plain sheet of paper to check the sharpness of the blades. It shows if the shears cut cleanly or tear the paper.
- Take a thin sheet of paper.
- Hold the paper firmly in one hand.
- Cut through the paper with your shears in one smooth motion.
- Look at the cut edge of the paper.
- If the cut is clean and smooth, the shears are sharp.
- If the paper tears or frays, the blades need sharpening.
Hair Strand Test
This test checks the shears’ sharpness using an actual hair strand. It helps you see how the blades perform on real hair.
| Test Step | What to Observe |
|---|---|
| Cut a single hair strand with shears | Check if the cut is smooth and clean |
| Try cutting several strands at once | Notice if the blades cut all strands evenly |
| Look for any hair split ends after cutting | Sharp shears cause no split ends or fraying |
Maintaining Sharpness
Keeping your hair shears sharp helps you cut cleanly and easily. Dull shears can pull hair and cause damage.
Regular care is key to maintaining the sharpness of your shears for a long time.
Regular Cleaning And Oiling
Clean your shears after every use to remove hair and dirt. Use a soft cloth and warm water. Dry them completely to stop rust.
- Wipe blades with rubbing alcohol to disinfect
- Apply a drop of oil on the pivot area and blades
- Open and close shears several times to spread oil evenly
- Remove excess oil with a clean cloth
Proper Storage Tips
| Storage Method | Benefit |
| Use a hard case | Protects blades from damage and dust |
| Keep shears dry | Prevents rust and corrosion |
| Store in a safe place away from children | Ensures safety and stops accidental drops |
| Do not store with other tools | Prevents blade nicks and dulling |

Credit: www.jpscissors.com
Avoiding Common Mistakes
Sharpening shears for hair cutting needs care and attention. Mistakes can damage the blades or reduce their lifespan. Knowing what to avoid helps keep your tools in top shape.
Focus on key issues like over-sharpening and incorrect angle. These are common errors that affect cutting performance and blade health.
Over-sharpening Risks
Sharpening shears too often or too much wears down the blade edges. This shortens the tool’s life and lowers cutting quality. It can also cause uneven edges, making haircuts rough.
- Excessive sharpening removes too much metal
- Blade edges become thin and weak
- Uneven sharpening leads to poor cuts
- Frequent sharpening wastes time and effort
- Damaged blades need replacement sooner
Incorrect Angle Issues
Sharpening at the wrong angle harms blade sharpness. The blade must keep its factory angle for best results. Wrong angles create dull spots or rough edges.
| Angle Problem | Effect on Shears |
| Too steep | Blade edge chips and dulls quickly |
| Too flat | Blade edge is weak and bends easily |
| Uneven angle | Cutting becomes rough and inconsistent |
Frequently Asked Questions
How Often Should I Sharpen Hair Shears?
Sharpen hair shears every 3-6 months for optimal cutting. Frequent use dulls blades faster. Regular sharpening maintains clean, precise cuts and extends shear lifespan.
What Tools Are Needed To Sharpen Hair Shears?
You need a sharpening stone or diamond sharpener, a screwdriver, and a cloth. These tools help maintain blade alignment and sharpness efficiently at home.
Can I Sharpen Hair Shears Without Professional Help?
Yes, you can sharpen shears at home using proper tools. Follow step-by-step instructions carefully for best results. Avoid excessive pressure to prevent damage.
How Do I Know If My Shears Need Sharpening?
If hair snags, bends, or uneven cuts occur, shears need sharpening. Dull blades reduce cutting efficiency and can damage hair texture.
Conclusion
Sharpening hair shears helps keep your cuts clean and precise. Regular care saves money and improves tool life. Use simple tools and follow each step carefully. Practice makes the process easier and faster. Keep your shears sharp for the best hair results.
Small efforts lead to big differences in cutting quality. Stay patient and enjoy smoother, sharper shears every time.