
You’ve invested in your tent, and now you’re staring at a tear or hole that could ruin your next trip. Don’t let a small rip turn into a big problem.
Knowing how to patch your tent quickly and effectively can save your gear and keep you comfortable outdoors. In this guide, you’ll discover simple, proven steps to fix your tent like a pro — so you can get back to enjoying your adventure without worry.
Keep reading to learn how to protect your tent and make it last longer.
Credit: www.pomoly.com
Identify Tent Damage
When camping, your tent is your shelter. It’s important to keep it in good condition. Identifying damage early can prevent bigger problems later.
Learn how to spot issues with your tent. This helps you fix them quickly and keep your camping trip enjoyable and safe.
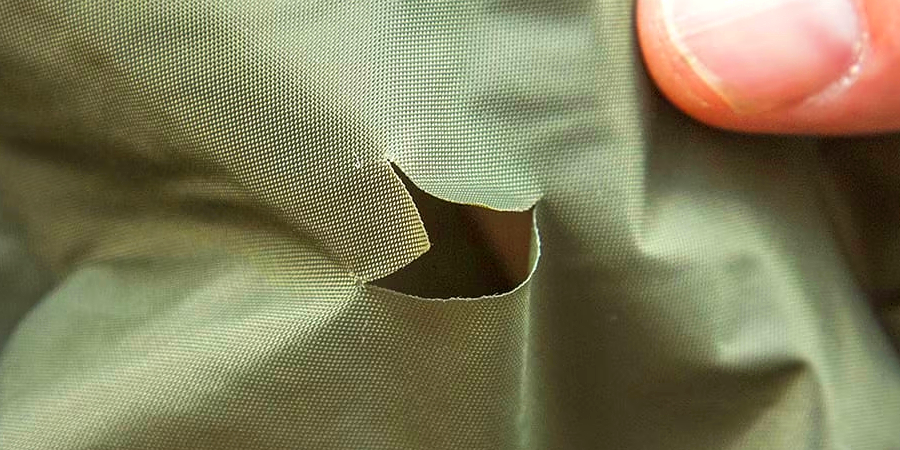
Locate Tears And Holes
Look for visible tears and holes in the fabric. These are the most common types of damage.
- Hold the tent up to the light to see through fabric.
- Feel for any weak spots by gently pressing areas.
- Check areas that touch the ground for wear.
Check Seams And Zippers
Seams and zippers are crucial for keeping water and bugs out. Ensure they are functioning properly.
Run your fingers along the seams to check for loose threads. Test all zippers to ensure they slide smoothly without snags.
| Seam Type | Common Issue |
| Taped Seams | Peeling tape |
| Sewn Seams | Loose threads |
| Zippers | Snags or splits |
Gather Repair Materials
Fixing a torn tent needs the right materials. Gather everything before you start. This helps the repair go smoothly.
Knowing what to use makes your patch last longer. Prepare a clean workspace and good lighting for the best results.
Essential Patch Kits
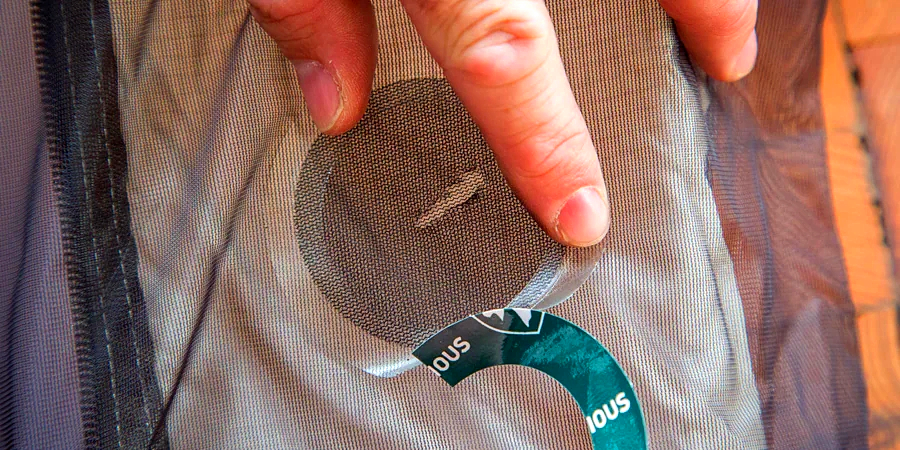
Patch kits have items made to fix tents fast and well. They usually include strong patches and special glue.
- Adhesive patches for quick covering
- Seam sealer to protect stitching
- Waterproof glue to hold pieces together
- Cleaning wipes to prep the torn area
- Instructions for easy use
Alternative Tools And Supplies
If you don’t have a patch kit, use these common tools and materials. They work well for small tent repairs.
| Tool or Supply | Purpose |
|---|---|
| Strong fabric (nylon or polyester) | Cut patches from this fabric |
| Clear waterproof tape | Temporary seal for small holes |
| Fabric glue or contact cement | Stick patch to tent surface |
| Scissors | Trim patch to size |
| Rubbing alcohol | Clean area before patching |
Clean And Prepare Area
Before patching a tent, cleaning and preparing the area is very important. This helps the patch stick well and last longer.
Take your time to make sure the area is ready. A clean and smooth surface improves repair quality.
Remove Dirt And Moisture
Start by removing dirt from the damaged area. Use a soft brush or cloth to clean the surface gently.
Make sure the area is completely dry before patching. Moisture can stop the glue from sticking properly.
- Brush off loose dirt and dust
- Wipe with a damp cloth if needed
- Let the area air dry fully
- Use a dry towel to remove any water spots
Smooth Surface For Patching
After cleaning, check the surface for bumps or rough spots. A smooth surface helps the patch stick better.
Use fine sandpaper or a cloth to gently smooth the edges around the tear or hole.
- Lightly sand the area around the damage
- Remove any loose threads or fabric pieces
- Clean away sanding dust with a dry cloth
- Ensure the surface feels even to touch
Credit: www.pomoly.com
Apply Patch Safely
Patching a tent can stop leaks and tears from getting worse. It is important to do it safely to keep the tent strong.
Using the right steps helps the patch stick well and last longer. Follow simple rules to protect your tent fabric.
Cut Patch To Size
Cut the patch so it is bigger than the hole or tear. Leave at least one inch of extra material all around.
Use sharp scissors to make clean cuts. Avoid jagged edges that can peel off easily.
- Measure the damaged area carefully
- Mark the patch material before cutting
- Cut a smooth shape, like a circle or oval
- Ensure the patch fully covers the damage
Adhere Patch Correctly
Clean and dry the tent surface before applying the patch. Dirt and moisture reduce how well the patch sticks.
Press the patch firmly onto the tent. Hold it in place until the adhesive bonds well with the fabric.
- Use a patch adhesive made for tents
- Apply glue evenly on the patch or tent
- Press out air bubbles under the patch
- Let the patch dry fully before packing the tent
Seal Seams And Edges
Sealing seams and edges is key to fixing a tent properly. It stops water from leaking inside. This guide shows how to seal your tent well.
Use the right sealant and follow drying tips. This will help your patch last longer and keep your tent dry.
Use Seam Sealant
Choose a seam sealant made for tents. It works like glue and waterproofs the fabric. Apply it carefully along the seams and edges.
- Clean the seam area first with a cloth and mild soap.
- Let the area dry completely before applying sealant.
- Use a small brush or applicator to spread sealant evenly.
- Cover all needle holes and edges fully.
- Apply a second coat if needed for extra protection.
Drying And Curing Tips
Let the sealant dry well. This makes sure it sticks and seals the tent. Drying times vary by brand and weather.
| Condition | Drying Time | Notes |
| Warm and dry | 6–8 hours | Best for quick curing |
| Cool or humid | 12–24 hours | May need longer time |
| Windy | 8–10 hours | Helps speed drying |
Keep the tent flat and still while drying. Avoid folding or touching the sealed seams. Check the sealant is dry before packing the tent away.
Test Tent Integrity
After patching your tent, it is important to check its strength. Testing the tent helps find any weak spots.
Testing ensures your tent will protect you from wind and rain during use.
Check For Leaks
Look closely at the patched area to find any leaks. Water can damage the inside and make you wet.
Spray water or use a wet cloth on the patch. Watch for water coming through or damp spots inside.
- Spray water evenly over the patched area
- Check inside the tent for wet spots
- Use a flashlight to see through the fabric
- Mark any leaks to fix again
Perform Strength Test
Press gently on the patched spot to check its strength. The patch should hold firm without peeling.
Try pulling lightly at the patch edges. If the patch lifts or tears, it needs to be redone.
- Press the patch with your fingers
- Pull lightly at the edges
- Look for any peeling or cracks
- Reapply patch if it feels weak
Prevent Future Damage
Patching your tent fixes holes and tears. Taking steps to prevent damage keeps your tent strong longer. Careful use and regular checks help avoid repairs.
Use the right setup and do simple maintenance. These actions protect your tent fabric and seams from wear and harm.
Proper Tent Setup
Setting up your tent correctly stops damage from wind, dirt, and rough ground. Choose the right spot and use all parts as designed.
- Pick a flat, clear area free of sharp rocks and sticks
- Clear debris before laying the tent footprint or groundsheet
- Use all stakes and guylines to keep the tent tight and stable
- Avoid pitching under trees with loose branches
- Do not drag the tent fabric on the ground
Routine Maintenance
Regular care keeps your tent fabric strong and seams sealed. Clean and dry your tent before storage. Check for small tears and fix them fast.
| Maintenance Task | Frequency | Purpose |
| Clean tent fabric | After each trip | Remove dirt that can wear fabric |
| Dry completely | Before storage | Prevent mold and mildew |
| Inspect seams and zippers | Monthly or before trips | Find damage early |
| Repair small holes or tears | As soon as found | Stop tears from growing |
| Store in a cool, dry place | When not in use | Protect fabric integrity |
Credit: www.pomoly.com
Frequently Asked Questions
How Do I Patch A Small Tear In My Tent?
To patch a small tear, clean the area and use a tent-specific adhesive patch. Press firmly and let it dry completely for a waterproof seal.
What Materials Are Best For Tent Patching?
Use waterproof adhesive patches or repair tape designed for nylon or polyester tents. Avoid regular tape, as it won’t hold in wet conditions.
Can I Patch A Tent Without Sewing?
Yes, use self-adhesive repair patches or waterproof tape. These provide a strong, quick fix without the need for sewing skills.
How Long Does A Tent Patch Last?
A well-applied patch can last several camping seasons. Proper cleaning and drying before patching improve durability and weather resistance.
Conclusion
Patching your tent keeps it safe and dry on every trip. Small tears can turn into big problems if ignored. Fixing holes quickly saves time and money. Use the right tools and follow simple steps carefully. A well-patched tent lasts for many camping seasons.
Enjoy your outdoor adventures without worry or stress. Keep your tent in good shape for all your journeys. Simple care makes camping more fun and comfortable. Stay prepared and protect your gear every time you camp.