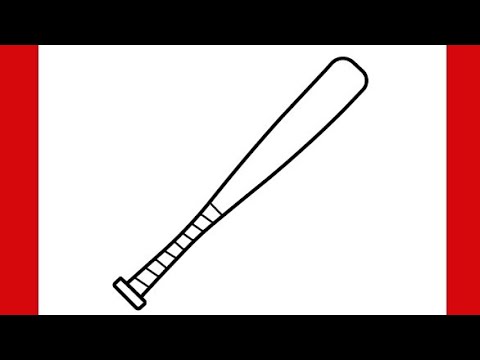
Have you ever wanted to draw a baseball bat but didn’t know where to start? You’re in the right place.
This guide will show you how to draw a baseball bat easily, step by step. No complicated art skills needed—just simple instructions anyone can follow. By the end, you’ll have a great-looking drawing that you’ll be proud to show off.
Ready to bring your drawing to life? Let’s get started!

Credit: www.drawingforall.net
Materials Needed
Drawing a baseball bat is simple with the right materials. Having everything ready helps you focus on your art.
This guide lists all the basic supplies you need to draw a baseball bat easily.
Paper
Choose a clean sheet of drawing paper. Plain white paper works best for clear lines and shading.
Pencil
Use a sharp pencil for drawing your bat outline. A standard HB pencil is a good choice for beginners.
Eraser
An eraser helps you fix mistakes and clean up your drawing. A soft rubber eraser is gentle on paper.
Coloring Tools
You can color your baseball bat using crayons, colored pencils, or markers. Pick tools you like to use.
- Crayons for bright, soft colors
- Colored pencils for detailed shading
- Markers for bold and solid colors
Ruler
A ruler helps you draw straight edges on the bat. It keeps your lines neat and accurate.
Optional: Reference Image
Having a picture of a baseball bat nearby can guide your drawing. You can print one or use an image on your device.
| Material | Purpose |
|---|---|
| Paper | Draw on a clean surface |
| Pencil | Sketch outlines and details |
| Eraser | Correct mistakes and clean lines |
| Coloring Tools | Add color and shading |
| Ruler | Draw straight lines |
| Reference Image | Visual guide for accuracy |
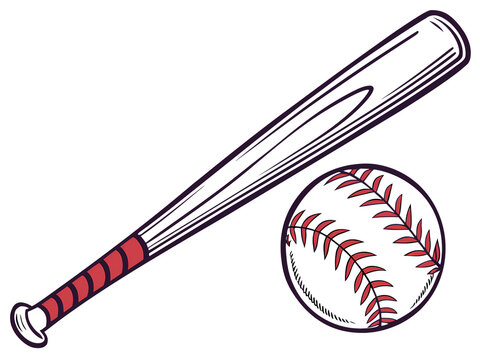
Credit: stock.adobe.com
Basic Shapes To Start
Drawing a baseball bat is easier when you start with simple shapes. These shapes form the basic structure of your bat.
Using basic shapes helps you keep the bat’s proportions right. You can add details after the shapes are done.
Draw A Long Rectangle
Begin with a long, thin rectangle for the bat’s main body. This shape shows the length and width of the bat.
Make sure the rectangle is straight and tall. This helps you see the bat’s handle and barrel clearly.
Add A Small Oval For The Handle
Draw a small oval at one end of the rectangle. This oval marks the handle’s grip area.
The oval should be narrower than the rectangle. It shows where the player holds the bat.
Sketch A Larger Oval For The Barrel
At the opposite end of the handle, draw a larger oval. This represents the bat’s barrel where the ball hits.
The barrel oval should be wider and rounder than the handle oval. It gives the bat its classic shape.
Connect The Shapes Smoothly
Use curved lines to join the handle and barrel ovals to the rectangle. This creates a smooth bat outline.
Smooth connections make the bat look natural and ready for detail work later.
Sketching The Bat Outline
Drawing a baseball bat can be fun and simple. Start by sketching its basic shape.
Focus on creating a clear outline. This helps in forming the bat’s structure.
Start With The Handle
The handle is the thin part of the bat. It is held by the player.
Draw a long, straight line. This line shows where the handle will be.
Add The Barrel
The barrel is the thick part of the bat. It hits the baseball.
Draw a curved line from the end of the handle. Extend it to form the barrel.
Connect The Parts
Now, connect the handle to the barrel. Use smooth lines to join them.
This connection makes the bat look realistic. Ensure lines are neat and clear.
Refine The Shape
Check your outline for any mistakes. Adjust the lines to improve the shape.
Erase extra marks. A clean outline makes your drawing look better.
- Use an eraser for small corrections
- Keep lines light for easy adjustments
- Focus on symmetry for balance
Adding Details And Curves
Drawing a baseball bat looks simple at first. Adding details and curves makes it look real.
Details give the bat texture and shape. Curves add smoothness and roundness to the bat.
Draw The Basic Shape With Curves
Start with a long, slightly curved rectangle for the bat’s body. Avoid straight lines.
Add a small curve at the handle end. This curve shows where the player holds the bat.
- Use soft, smooth lines for curves
- Make the bat thicker near the hitting end
- Keep the handle thinner and rounded
Add Wood Grain Details
Draw thin, wavy lines along the bat’s body. These lines look like wood grain.
Keep lines light and not too close. This detail makes the bat look wooden and natural.
- Draw lines following the bat’s curve
- Vary line length and spacing
- Use gentle waves, not straight lines
Add The Bat’s End Cap
Draw a small oval shape at the bat’s thick end. This is the end cap.
The oval should follow the bat’s curve and look slightly rounded to show depth.
- Make the end cap smaller than the bat’s width
- Draw a curved line inside the oval for thickness
- Add a shadow line below for a 3D effect
Highlight The Handle’s Grip
Add small horizontal lines near the handle. These show where the grip wraps around.
Space lines evenly and curve them slightly. This adds texture to the handle.
- Draw 4-6 short horizontal lines
- Curve lines slightly to match handle shape
- Keep lines light for subtle effect
Refining The Drawing
After sketching the basic shape of the baseball bat, it is time to add details. Refining your drawing makes it look more realistic and clear.
This stage helps to improve lines, shapes, and shadows. Take your time and use light strokes for adjustments.
Smooth Out The Outline
Start by erasing extra sketch lines that are not part of the final shape. Then, redraw the outline with smooth, confident strokes.
Add Details To The Handle
The handle usually has a grip or tape. Draw small horizontal lines or a crisscross pattern to show this texture. Keep the lines light and neat.
- Draw thin, parallel lines for grip texture
- Use light shading to show tape overlaps
- Keep the handle thinner than the barrel
Create The Barrel Shape
The barrel is the thickest part of the bat. Make sure it looks round and smooth. Add a slight curve at the end to show the knob.
Shade The Bat For Depth
Shading gives your drawing a three-dimensional look. Use a pencil to add light and dark areas. Shade the side opposite your light source darker.
| Part of Bat | Shading Tip |
| Handle | Light shading with thin lines |
| Barrel | Darken the lower side and edges |
| Knob | Highlight the top with no shading |
Check Proportions And Make Final Touches
Look at your drawing from a distance to spot mistakes. Fix any uneven parts and clean the lines. Add small details like wood grain or logos if you want.
Tip:Use a blending stump or your finger to smooth shaded areas for a soft look.

Credit: www.vecteezy.com
Shading And Texture Tips
Drawing a baseball bat looks simple, but shading adds depth and realism. Texture makes the bat appear natural and wooden.
Focus on light and shadow to show the bat’s round shape. Use lines and patterns to create wood texture.
Understand Light Source
Decide where the light comes from before shading. Shade the opposite side darker to show shadow.
This contrast helps the bat look three-dimensional and solid.
Use Smooth Gradient Shading
Shade gently from dark to light using smooth strokes. Avoid harsh lines for a soft round look.
Blend pencil or color softly to make the bat’s surface appear curved.
Add Wood Grain Texture
Draw thin, curved lines along the bat’s length to mimic wood grain. Keep lines light and uneven.
This detail makes the bat look more natural and realistic.
- Use short, curved strokes
- Vary line thickness slightly
- Keep texture subtle, not too dark
Highlight The Edges
Leave small areas lighter or white along the bat’s edge. This shows where light hits the surface.
Highlights give the bat a shiny and smooth look.
Use Cross-hatching For Shadows
Cross-hatching uses crisscross lines to build shadow and depth. Apply it on darker bat areas.
This technique adds texture and strong contrast to your drawing.
- Draw parallel lines close together
- Add a second layer of lines crossing the first
- Increase line density in darkest spots
Common Mistakes To Avoid
Drawing a baseball bat can be simple, but some mistakes can make it look wrong. Avoiding these errors helps you create a clean and clear image.
Here are common mistakes to watch for when you draw a baseball bat.
Wrong Proportions
One common mistake is drawing the bat too short or too thick. A baseball bat is usually long and slim. Keep the handle thinner and the barrel wider but not too bulky.
Ignoring Basic Shapes
Skipping simple shapes makes the bat look uneven. Start with a long rectangle for the bat’s body and add an oval for the handle end. This helps keep the shape right.
Poor Handle Detail
Many forget to add the small details on the handle. The handle should show a taper and a knob at the end. Without these, the bat looks flat and less real.
Incorrect Bat Angles
Drawing the bat at odd angles can confuse the viewer. Keep the bat mostly straight or at a simple angle. This shows the bat clearly and makes it easier to understand.
Lack Of Shading And Texture
Without shading, the bat looks flat. Adding light and dark areas shows the round shape. Wood grain lines or simple texture make the bat look real.
- Use light strokes for wood grain
- Shade one side darker for shadow
- Keep highlights on the opposite side
- Avoid heavy, dark lines all over
Rushing The Outline
Tip:Take your time with the outline. A smooth, clean line looks better than a rough one.
Practice Ideas For Improvement
Drawing a baseball bat can be simple with the right practice. Practicing often helps you get better.
Try different exercises to improve your skills step by step. Focus on shapes, lines, and details.
Start With Basic Shapes
Begin by drawing simple shapes like rectangles and cylinders. These shapes make up the baseball bat.
Practice drawing these shapes from different angles. This helps you see the bat in 3D.
Use Light Sketch Lines
Draw light lines first to create the bat’s outline. Light lines are easy to erase and change.
Refine your lines slowly to make the bat look clear and neat. Avoid pressing too hard at first.
Practice Drawing Details
Add details like the handle, the barrel, and the knob. These parts make the bat look real.
Try drawing wood grain or texture lines to show the bat’s material. This adds depth to your drawing.
Draw From Real Bat Images
Look at pictures of baseball bats to see their shape and features. Copy what you see carefully.
Practice drawing the bat in different positions. This builds your observation and drawing skills.
Use Step-by-step Drawing Guides
Follow simple guides that show how to draw a bat in steps. These guides keep you focused.
- Start with a basic shape
- Add the handle and barrel
- Draw the knob at the end
- Add details and shading
Practice Shading For Depth
Shade the bat to show light and shadow. This makes your drawing look three-dimensional.
Use soft pencil strokes for smooth shading. Practice shading the curved parts carefully.
Draw Regularly To Improve
Draw a baseball bat every day or week. Regular practice builds your confidence and skill.
Keep your old drawings to see your progress. Try to improve small details each time.
Frequently Asked Questions
How Can I Draw A Baseball Bat Step-by-step?
Start by sketching a long cylinder shape for the bat’s body. Add a tapered handle at one end. Include details like the knob and wood grain. Use light pencil strokes first, then outline with a darker pen. Finally, shade to add depth and realism.
What Materials Do I Need To Draw A Baseball Bat?
You need paper, a pencil, an eraser, and a black pen or marker. Colored pencils or markers help add color and shading. A ruler can assist in drawing straight lines. These simple tools make drawing easy and enjoyable.
How To Make My Baseball Bat Drawing Look Realistic?
Add shading to show light and shadow on the bat’s surface. Include wood grain texture with fine lines. Use a reference photo for accurate shape and proportions. Blend pencil strokes smoothly for a natural look. Highlight reflective spots for a polished finish.
Can Beginners Easily Draw A Baseball Bat?
Yes, beginners can draw a baseball bat by breaking it into simple shapes. Start with basic cylinders and rectangles, then refine the details gradually. Practice helps improve proportions and shading. Easy guides make learning fun and effective.
Conclusion
Drawing a baseball bat can be simple and fun. Start with basic shapes and add details step by step. Practice helps you improve your skills quickly. Keep your lines light at first, then darken them later. Use this guide to build confidence in your drawing.
Soon, you will create clean and clear baseball bat images. Enjoy the process and keep drawing every day. Art grows with patience and regular effort. Give yourself time and watch your drawings get better. You can do this!