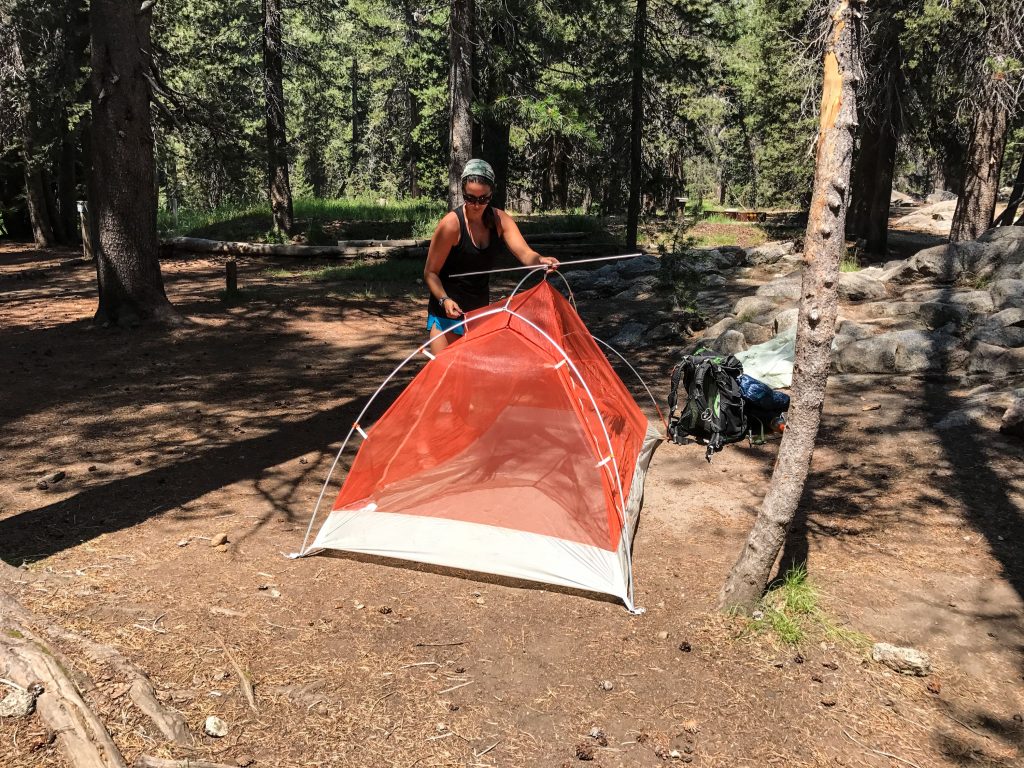
Have you ever stood in the middle of a campsite, staring at a tent bag, wondering where to start? Pitching a tent might seem tricky at first, but once you know the right steps, it becomes quick and easy.
Imagine settling into your cozy shelter without frustration or wasted time. This guide will show you exactly how to pitch a tent like a pro, so you can enjoy your outdoor adventure from the very first moment. Ready to make your camping experience smooth and stress-free?
Let’s get started!

Credit: woodsworthexploring.co.uk
Choosing The Right Spot
Picking the right place to pitch your tent makes camping safe and comfortable. A good spot keeps you dry, warm, and protected from dangers. It also helps you enjoy the outdoors better.
This guide covers three key points: finding flat and clear ground, avoiding hazards, and thinking about wind direction. Each point helps you choose the best place for your tent.
Flat And Clear Ground
Look for ground that is flat and free of rocks or sticks. Uneven ground can make sleeping uncomfortable and damage your tent floor. Clearing the area helps avoid holes or bumps.
- Find a spot with level soil or grass
- Remove stones, branches, and debris
- Avoid slopes that cause water runoff
- Check for soft ground that might get muddy
Avoiding Hazards
Check the area for dangers like falling branches or unstable trees. Avoid places near cliffs, animal paths, or flood zones. Safety comes first when choosing where to camp.
| Hazard | What to Do |
|---|---|
| Dead or weak tree branches | Do not camp under them |
| Animal tracks or dens | Pick a spot far away |
| Low areas prone to flooding | Choose higher ground |
| Cliffs or steep edges | Keep a safe distance |
Considering Wind Direction
Know where the wind usually blows. Set your tent so the door faces away from the wind. This reduces wind inside the tent and keeps it steady during gusts.
- Use natural windbreaks like bushes or rocks
- Pitch tent low to the ground if wind is strong
- Secure tent stakes firmly against wind direction
Unpacking And Sorting Gear
Before pitching a tent, unpack your gear carefully. Sorting your gear helps find items quickly.
Organizing makes setting up your tent faster and easier. Keep everything in order.
Checking Tent Components
Check all parts of your tent before setting it up. Make sure nothing is missing or broken.
Look for the tent body, rainfly, poles, stakes, and any extra parts. Each part is important.
- Tent body: main fabric that forms the shelter
- Rainfly: waterproof cover for rain protection
- Poles: support structure for the tent
- Stakes: secure the tent to the ground
- Extra parts: clips, cords, or repair kits
Organizing Poles And Stakes
Separate poles by size and type to avoid confusion. Group similar poles together.
Keep stakes in one place so you can find and use them easily. Check if any stakes are bent or damaged.
- Sort poles by length or color codes
- Bundle poles to prevent tangling
- Place stakes in a bag or container
- Check stakes for bends or breaks
Laying Out The Tent
Setting up a tent begins with laying out the groundwork. This ensures a stable and comfortable shelter. Follow these steps to start your camping adventure right.
Positioning The Tent Footprint
The tent footprint is the first layer between your tent and the ground. It protects your tent from moisture and damage.
- Find a flat, dry area free of rocks and debris.
- Ensure the footprint aligns with the tent’s shape.
- Secure the footprint with stakes if windy conditions.
Aligning The Tent Body
Once the footprint is in place, position the tent body. This step is crucial for a snug fit and ease of setup.
Align the tent body with the footprint corners. Ensure all sides match perfectly for optimal stability.
With the tent body correctly aligned, you are ready for the next steps in pitching your tent. This foundation is key for a successful camping experience.
Assembling The Poles
Setting up your tent starts with assembling the poles properly. Poles give the tent its shape and hold it steady. Knowing how to connect and handle them will make pitching faster and safer.
Each pole usually comes in sections that fit together. You need to join these sections carefully and avoid bending or breaking them. This guide helps you do it right.
Connecting Sections
Most tent poles are made of several smaller pieces linked by an elastic cord inside. Follow these tips to connect them:
- Lay out all pole sections on flat ground.
- Find the ends that fit into each other.
- Slide the sections together gently until secure.
- Make sure the elastic cord stays inside the poles.
- Check that each joint is tight and aligned.
Avoiding Damage
Handling poles with care helps them last longer and keeps your tent stable. Avoid these common mistakes:
- Forcing poles when they don’t fit
- Bending poles sharply
- Leaving poles under heavy weight
- Pulling poles apart too hard
- Exposing poles to direct sunlight for long
Always store poles in their bag after use. Check for cracks or splinters before packing them away.
Raising The Tent
Raising a tent is an essential skill for camping. It makes your shelter stable and ready for use. This part guides you through the process step-by-step.
We will look at inserting poles into sleeves or clips and then securing the tent structure. These actions help keep your tent safe in wind and rain.
Inserting Poles Into Sleeves Or Clips
Most tents have poles that slide into fabric sleeves or attach with clips. This step gives the tent its shape and support. It is important to handle poles carefully to avoid damage.
- Locate the sleeves or clips along the tent body.
- Slide each pole section into the sleeves or snap the clips onto poles.
- Ensure poles are fully extended and connected at joints.
- Check that poles follow the tent’s designed curves.
- Keep tension on poles but do not force them.
Securing Tent Structure
Once the poles are in place, secure the tent to keep it stable. Use stakes and guy lines to hold the tent firmly on the ground. Proper setup prevents the tent from collapsing or moving.
| Item | Purpose | Tips |
|---|---|---|
| Stakes | Anchor tent base to the ground | Push or hammer stakes at a 45-degree angle |
| Guy Lines | Add extra support to the tent | Tighten lines evenly and attach to solid points |
| Rainfly | Protect tent from rain and wind | Secure all corners and adjust tension |
Anchoring The Tent
Anchoring your tent well keeps it stable in wind and rain. It stops the tent from moving or collapsing.
Good anchoring means driving stakes correctly and tightening guy lines. Both help hold the tent firmly on the ground.
Driving Stakes At Proper Angles
Drive stakes into the ground at a 45-degree angle away from the tent. This angle gives the best hold and keeps stakes from pulling out.
- Use a mallet or rock to tap stakes firmly into the soil.
- Place stakes in firm soil, avoiding loose or sandy areas.
- Angle stakes away from the tent to increase resistance to wind.
- Check stakes regularly and adjust if they become loose.
Tensioning Guy Lines
Guy lines add extra support by pulling the tent fabric tight. Proper tension keeps the tent shape steady.
| Tip | Purpose |
| Attach lines to secure points on the tent | Distribute force evenly |
| Pull lines taut but not too tight | Prevent fabric damage |
| Stake guy lines at an angle away from the tent | Improve hold in wind |
| Use tensioners or knots to adjust line length | Maintain proper tension |
Adding The Rainfly
Adding the rainfly is an important step to keep your tent dry. It protects you from rain and wind.
Make sure to handle the rainfly carefully to cover the tent fully and avoid water leaks.
Positioning For Coverage
Place the rainfly over the tent so it covers the roof and walls. The rainfly should reach past the tent edges.
- Align the front of the rainfly with the tent door.
- Check that all corners of the rainfly reach the tent’s base.
- Adjust the rainfly to cover mesh windows completely.
- Make sure the rainfly does not touch the tent floor directly.
Securing And Ventilating
Secure the rainfly to keep it tight and prevent it from flapping. Good ventilation stops moisture inside the tent.
| Action | Reason |
|---|---|
| Fasten rainfly clips tightly | Prevents movement in wind |
| Stake out rainfly corners | Keeps rainfly stable on the ground |
| Leave vents open | Allows airflow to reduce condensation |
| Use mesh windows under rainfly | Improves breathability |

Credit: www.yahoo.com
Common Mistakes To Avoid
Pitching a tent may seem easy, but many campers make mistakes. These errors can cause discomfort and damage to your tent.
Knowing what to avoid helps you set up your tent quickly and safely. Let’s look at common mistakes that can ruin your camping experience.
Skipping Site Preparation
Choosing a campsite without cleaning it first causes problems. Rocks, sticks, and uneven ground can damage your tent floor.
Make sure to clear the area before pitching. This step makes your tent more comfortable and protects it from tears.
- Remove sharp objects like stones and branches
- Check for slopes to avoid water pooling
- Look for low-hanging branches that can hit your tent
- Clear leaves and debris for a clean surface
Loose Stakes And Guy Lines
Failing to secure stakes tightly causes your tent to move or collapse. Loose guy lines make your tent unstable during wind.
Always drive stakes firmly into the ground. Tighten guy lines to keep your tent steady and safe.
- Push stakes fully into soil at a 45-degree angle
- Tighten guy lines after staking to remove slack
- Check tension regularly, especially if the wind picks up
- Use extra stakes if the ground is soft or sandy
Tips For Faster Setup
Pitching a tent can take time if you are not prepared. Learning some quick tips can help you set up your tent faster.
With practice and smart use of your tent parts, you can save minutes and avoid frustration outdoors.
Practice Beforehand
Try setting up your tent at home before camping. This helps you learn how all parts fit together.
Practicing lets you spot any missing parts or problems early. You become faster and more confident.
- Find a flat surface to practice
- Time yourself to track improvement
- Practice packing and unpacking
- Follow the instructions step by step
Using Color-coded Components
Some tents have color-coded poles and sleeves. This helps you match parts quickly and avoid mistakes.
Using colors to guide setup speeds up the process, especially in low light or with multiple people.
- Match pole colors with tent sleeves
- Organize stakes by color for easy access
- Use colored tags or tape if your tent lacks colors
- Teach all helpers the color system

Credit: sunny-outdoors.com
Frequently Asked Questions
How Do You Choose The Right Spot To Pitch A Tent?
Choose a flat, dry area free of rocks and debris. Avoid low spots where water can collect. Look for natural windbreaks like trees or bushes. Ensure the location is safe and legal for camping.
What Tools Are Needed To Pitch A Tent Properly?
You need tent stakes, a mallet, and the tent itself. Some tents include poles and a rainfly. A ground tarp is helpful to protect the tent floor. Having a hammer can aid in securing stakes.
How Do You Secure A Tent In Windy Conditions?
Use all the stakes and guy lines provided. Angle stakes away from the tent for better grip. Tighten guy lines to stabilize the tent structure. Place heavy objects inside to add weight if needed.
What Is The Basic Step-by-step Process To Pitch A Tent?
First, lay a ground tarp to protect the tent floor. Unfold the tent and assemble poles. Insert poles into tent sleeves or clips. Stake the tent corners securely. Attach the rainfly if available for weather protection.
Conclusion
Pitching a tent is easier than it seems. With the right steps, anyone can do it well. Start by choosing a flat, clear spot. Then, follow the instructions carefully and take your time. Practice helps you get faster and more confident.
A well-set tent keeps you safe and comfortable outdoors. Remember, camping is about enjoying nature and having fun. Keep your gear ready, and don’t stress. Soon, pitching a tent will feel natural and simple. Give it a try on your next adventure!