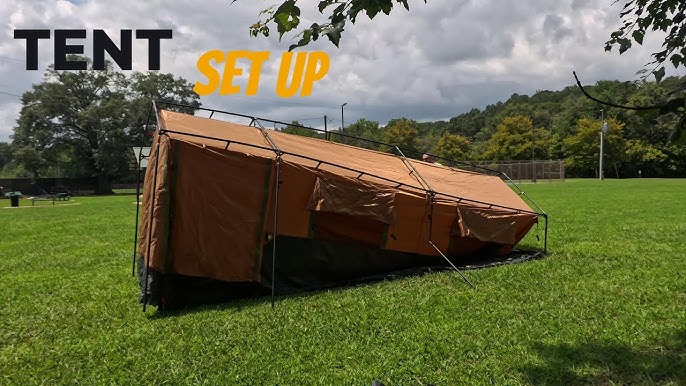
Setting up your Ozark Trail tent doesn’t have to be a struggle. Imagine stepping out of your car, knowing you can have your shelter ready in minutes—no stress, no confusion.
Whether you’re a first-timer or just want to speed up your setup, this guide is made for you. You’ll learn simple, clear steps to get your tent standing strong, so you can focus on enjoying your adventure. Keep reading, and soon you’ll have your Ozark Trail tent ready like a pro every time.
Credit: business.walmart.com
Choosing The Right Spot
Setting up your Ozark Trail tent starts with picking the best place to pitch it. A good spot keeps you safe and comfortable while you sleep.
Think about the ground, hazards around, and the wind direction before you start setting up your tent.
Find Level Ground
Look for flat ground to set your tent on. This helps you sleep better and keeps the tent stable.
Avoid slopes or uneven spots. Sleeping on a slope can be uncomfortable and cause the tent to slide.
Avoid Hazards
Check the area for things that could cause problems. Avoid places with sharp rocks, sticks, or holes.
Stay away from dead trees or branches that could fall. Also, avoid low spots where water might collect if it rains.
- Sharp rocks or sticks
- Falling branches or dead trees
- Low spots where water pools
- Ant or insect nests
Consider Wind Direction
Look at how the wind is blowing before pitching your tent. Position the tent door away from strong winds.
This helps keep the tent stable and stops wind from blowing inside. Use natural windbreaks like trees or bushes if possible.

Credit: www.greensafaris.com
Unpacking Your Tent
Setting up your Ozark Trail tent starts with unpacking it carefully. This step helps you avoid missing parts.
Take your time to unpack everything on a clean surface. This makes setup easier and faster.
Check All Components
Look through the bag and find every part of your tent. Make sure nothing is missing or damaged.
- Tent body
- Rainfly
- Poles
- Stakes
- Guy lines
- Carry bag
Check the poles for cracks and the stakes for bends. Replace any broken parts before you start.
Lay Out The Tent
Spread the tent body flat on the ground. Choose a spot that is free of rocks and sticks.
Make sure the tent door faces the direction you want. This helps with wind and sun during camping.
Organize Poles And Stakes
Sort the tent poles by size and shape. This makes it easier to find the right pole for each part.
Place the stakes near the tent corners. Keep the guy lines ready for quick use after setting the tent.
- Group poles by length
- Keep stakes in one spot
- Untangle guy lines
Assembling The Tent Frame
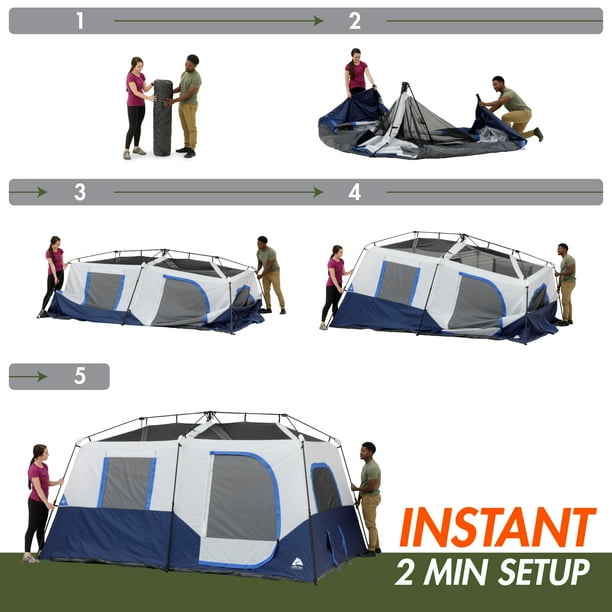
Setting up your Ozark Trail tent is simple. The first step is assembling the tent frame. This ensures your tent stands firm and stable.
The frame forms the tent’s backbone. Proper assembly is crucial for a safe camping experience.
Connect Tent Poles
Tent poles give structure to your tent. Begin by connecting all the poles. They usually snap together easily.
- Lay out all poles on the ground.
- Identify matching ends.
- Connect poles by sliding them into each other.
Insert Poles Into Tent Sleeves
Now that the poles are connected, insert them into the tent sleeves. This helps to shape the tent.
Make sure each pole goes through a sleeve. It must reach the opposite end of the tent.
Secure Pole Clips
Once poles are in place, use pole clips to secure them. Clips hold the tent fabric to the poles.
- Locate the pole clips on the tent fabric.
- Attach each clip to the nearest pole.
- Ensure all clips are fastened tightly.
Credit: www.walmart.ca
Anchoring The Tent
Properly anchoring your Ozark Trail tent helps keep it secure and stable. This prevents damage from wind and weather.
Follow these steps to anchor your tent safely and enjoy a comfortable camping experience.
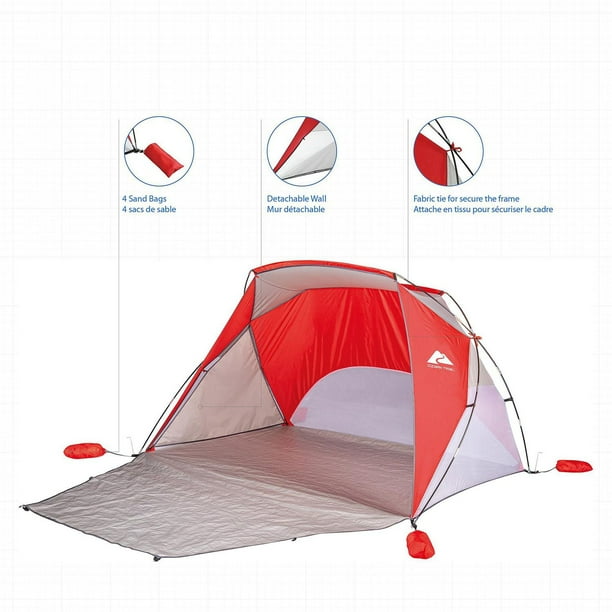
Stake Down Corners
Start by staking down each corner of the tent. This holds the base firmly to the ground.
- Locate the tent corners and pull the fabric tight.
- Push the stakes through the loops at each corner.
- Angle stakes away from the tent at about 45 degrees.
- Hammer stakes into the ground until secure.
Adjust Tent Tension
Adjusting the tent’s tension improves its shape and stability. Tighten or loosen the fabric as needed.
| Action | Purpose |
| Tighten corner stakes | Keep tent fabric smooth and taut |
| Loosen if too tight | Prevent fabric tearing or stress |
| Check tension after wind | Maintain tent shape and strength |
Use Guy Lines For Stability
Guy lines add extra support to the tent, especially in windy conditions.
- Attach guy lines to the tent’s loops or hooks.
- Extend lines outward at an angle.
- Stake the lines firmly into the ground.
- Tighten the lines to remove slack.
- Check lines regularly during your stay.
Adding The Rainfly
The rainfly is important to keep your Ozark Trail tent dry. It covers the top and sides of the tent. Setting it up right will protect you from rain and wind.
Follow these simple steps to add the rainfly to your tent. This guide helps you position, attach, and secure it properly.
Position The Rainfly
Start by unfolding the rainfly. Lay it flat near your tent. Make sure the rainfly is facing the right way with the door flap matching the tent’s door.
Place the rainfly over the tent gently. Align the edges so it covers the tent fully. Check that the vents or mesh windows are not blocked.
Attach Rainfly To Tent
Look for the clips or Velcro strips on the rainfly. These connect to the tent’s poles or fabric loops. Start attaching the rainfly from one side and work your way around.
Make sure all clips are secure. The rainfly should fit snugly but not pull too tight. This helps keep the tent stable in wind.
- Find clips on rainfly edges
- Hook clips onto tent loops or poles
- Check all clips are fastened
- Avoid stretching the rainfly too much
Secure Rainfly With Stakes
Use stakes to hold the rainfly down. Find the loops or tabs at the rainfly corners. Push stakes through these loops into the ground.
Pull the rainfly tight before staking. This stops water from pooling on the top. Place stakes firmly and at an angle for best hold.
- Locate staking loops at rainfly corners
- Pull rainfly tight over tent
- Drive stakes through loops into ground
- Angle stakes away from tent for strength
Final Checks
Before you settle in, it is important to do final checks on your Ozark Trail tent. These checks help ensure your tent is secure and ready for use.
Taking time to inspect and prepare can improve your comfort and safety during your outdoor stay.
Inspect Tent Setup
Walk around your tent and look for loose or missing stakes and guylines. Make sure the tent fabric is pulled tight and the poles are firmly in place.
- Check if all zippers open and close smoothly
- Confirm the rainfly covers the tent fully
- Ensure no holes or tears are present in the fabric
- Look for proper alignment of tent seams
Test Door And Ventilation
Open and close the tent door several times to check ease of use. Good ventilation helps reduce condensation inside your tent.
| Vent Location | Check | Action Needed |
| Front mesh vent | Is it clear and open? | Clear debris or adjust flap |
| Rear window vent | Does it open properly? | Fix zipper or reposition flap |
| Rainfly vents | Are they aligned with tent vents? | Adjust rainfly position |
Prepare For Weather Changes
Weather can change quickly outdoors. Prepare your tent to handle rain, wind, or sun.
- Keep extra stakes and guylines ready for strong winds.
- Store rainfly securely to cover the tent fully in rain.
- Use a ground tarp to protect the tent floor from moisture.
- Open vents on warm days to reduce heat buildup inside.
Packing Up Efficiently
Packing up your Ozark Trail tent the right way saves time and keeps your gear safe. A neat pack prevents damage and makes your next setup easier.
Follow these simple steps to remove stakes and poles, fold the tent neatly, and store all components correctly.
Remove Stakes And Poles
Start by pulling out all the stakes from the ground. Clean off any dirt or mud before storing them. Next, carefully disassemble the poles to avoid bending or breaking.
- Pull stakes straight up to avoid bending
- Wipe off dirt and moisture
- Take apart poles gently
- Check poles for any damage
Fold Tent Neatly
Lay the tent flat on clean ground. Smooth out wrinkles and fold it along its natural seams. Folding tightly helps save space in your bag.
Folding tips:
- Keep the tent dry before folding
- Align edges carefully
- Roll or fold to fit your storage bag
- Avoid stuffing the tent to prevent tears
Store Components Properly
Store stakes, poles, and tent fabric in separate compartments if possible. Keep everything dry and organized to find your gear easily next time.
| Component | Storage Tip |
|---|---|
| Stakes | Use a small bag to keep them together |
| Poles | Store in a pole bag or wrap with elastic bands |
| Tent Fabric | Keep in the tent bag, dry and folded neatly |
Frequently Asked Questions
How Do I Start Setting Up An Ozark Trail Tent?
Begin by selecting a flat, clear area. Lay out the tent body, spread it evenly. Insert poles into their sleeves or clips. Secure the poles to the tent corners. Attach the rainfly last for protection.
What Tools Are Needed To Set Up An Ozark Trail Tent?
No special tools are needed. The tent includes poles, stakes, and guy lines. A mallet can help drive stakes into hard ground. Use your hands to assemble poles and clips.
How Can I Secure My Ozark Trail Tent In Wind?
Stake all corners firmly. Use guy lines attached to the tent’s loops. Tighten lines for added stability. Position the tent with the lowest profile facing the wind.
What Is The Best Way To Organize Tent Setup Gear?
Keep poles, stakes, and rainfly in separate bags. Lay out all parts before starting. This prevents loss and speeds up setup. Organize gear by function for easy access.
Conclusion
Setting up an Ozark Trail tent is simple and quick. Follow the steps carefully for a strong, safe shelter. Practice a few times before your trip to feel confident. A well-pitched tent keeps you dry and comfortable outside. Take your time and enjoy the process.
Your camping experience will improve with a good tent setup. Ready for your next outdoor adventure?